Author: kinzapadhyair@gmail.com

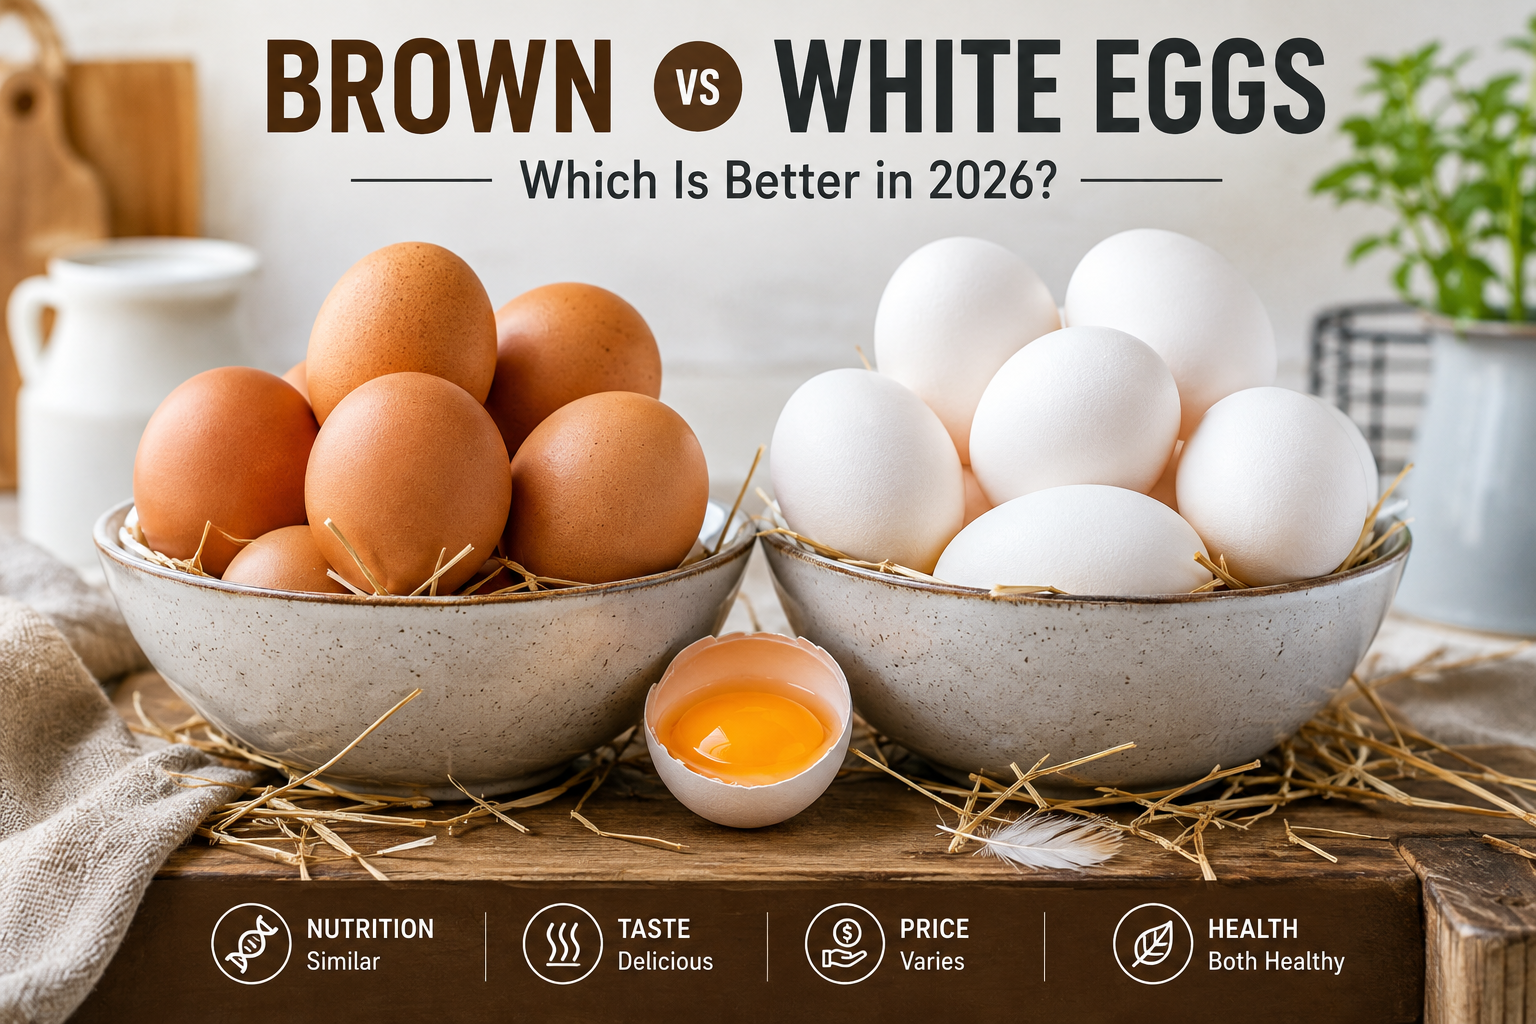
  • Brown vs White Eggs: Which Is Better in 2026?

    Brown vs White Eggs: Which Is Better in 2026?

    Brown vs White Eggs: Which Is Better in 2026?

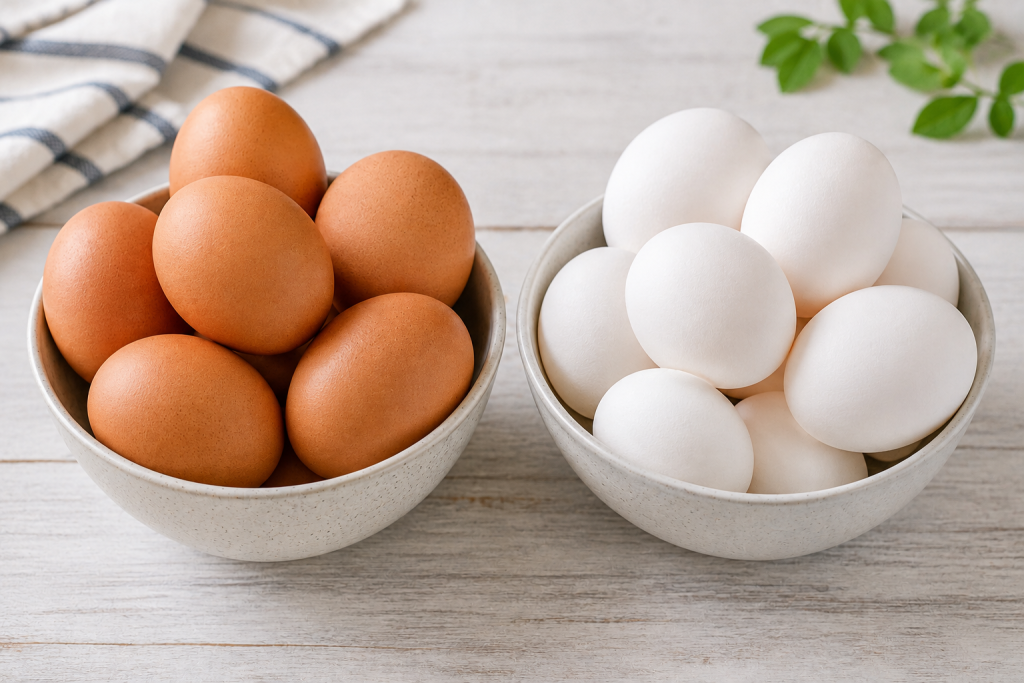
    When shopping for eggs, many people wonder about Brown vs White Eggs. Does the shell color affect nutrition, taste, quality, or freshness? For US shoppers and families worldwide, the answer may be simpler than expected. In most cases, shell color does not determine an egg’s nutritional value.

    Instead, factors such as the hen’s diet, freshness, farming method, and storage conditions matter more. So, let’s explore the real difference and help you choose confidently in 2026.

    Brown vs White Eggs: What Is the Difference?

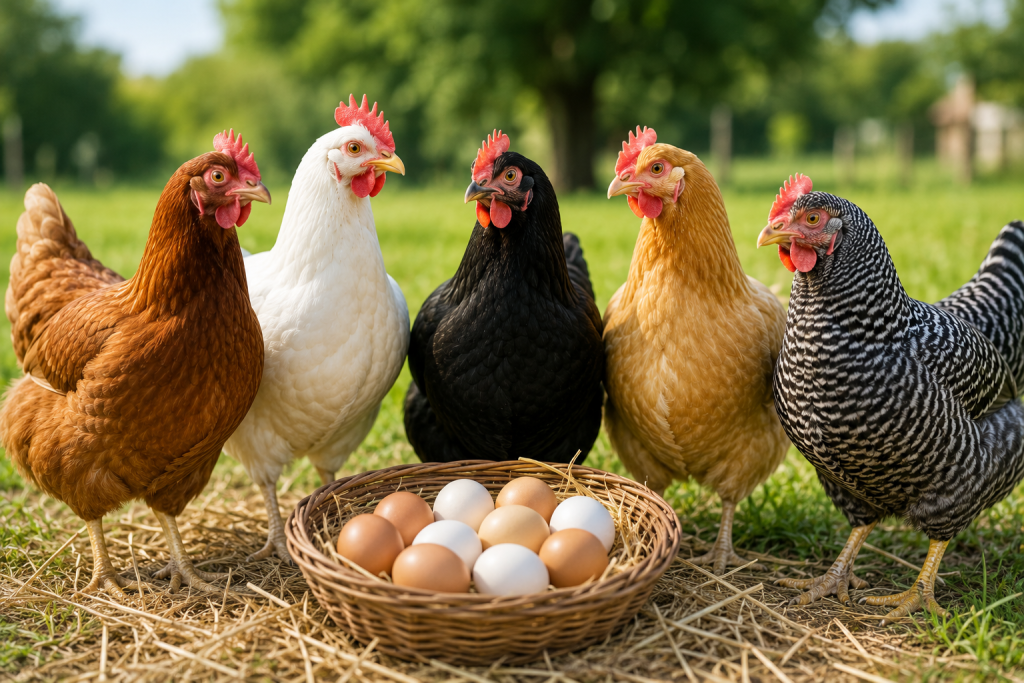
    The main difference is the breed of hen that lays the egg. White-feathered chickens with white earlobes often lay white eggs, while many brown-feathered breeds with red earlobes lay brown eggs.

    Therefore, shell color mainly comes from genetics. It does not automatically mean that one egg contains more protein, vitamins, or minerals.

    Does Shell Color Affect Nutrition?

    Generally, no. Both brown and white eggs can provide similar amounts of:

    • High-quality protein
    • Vitamin B12
    • Vitamin D
    • Choline
    • Selenium
    • Healthy fats

    However, the hen’s diet can influence the nutritional profile of an egg. For example, specially formulated feed can increase certain nutrients regardless of shell color.

    Brown vs White Eggs: Which Tastes Better?

    Taste is another common reason shoppers compare Brown vs White Eggs. However, shell color itself does not create a major taste difference.

    Freshness, feed, storage, and cooking methods can have a bigger effect. Additionally, some people notice slight flavor differences between eggs from different farms because the hens may eat different diets.

    As a result, choosing eggs based only on shell color may not give you the taste you expect.

    Are Brown Eggs Healthier?

    The idea that brown eggs are automatically healthier is a common misconception. Brown eggs can be nutritious, but their darker shells do not make them naturally healthier.

    Similarly, white eggs can provide excellent nutrition. Therefore, check the nutrition label and farming information instead of judging an egg by its shell.

    Brown vs White Eggs: Which Costs More?

    In many US grocery stores, brown eggs can cost more than white eggs. However, the price difference usually relates to production costs, breed, farm practices, packaging, or marketing.

    Brown-laying hens may require more feed because some breeds are larger. Consequently, producers may charge more for brown eggs.

    Still, a higher price does not necessarily mean better nutrition.

    Types of Eggs to Consider

    Conventional Eggs

    These are widely available and often provide the lowest-cost option. They can be a practical choice for families buying eggs regularly.

    Free-Range Eggs

    Free-range labels refer to how hens are housed and given access to outdoor areas under applicable standards. Therefore, check the package label to understand the exact production method.

    Organic Eggs

    Organic eggs come from hens raised under certified organic production standards. Additionally, the feed and farming practices must meet specific requirements.

    Pasture-Raised Eggs

    These eggs come from hens with access to outdoor pasture under the producer’s farming system. However, practices can vary, so shoppers should read the label carefully.

    Buying Guide: How to Choose the Best Eggs

    When comparing Brown vs White Eggs, focus on these factors:

    1. Freshness: Check the carton dates and choose eggs that have been stored properly.
    2. Nutrition: Compare labels if specific nutrients matter to you.
    3. Price: Choose the option that fits your household budget.
    4. Farming practices: Look for labels that match your preferences.
    5. Egg size: Select the size needed for your recipe.
    6. Storage: Keep eggs refrigerated according to local food-safety guidance.

    Additionally, inspect the carton before buying. Avoid cracked or dirty eggs when possible.
    Common Mistakes to Avoid

    One common mistake is assuming brown eggs are automatically healthier. Another is believing white eggs are lower quality simply because they usually cost less.

    Furthermore, shoppers sometimes confuse shell color with yolk color. Yolk color can vary based on the hen’s diet, so it is not a reliable indicator of shell color or overall egg quality.

    Do not ignore freshness, either. A fresh egg from a white-laying hen can be just as useful as a fresh egg from a brown-laying hen.

    Care and Storage Tips

    Regardless of shell color, proper storage helps maintain egg quality. Keep eggs refrigerated and follow the storage instructions on the carton.

    Also, avoid leaving eggs at room temperature for extended periods. Keep the carton in a stable, cold part of the refrigerator rather than the refrigerator door when possible.

    For cooking, use clean utensils and wash your hands after handling raw eggs. Proper cooking and food handling are especially important for children, older adults, pregnant people, and anyone with a weakened immune system.

    Final Thought

    So, which should you buy? Brown vs White Eggs are nutritionally similar in most cases, and shell color is mainly a genetic trait. Instead, consider freshness, hen diet, production methods, price, and your personal preferences.

    Ultimately, Brown vs White Eggs comes down to more than appearance. Both can be an affordable and nutritious part of a balanced diet. Compare labels, choose fresh eggs, and select the option that best fits your needs in 2026.

  • Best Egg-Laying Breeds 2026: Top Choices

    Best Egg-Laying Breeds 2026: Top Choices

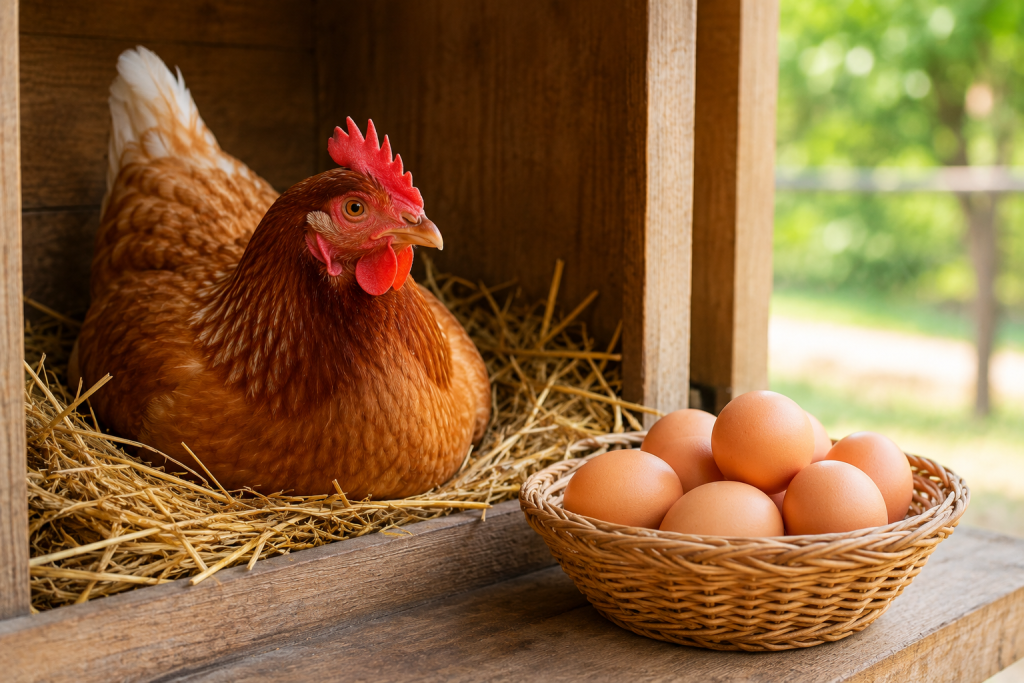
    If you want a steady supply of fresh eggs, choosing the right chickens matters. The Best Egg-Laying Breeds can help backyard keepers and small farms get reliable production without making flock care too difficult. In 2026, factors such as climate, feed costs, temperament, and egg size all deserve attention.

    Why Best Egg-Laying Breeds Matter

    A productive hen can reduce the cost of buying eggs and provide fresh food for your household. However, high production is not the only goal. Good flock choices should also fit your space, weather, experience, and daily routine.

    Additionally, many productive hens have friendly temperaments, making them suitable for family flocks. Before choosing, compare laying rate, cold or heat tolerance, body size, broodiness, and feed needs.

    Key Features to Consider

    Best Egg-Laying Breeds for Production

    The Best Egg-Laying Breeds often include:

    • Leghorn: Excellent production, efficient feed use, and strong foraging ability.
    • Australorp: Calm birds known for strong egg production and good backyard behavior.
    • Rhode Island Red: Hardy, adaptable, and useful for both eggs and meat.
    • ISA Brown: A popular commercial-style layer with high production when well managed.
    • Plymouth Rock: Friendly, hardy, and a practical choice for mixed backyard flocks.

    Production varies by individual bird, season, age, nutrition, and management. Therefore, published annual egg numbers should be treated as estimates rather than guarantees.

    Egg Size and Shell Color

    If appearance matters, consider the type of eggs each breed produces. Leghorns commonly lay white eggs, while Rhode Island Reds and Australorps generally produce brown eggs. However, shell color does not determine nutritional quality.

    Types and Categories

    Best Egg-Laying Breeds for Backyard Flocks

    For families, the Best Egg-Laying Breeds should balance production with temperament. Australorps, Plymouth Rocks, and Rhode Island Reds can work well when you want productive birds that are also manageable.

    Best Egg-Laying Breeds for High Output

    If your main goal is maximum egg production, Leghorns and commercial hybrid layers deserve attention. They can produce heavily under good conditions, but hybrids may not breed true for the same performance in the next generation.

    Buying and Decision Guide

    Before buying chicks or pullets, use this simple process:

    1. Set your goal: Decide whether you want eggs, dual-purpose birds, or family-friendly pets.
    2. Check your climate: Choose birds suited to your local heat, cold, humidity, and seasonal changes.
    3. Estimate space: Provide a safe coop, clean nesting areas, and enough outdoor room.
    4. Plan feed costs: Productive hens need balanced nutrition and constant access to clean water.
    5. Buy healthy birds: Choose reputable breeders or hatcheries with clear health and breed information.

    The Best Egg-Laying Breeds are not automatically the best choice for every flock. Local conditions can change which birds perform most reliably.

    Common Mistakes to Avoid

    New keepers often focus only on the number of eggs a breed can produce. However, this can lead to poor choices.

    Avoid these mistakes:

    • Buying birds without checking their health history.
    • Ignoring local weather conditions.
    • Expecting peak production throughout a hen’s life.
    • Feeding an unbalanced diet.
    • Overcrowding the coop.
    • Choosing a breed based only on egg color.

    Additionally, remember that stress, parasites, disease, poor lighting, and inadequate nutrition can reduce laying performance.

    Care and Maintenance Tips

    Even the Best Egg-Laying Breeds need consistent care. Give hens a complete layer ration, fresh water, clean bedding, secure housing, and suitable nesting boxes.

    Keep the coop dry and well ventilated while protecting birds from predators. Also, monitor body condition, appetite, behavior, and egg production so you can spot problems early.

    Conclusion

    Choosing the Best Egg-Laying Breeds in 2026 is about matching production with your climate, space, budget, and flock goals. Start with a healthy breed from a reliable source, then support it with good feed, housing, and daily care. Ready to build a productive flock? Compare your top choices and choose the birds that best fit your backyard or farm.

  • Egg Collection Tips: Fresh Eggs Guide 2026

    Egg Collection Tips: Fresh Eggs Guide 2026

    Egg Collection Tips: A Fresh-Egg Guide for 2026

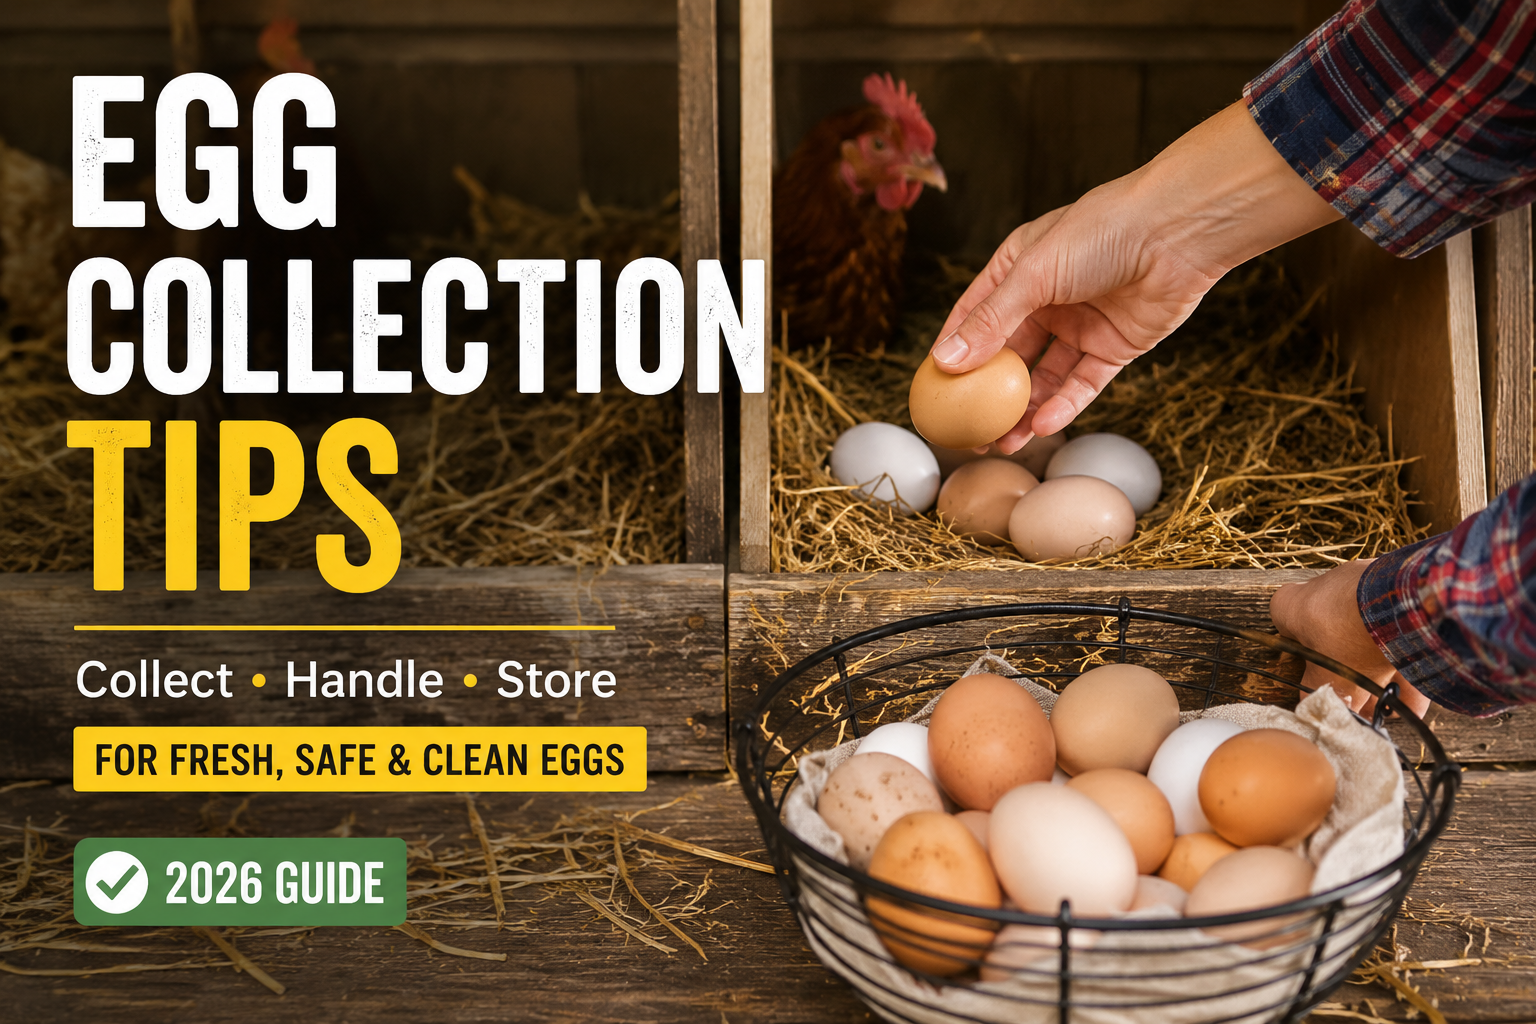
    If you keep backyard chickens or manage a small flock, Egg Collection Tips can help you get cleaner, safer, and better-quality eggs. In 2026, good collection habits remain important for both home keepers and small producers. Additionally, USDA guidance continues to emphasize careful egg handling and food safety.

    Whether you collect a few eggs each morning or manage a larger flock, a simple routine can prevent cracks, dirt, and unnecessary contamination.

    Why Egg Collection Tips Matter

    Fresh eggs can become dirty or damaged when hens lay them in poorly maintained nesting areas. Therefore, regular collection is one of the easiest ways to protect egg quality.

    For backyard chicken owners, good fresh egg collection also makes cleaning, sorting, and storage easier. UMN Extension recommends collecting eggs two to three times per day and discarding eggs with cracked shells.

    Additionally, proper handling can reduce food-safety risks. USDA advises keeping eggs properly refrigerated and avoiding extended periods at room temperature.

    Key Egg Collection Tips for 2026

    Collect Eggs Regularly

    One of the most useful Egg Collection Tips is simple: check nesting boxes regularly.

    Aim for two or three collection rounds each day when practical. This reduces the time eggs spend exposed to dirt, manure, moisture, and accidental breakage.

    Keep Nesting Boxes Clean

    Clean, dry nesting material helps protect eggs from contamination. Replace wet or heavily soiled bedding promptly.

    Furthermore, provide enough nesting space so hens are less likely to crowd into the same box.

    Handle Eggs Gently

    Eggshells can crack from drops or rough handling. Consequently, use a clean basket or container with enough protection to prevent eggs from hitting one another.

    Types of Eggs You May Collect

    Clean, Intact Eggs

    These are the easiest eggs to store and use. Check each shell for cracks before placing it into storage.

    Dirty Eggs

    Light surface dirt may require careful cleaning according to your local food-safety rules. However, avoid practices that can push contamination through the shell. UMN Extension recommends dry cleaning methods for certain farm-fresh eggs and warns against using rags or sponges.

    Cracked Eggs

    Do not treat cracked shells like normal eggs. Cracks can provide an entry point for bacteria, so follow local food-safety guidance and discard questionable eggs.

    Egg Collection Tips for Storage

    After collection, keep eggs protected from temperature changes and contamination. In the United States, USDA recommends prompt refrigeration as part of safe egg handling.

    Also, keep eggs away from foods with strong odors and store them in a clean container. Avoid leaving refrigerated eggs at room temperature for extended periods.

    For egg handling and storage, always check the rules that apply in your country because requirements can differ.

    Common Mistakes to Avoid

    Avoid these frequent problems:

    • Collecting eggs only once a day.
    • Leaving broken eggs in the nesting box.
    • Using dirty collection baskets.
    • Storing cracked eggs with intact eggs.
    • Ignoring wet or contaminated nesting material.
    • Handling eggs with dirty hands.
    • Leaving refrigerated eggs out for too long.

    Additionally, wash hands and clean equipment after handling eggs. USDA specifically recommends washing utensils, equipment, and work areas with hot, soapy water before and after contact with eggs.

    Maintenance and Care Tips

    Good Egg Collection Tips work best when combined with regular coop care. Keep nesting areas dry, replace dirty bedding, and monitor hens for changes in laying behavior.

    Furthermore, maintain good flock biosecurity. USDA’s 2026 Defend the Flock resources continue to provide practical guidance for poultry owners and producers.

    For larger operations, monitor egg quality, production levels, flock health, and environmental conditions. USDA reports that U.S. table-egg production was projected to rise in 2026, making efficient egg handling relevant across the industry.

    A Simple Collection Routine

    Use this quick routine:

    1. Wash your hands before collecting eggs.
    2. Check every nesting box.
    3. Remove eggs gently.
    4. Separate cracked or questionable eggs.
    5. Clean appropriate surfaces and equipment.
    6. Store eggs according to local food-safety rules.
    7. Record unusual changes in egg quality or production.

    This routine takes only a few minutes. However, it can make a major difference in cleanliness and consistency.

    Conclusion

    The best Egg Collection Tips are simple: collect eggs regularly, keep nesting areas clean and dry, handle shells gently, separate damaged eggs, and follow safe storage practices. As a result, backyard keepers and small producers can protect egg quality while making daily flock care easier.

    Ready to improve your routine? Start using these Egg Collection Tips today and build a consistent collection and storage system for your flock.

  • Egg Storage Guide: Safe & Fresh Tips for 2026

    Egg Storage Guide: Safe & Fresh Tips for 2026

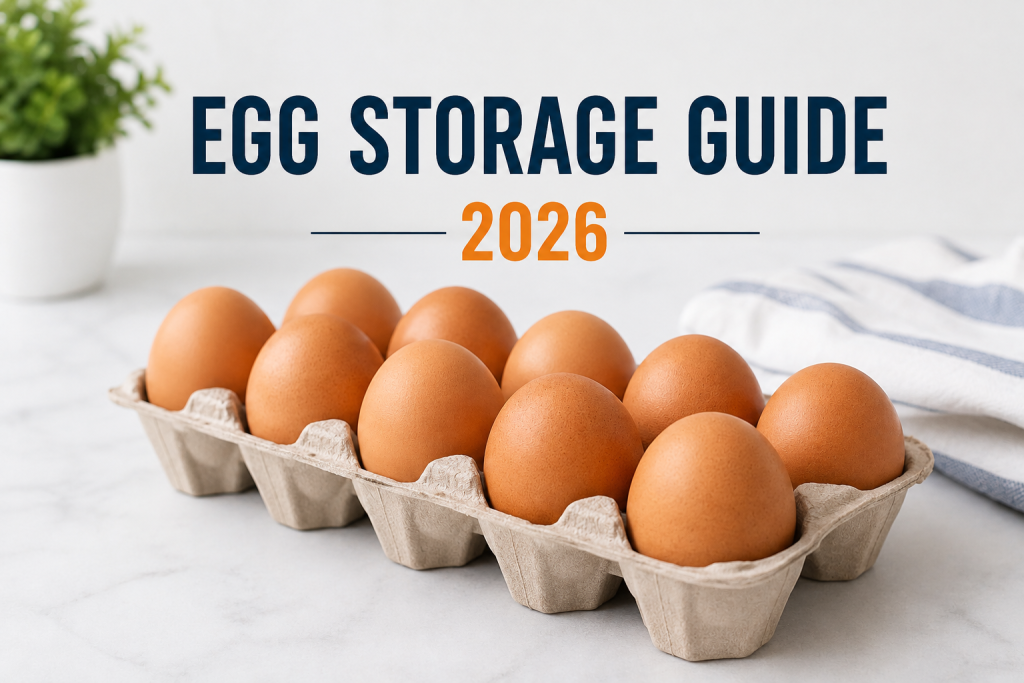
    An Egg Storage Guide can help households keep eggs fresh, reduce food waste, and handle them more safely. Whether you buy eggs weekly or keep a larger supply, proper storage matters.

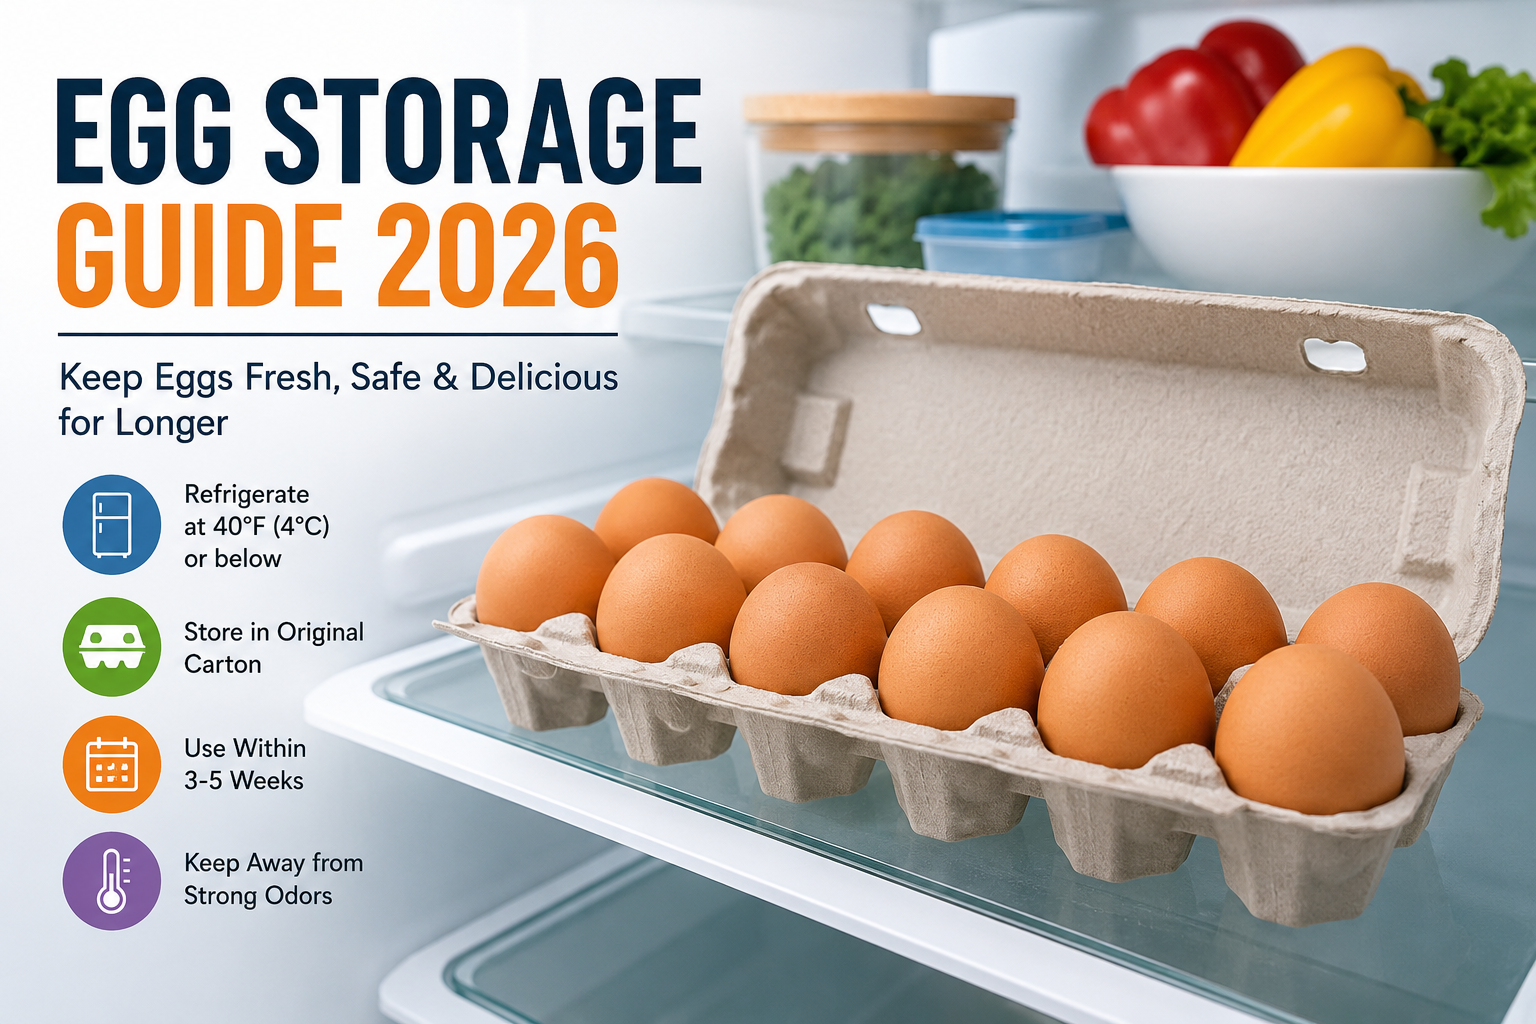
    In 2026, food-safety guidance still emphasizes keeping refrigerated eggs cold and handling them carefully. For U.S. readers, USDA guidance says fresh eggs can generally stay refrigerated for 3 to 5 weeks when stored properly at 40°F (4°C) or below.

    However, storage practices can differ around the world. Therefore, always follow the instructions on your local egg packaging and food-safety authority.

    Why Egg Storage Matters

    Good storage protects both freshness and food safety. Additionally, it helps eggs maintain their texture and quality for cooking.

    Proper storage can help you:

    • Keep eggs fresh for longer
    • Reduce unnecessary food waste
    • Protect eggs from temperature changes
    • Lower the risk of bacterial growth
    • Organize eggs by purchase date

    As a result, a few simple habits can make a major difference.

    Egg Storage Guide: Key Factors to Consider

    Keep Eggs Refrigerated

    For refrigerated eggs, maintain your refrigerator at 40°F (4°C) or below. FDA guidance recommends storing eggs promptly in a clean refrigerator and using the original carton.

    Additionally, avoid storing eggs in the refrigerator door. The temperature can change more often there. Instead, keep the carton on an interior shelf where the temperature stays more stable.

    Use the Original Carton

    The carton provides useful information, including dates and product details. It also helps protect eggs from absorbing strong odors from other foods.

    Therefore, keep eggs in their original packaging until you are ready to use them.

    Check Eggs Before Buying

    Good safe egg storage begins at the grocery store. FDA recommends buying eggs from refrigerated cases and checking that the shells are clean and free from cracks.

    Avoid cracked eggs because damaged shells can increase the opportunity for contamination.

    Egg Storage Guide: Different Egg Types

    Fresh Shell Eggs

    Fresh eggs should remain refrigerated. USDA states that refrigerated shell eggs generally keep for 3 to 5 weeks from the day they are placed in the refrigerator.

    For best quality, however, FDA recommends using eggs within about three weeks.

    Hard-Cooked Eggs

    Hard-cooked eggs require different handling. Store them in the refrigerator and use them within one week after cooking.

    Labeling the container with the cooking date can make this easier.

    Frozen Eggs

    Do not freeze eggs in their shells. Instead, crack them first and beat the yolks and whites together before freezing. FDA says frozen eggs can be used within one year for best quality.

    For more detailed food-safety information, see the FDA egg safety guidance and USDA egg storage guidance.

    Buying and Storage Decision Guide

    When buying eggs, follow these simple steps:

    1. Choose eggs from a refrigerated section.
    2. Check the carton and dates.
    3. Avoid cracked or dirty shells.
    4. Refrigerate eggs soon after shopping.
    5. Keep them in their original carton.
    6. Follow local storage instructions.

    Additionally, keep older eggs toward the front of your refrigerator. Put newer cartons behind them. This simple first-in, first-out approach helps prevent forgotten eggs.

    Common Egg Storage Mistakes to Avoid

    Even careful cooks can make storage mistakes. Avoid these common problems:

    • Leaving refrigerated eggs on the counter for long periods
    • Storing eggs in the refrigerator door
    • Freezing eggs inside their shells
    • Ignoring cracked shells
    • Keeping cooked eggs too long
    • Allowing the refrigerator to become too warm

    USDA advises not keeping eggs out of refrigeration for more than two hours.

    Furthermore, cooked egg dishes should be refrigerated promptly and used within the recommended time.

    Egg Storage Guide: Maintenance and Care Tips

    A reliable Egg Storage Guide should include regular refrigerator care. First, check your refrigerator temperature with an appliance thermometer. The FDA recommends keeping it at 40°F or below.

    Next, clean spills quickly and avoid overcrowding the refrigerator. Cold air needs space to circulate properly.

    Finally, organize eggs so that you can easily see older cartons. This makes everyday egg refrigerator storage simpler and can reduce waste.

    What About Power Outages?

    Power failures require extra care. Keep the refrigerator door closed as much as possible. FDA says a closed refrigerator can generally keep food cold for about four hours.

    If perishable foods, including eggs, have been above 40°F for two hours or more, they should be discarded according to FDA emergency food-safety guidance.

    Frequently Asked Questions

    1. How long do fresh eggs last in the refrigerator?

    Fresh eggs can generally stay refrigerated for about 3 to 5 weeks when stored correctly at 40°F (4°C) or below. However, always check the carton date and follow food-safety guidance in your country.

    2. What is the best way to store eggs?

    The Egg Storage Guide recommends keeping eggs refrigerated in their original carton. Place them on an interior refrigerator shelf rather than in the door, where temperatures can change more often.

    3. Can you freeze eggs?

    Yes, but you should not freeze eggs in their shells. Crack them first, beat the yolks and whites together, and place them in a suitable freezer container. The Egg Storage Guide approach can help maintain better quality during long-term storage.

    4. How long do hard-boiled eggs last?

    Hard-boiled eggs should be refrigerated and used within one week. Store them in a covered container and label the container with the cooking date when possible.

    5. Should eggs be stored in the refrigerator door?

    No. The Egg Storage Guide recommends keeping eggs on an interior shelf because the temperature is usually more stable there. Keeping eggs in their original carton also helps protect them from odors and damage.

    6. How can you tell if an egg is unsafe?

    Avoid eggs with cracked shells, unusual odors, or obvious signs of spoilage. Additionally, eggs that have been kept at unsafe temperatures for too long should be discarded.

    7. Can eggs be left at room temperature?

    Refrigerated eggs should not remain at room temperature for extended periods. Following the Egg Storage Guide means returning refrigerated eggs to the refrigerator promptly after use and following local food-safety rules.

    8. What temperature should eggs be stored at?

    For refrigerated eggs, keep the refrigerator at 40°F (4°C) or below. A refrigerator thermometer can help you monitor the temperature accurately.

    9. Does the original egg carton matter?

    Yes. The carton protects eggs from damage and helps reduce exposure to odors. It also keeps important date and product information available. The Egg Storage Guide recommends keeping eggs in their original carton whenever possible.

    10. What is the easiest way to reduce egg waste?

    Use older eggs first, keep the refrigerator organized, and check storage dates regularly. A simple Egg Storage Guide routine can help households avoid forgetting older cartons.

    Conclusion

    Following an Egg Storage Guide can help you keep eggs fresh, organized, and safer to eat throughout 2026. Keep refrigerated eggs cold, use the original carton, monitor storage times, and handle cooked eggs carefully.

  • Fertilized vs Unfertilized Eggs: 2026 Guide

    Fertilized vs Unfertilized Eggs: 2026 Guide

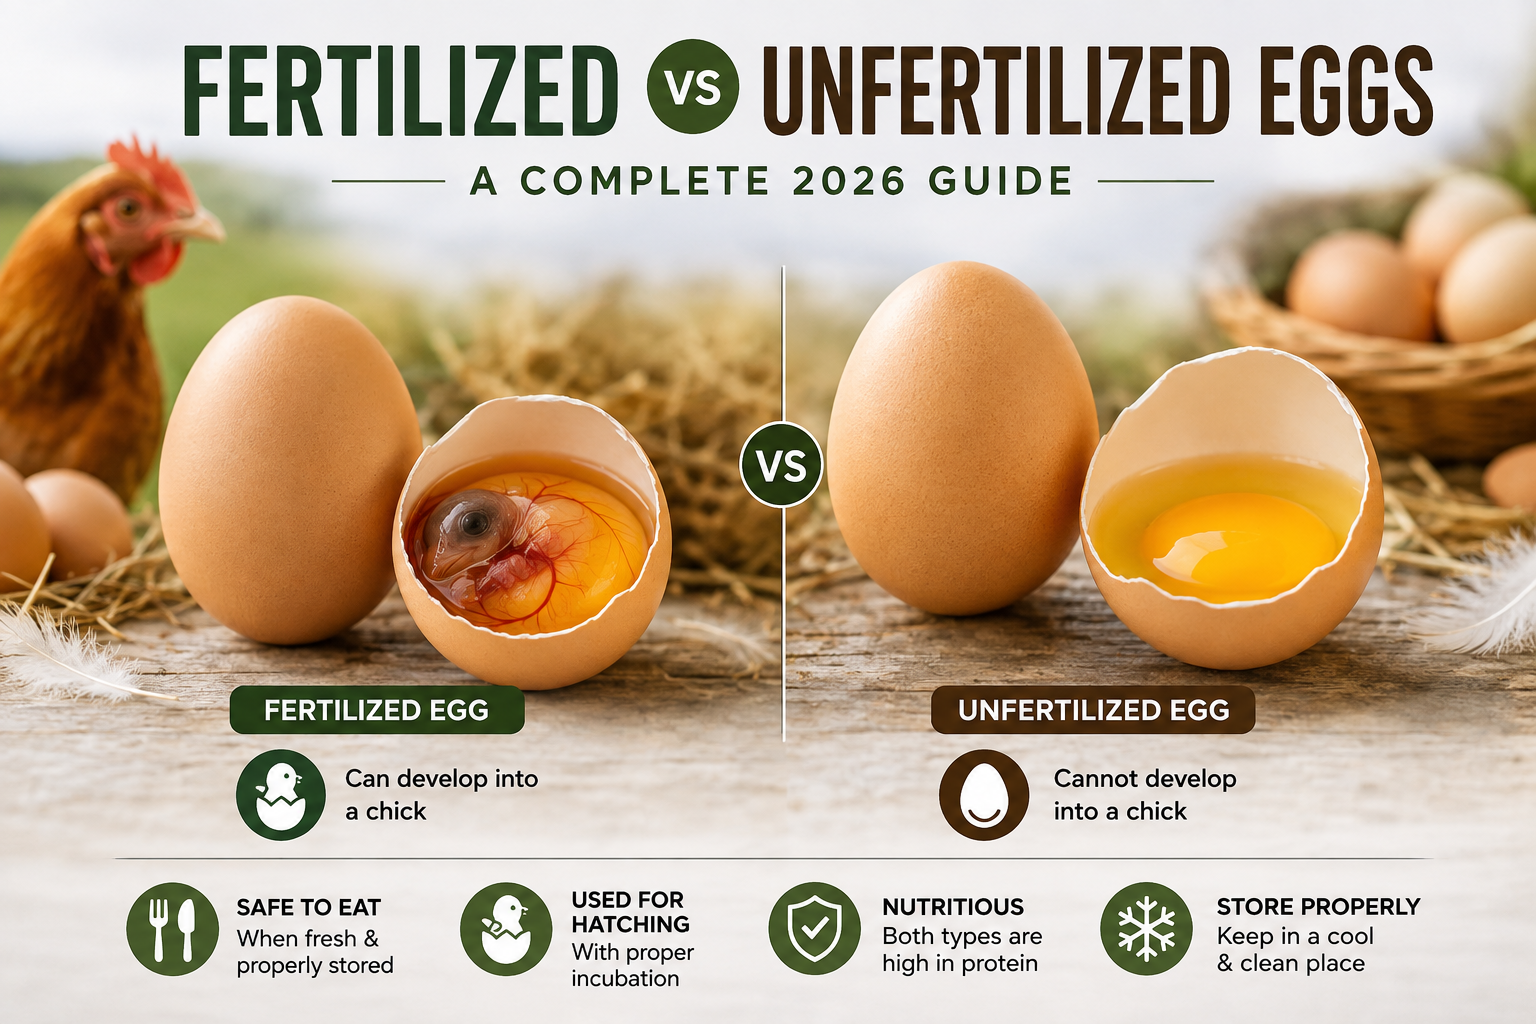
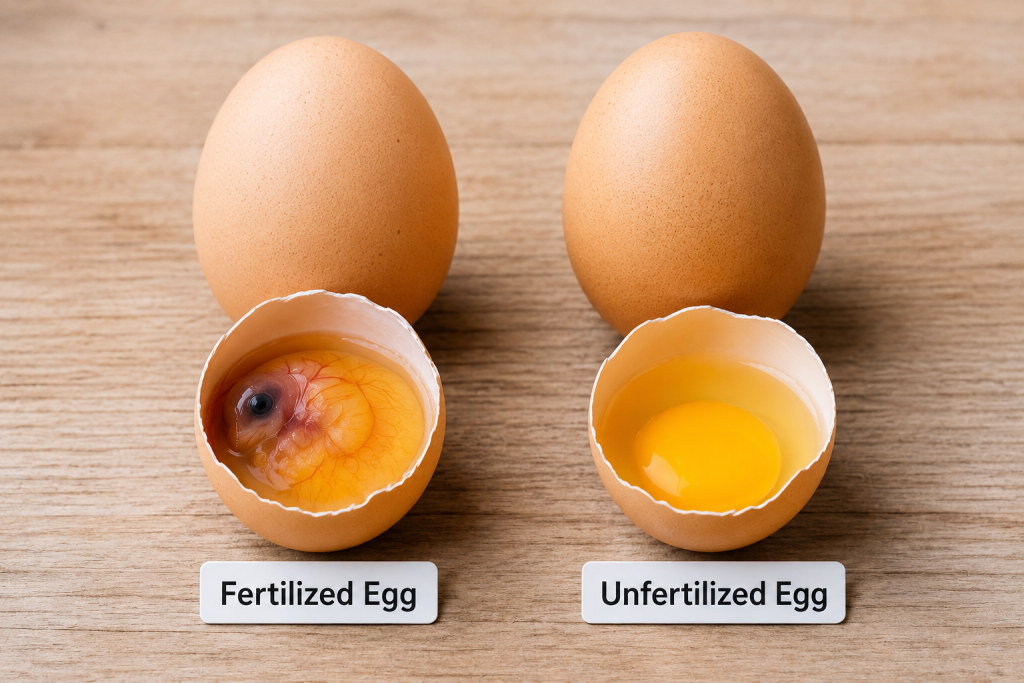
    Understanding Fertilized vs Unfertilized Eggs can help backyard chicken keepers, farmers, and everyday consumers make better choices. The main difference is simple: a fertilized egg can develop into a chick under the right conditions, while an unfertilized egg cannot.

    However, the difference does not automatically make one egg better than the other. In fact, both types can be nutritious and safe to eat when handled and stored properly. Additionally, the egg’s purpose matters. If you want fresh breakfast eggs, fertility may not matter. If you want to hatch chicks, it matters greatly.

    Why Fertilized vs Unfertilized Eggs Matters

    The biggest factor is whether a hen has access to a rooster. A hen can lay eggs without a rooster. Those eggs are normally unfertilized.

    When a rooster mates with a hen, fertilization can occur before the egg develops its shell. As a result, some eggs from a flock with a rooster may be fertilized.

    For backyard keepers, understanding Fertilized vs Unfertilized Eggs is especially useful when collecting eggs for eating or fertilized eggs for hatching.

    Fertilized vs Unfertilized Eggs: Key Differences

    Fertilized Chicken Eggs

    A fertilized egg contains the genetic material needed to potentially develop into a chick. However, fertilization alone does not mean a chick will start growing immediately.

    The egg needs suitable incubation conditions, including appropriate temperature, humidity, and regular turning. Without incubation, the embryo will not continue normal development.

    Unfertilized Chicken Eggs

    An unfertilized egg does not contain a developing embryo. Therefore, it cannot hatch into a chick.

    Most commercial table eggs are unfertilized because egg-laying hens are generally kept without roosters. These eggs remain a common food source worldwide.

    How to Tell If an Egg Is Fertilized

    One common question is how to tell if an egg is fertilized. Before incubation, it can be difficult to confirm fertility simply by looking at an intact egg.

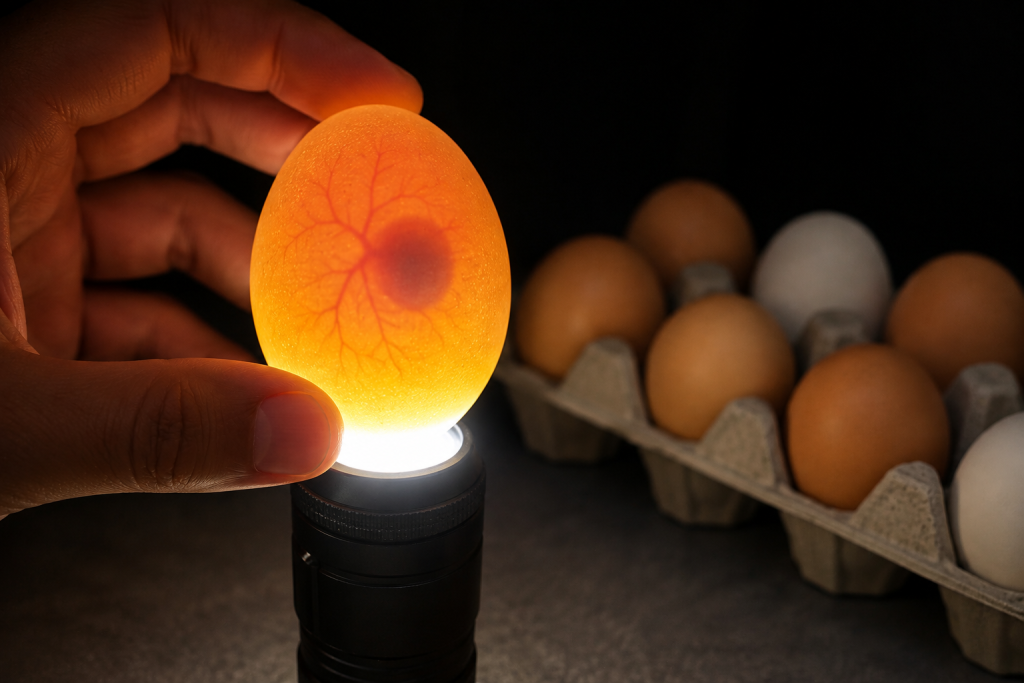
    After incubation begins, a process called candling can provide useful clues. Candling involves shining a bright light through the shell in a dark environment.

    After several days of proper incubation, a developing fertilized egg may show:

    • Visible blood vessels
    • A developing embryo
    • Darker areas as growth continues
    • Movement during later stages

    An unfertilized egg will not show normal embryo development.

    Can Fertilized Eggs Be Eaten?

    Yes, fertilized eggs can be eaten when they have been collected fresh, handled safely, and have not undergone significant embryo development.

    The taste and nutritional value are generally similar to ordinary eggs. However, an egg that has been kept warm for incubation may begin developing. Therefore, eggs intended for eating should be collected regularly and stored correctly.

    Always follow local food-safety guidance, especially when selling or serving eggs.

    Types and Uses of Chicken Eggs

    Eggs for Eating

    For everyday cooking, either type can work. Scrambled eggs, omelets, baking, and boiled eggs can all use fresh eggs.

    Eggs for Hatching

    For fertilized eggs for hatching, fertility is essential. You also need healthy breeding birds, proper storage before incubation, and a reliable incubator or broody hen.

    Therefore, choosing eggs from a healthy flock is more important than simply choosing the largest eggs.

    Buying and Decision Guide

    When comparing Fertilized vs Unfertilized Eggs, consider your goal:

    1. For eating: Choose fresh, properly stored eggs.
    2. For hatching: Choose fresh fertilized eggs from healthy breeding stock.
    3. For breeding: Consider the health, age, and genetics of the parent flock.
    4. For incubation: Check that eggs have clean, intact shells and suitable storage conditions.

    Additionally, avoid cracked or heavily soiled eggs when selecting eggs for incubation or consumption.

    Common Mistakes to Avoid

    People often make several mistakes when dealing with fertile eggs.

    • Assuming every backyard egg is fertilized
    • Believing fertilized eggs always contain a visible chick
    • Storing hatching eggs incorrectly
    • Keeping eggs too warm before incubation
    • Using cracked eggs for incubation
    • Assuming fertility automatically means better nutrition

    Most importantly, remember that fertility and freshness are different things.

    Egg Care and Storage Tips

    Proper storage helps maintain egg quality. Keep eggs in a clean environment and follow recommended food-safety practices for your region.

    For hatching eggs, avoid washing them unnecessarily because the shell’s natural protective coating can be affected. Instead, select clean eggs from a clean nesting area.

    Additionally, store hatching eggs under suitable conditions before incubation and avoid unnecessary temperature changes.

    Conclusion

    The difference between Fertilized vs Unfertilized Eggs mainly comes down to reproduction. Fertilized eggs have the potential to develop into chicks under proper incubation, while unfertilized eggs cannot hatch.

    For eating, both can be suitable when fresh and handled safely. For breeding and incubation, however, fertilization is essential. If you keep chickens, understanding Fertilized vs Unfertilized Eggs will help you collect, store, and use your eggs more effectively.

  • Egg Incubation Guide 2026: Easy Hatching Tips

    Egg Incubation Guide 2026: Easy Hatching Tips

    Egg Incubation Guide 2026: Easy Hatching Tips

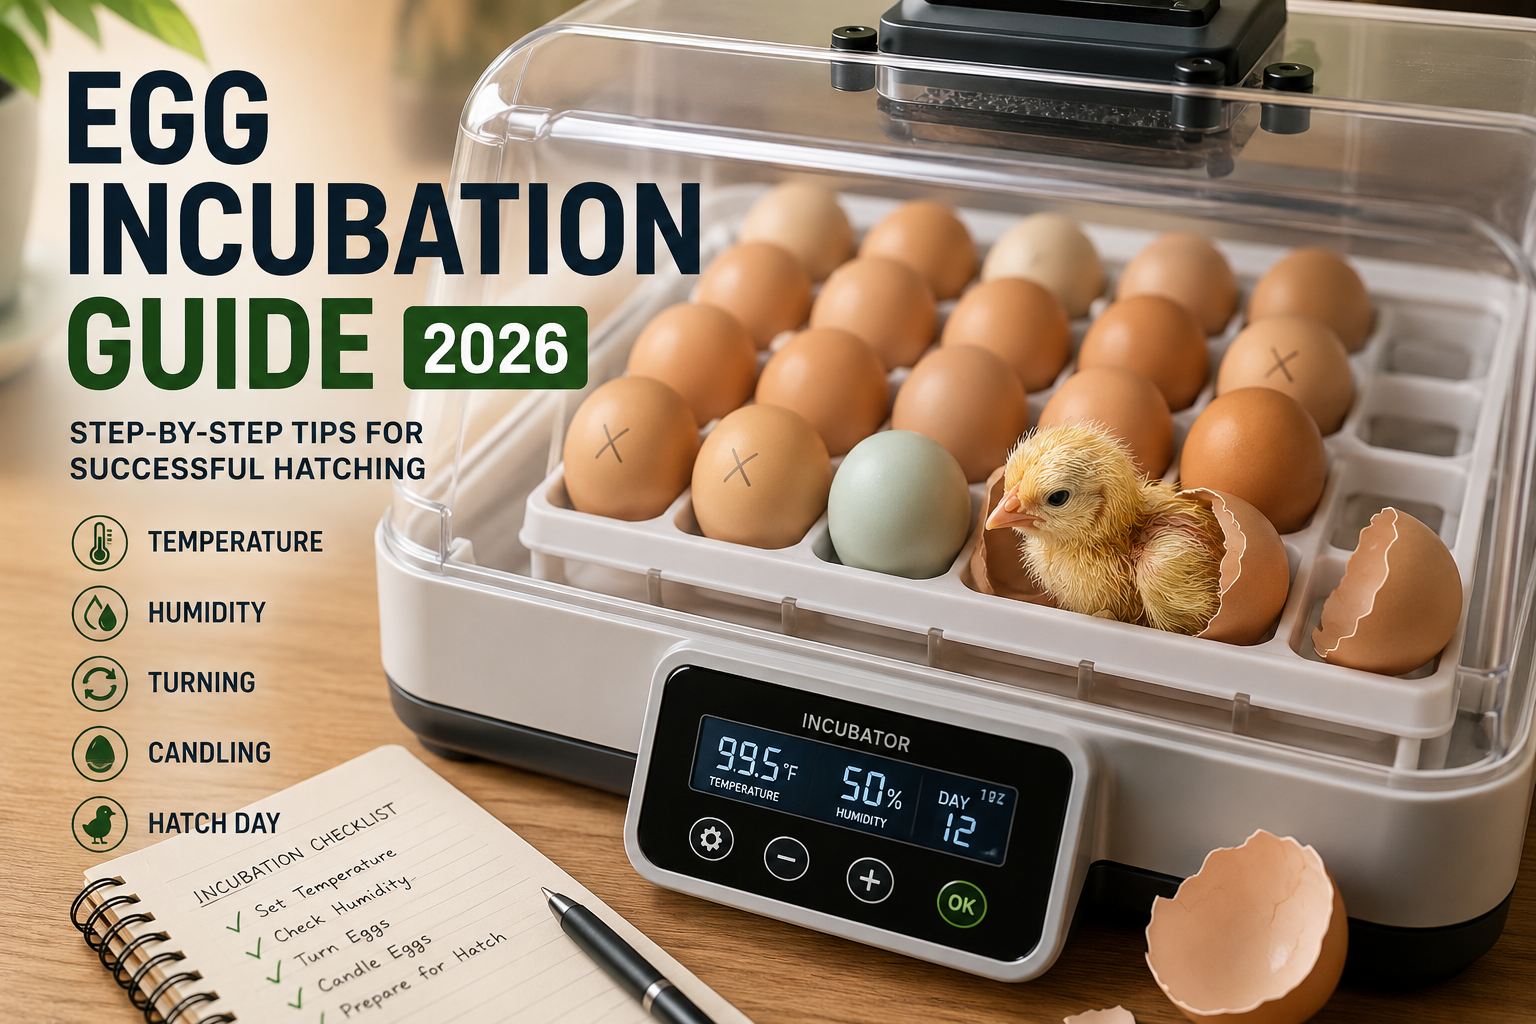
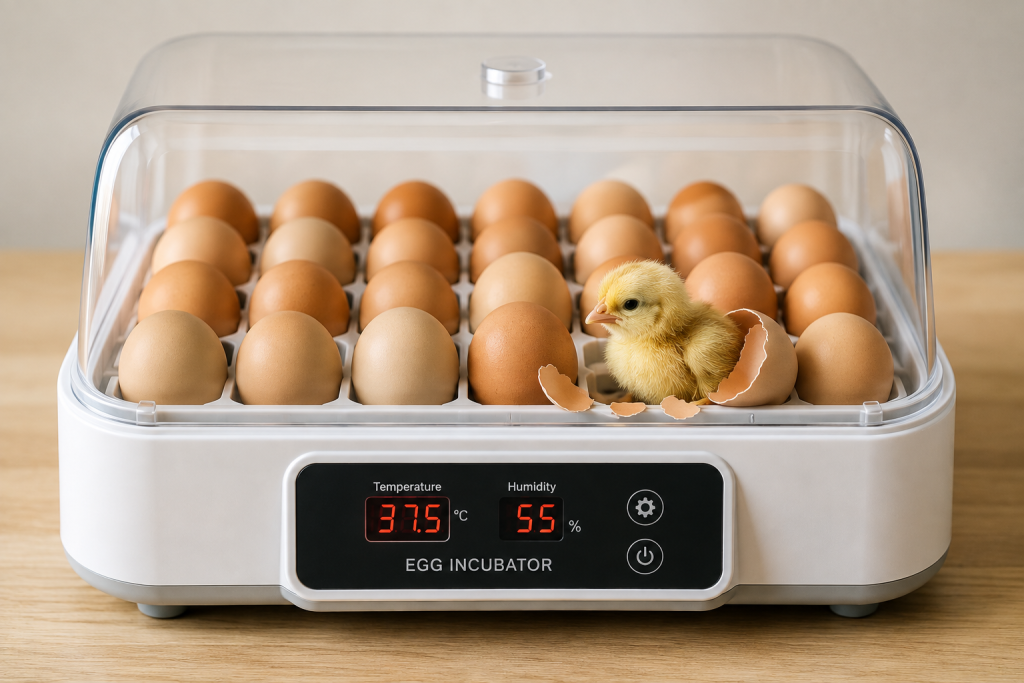
    Hatching fertile eggs at home can be exciting, but success depends on careful preparation. This Egg Incubation Guide explains the key steps beginners and experienced poultry keepers can follow in 2026. Whether you have a small backyard flock or want to hatch chicks for a larger project, the right temperature, humidity, ventilation, and egg turning can make a major difference.

    For chicken eggs, incubation normally takes about 21 days. However, small temperature changes can affect hatch timing and embryo development. [Internal Link: Chicken Egg Hatching Guide]

    Why This Egg Incubation Guide Matters

    Successful incubation is not simply about putting eggs inside an incubator. Instead, you must create stable conditions that support embryo growth.

    A reliable Egg Incubation Guide can help you:

    • Choose suitable fertile eggs.
    • Maintain the correct incubator temperature.
    • Control humidity throughout incubation.
    • Turn eggs correctly.
    • Monitor embryo development through candling.
    • Prepare for the final hatch.

    Additionally, keeping the incubator closed as much as possible helps prevent sudden changes in temperature and humidity.

    Egg Incubation Guide: Key Factors

    1. Choose Good Fertile Eggs

    Start with clean, healthy, normally shaped eggs. Avoid eggs with cracks, very thin shells, or severe dirt. Do not wash hatching eggs because washing can damage the protective surface of the shell.

    If you need fertile eggs, purchase them from a reliable breeder or hatchery. [External Link Placeholder: Trusted Poultry Hatchery]

    2. Set the Right Temperature

    Temperature is one of the most important parts of chicken egg incubation. For many forced-air incubators, the target is close to 99.5°F (37.5°C), although you should always follow your incubator manufacturer’s instructions.

    Therefore, use a reliable thermometer and check that your incubator holds a stable temperature before adding eggs.

    3. Control Humidity

    Humidity affects how much moisture an egg loses during development. As a result, incorrect humidity can contribute to poor hatching results.

    Your incubator may use a water reservoir to control humidity. During the final three days, humidity should generally increase, helping the membranes remain flexible while chicks hatch.

    [Internal Link Placeholder: Chicken Egg Humidity Guide]

    4. Turn Eggs Regularly

    Turning helps prevent the developing embryo from sticking to the shell membrane. Automatic turners can make this easier, especially if you are incubating several eggs.

    However, stop turning chicken eggs around Day 18, when the chicks enter the final hatching stage.

    Types of Egg Incubators

    Forced-Air Incubators

    Forced-air models use a fan to circulate warm air. Consequently, they can provide more consistent temperatures throughout the incubator.

    Still-Air Incubators

    Still-air models do not use a fan, so temperature can vary between different areas. Therefore, thermometer placement and careful monitoring become especially important. Always follow the temperature instructions supplied with your specific model.

    Egg Incubation Guide: Candling Eggs

    Candling lets you shine a bright light through an egg to observe development. In the early stages, you may see blood vessels and an expanding embryo.

    However, avoid opening the incubator unnecessarily. By around Day 14, many guides recommend limiting candling because maintaining stable incubation conditions becomes increasingly important.

    Simple 21-Day Incubation Timeline

    Days 1–7: Maintain stable temperature and humidity. Turn eggs regularly.

    Days 8–14: Continue turning and monitor development. Candling can help identify developing embryos.

    Days 15–17: Continue stable incubation and prepare for lockdown.

    Days 18–21: Stop turning, increase humidity according to your incubator’s instructions, and avoid opening the incubator unnecessarily.

    Common Mistakes to Avoid

    Even a good Egg Incubation Guide cannot compensate for poor equipment or inconsistent care. Avoid these common mistakes:

    • Frequently opening the incubator.
    • Using an inaccurate thermometer.
    • Letting temperature fluctuate significantly.
    • Ignoring humidity.
    • Turning eggs after Day 18.
    • Washing hatching eggs.
    • Handling eggs unnecessarily during lockdown.
    • Helping chicks break out of their shells too quickly.

    Most importantly, be patient. Hatching can take time, and some chicks may arrive slightly earlier or later than expected.

    Caring for Chicks After Hatching

    Once chicks hatch, allow them to dry and become active before moving them to a properly prepared brooder. The brooder should provide warmth, clean water, suitable chick starter feed, dry bedding, and good ventilation.

    Additionally, prepare the brooder before hatch day so you do not have to rush after the chicks emerge.

    Conclusion

    Following an Egg Incubation Guide gives you a clear process for managing fertile eggs from setting to hatch. Focus on stable temperature, appropriate humidity, regular turning, cleanliness, ventilation, and careful observation. Most importantly, follow your incubator manufacturer’s instructions because equipment designs vary.

    Ready to start? Prepare your incubator several days before setting your eggs, test its temperature, and keep a simple daily record. With patience and consistent care, this Egg Incubation Guide can help you work toward a healthier and more successful hatch in 2026.

  • Candling Eggs: 2026 Guide to Egg Candling

    Candling Eggs: 2026 Guide to Egg Candling

    Candling Eggs: 2026 Guide to Egg Candling

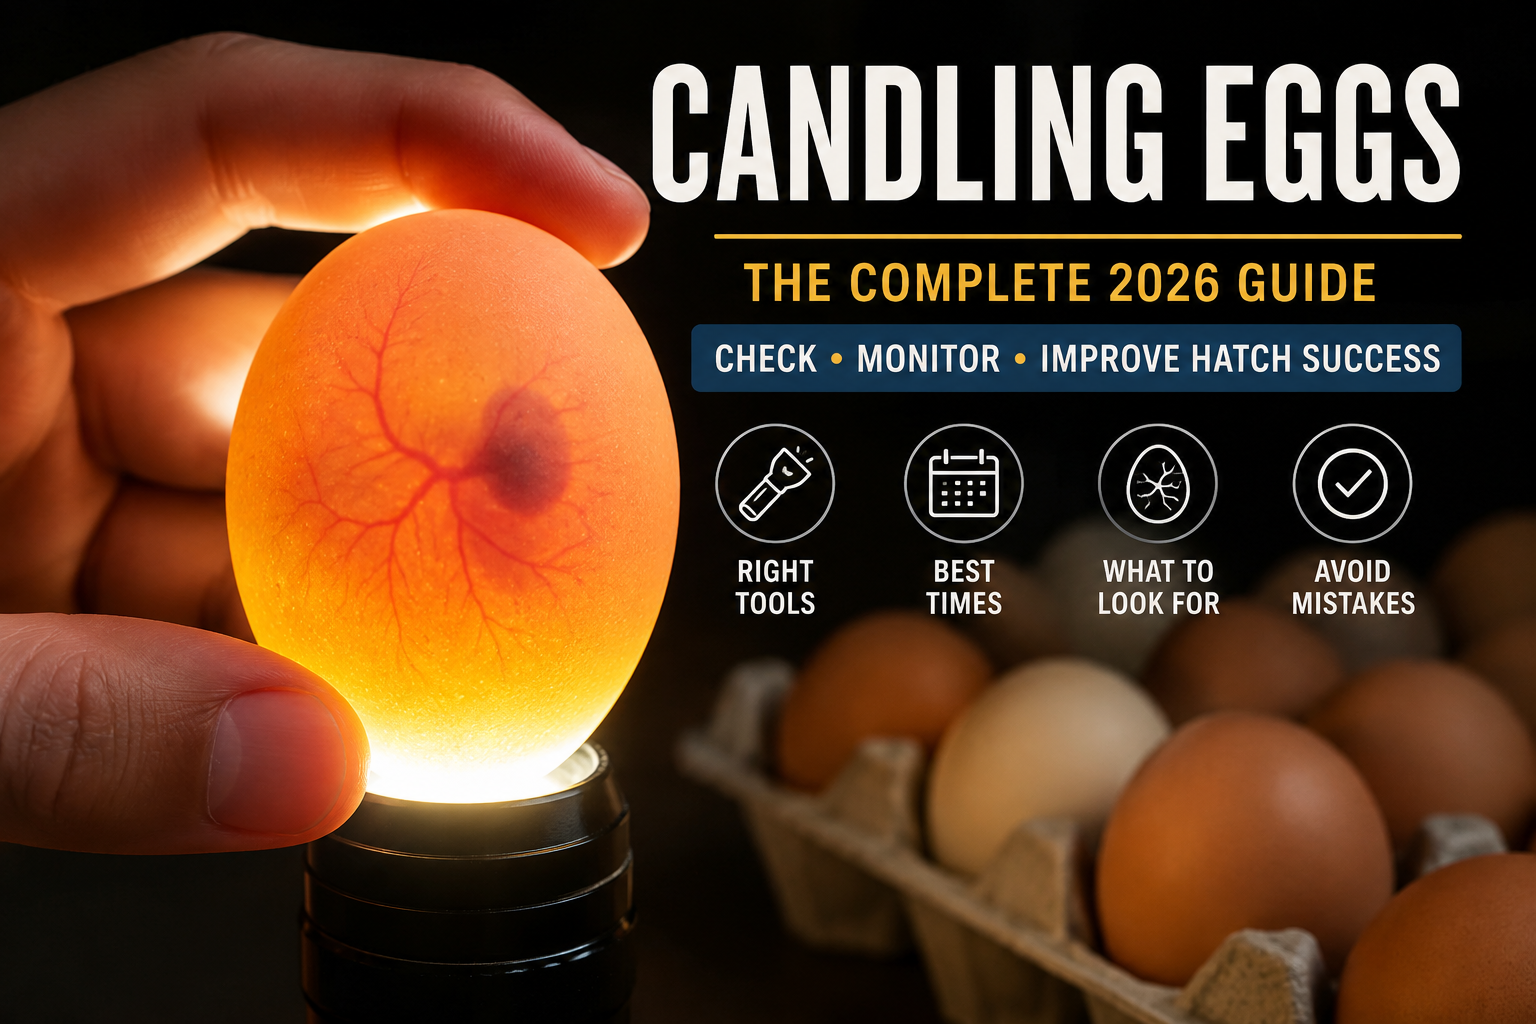
    If you are raising chickens, hatching chicks, or teaching children about poultry, Candling Eggs is one of the simplest ways to see what is happening inside an egg. In 2026, backyard poultry keepers and small farms can use a bright LED flashlight or dedicated egg candler to monitor fertile eggs without opening the shell.

    The process uses light to reveal the air cell, yolk, blood vessels, and developing embryo. Additionally, regular checks can help you understand whether an embryo is developing normally.

    Why Candling Eggs Matters

    Candling Eggs provides a non-invasive way to observe chicken embryo development. You can see changes inside the shell as incubation progresses.

    For example, Penn State Extension explains that candling can reveal the air sac, developing embryo, and movement of a live embryo. A dead embryo may stop moving, while a blood ring can indicate that development has stopped.

    Additionally, candling can help with egg quality. Extension guidance notes that holding an egg before a bright light can reveal cracks, spots, and other internal defects.

    How to Candle Eggs Safely

    Choose the Right Egg Candler

    You do not need expensive equipment. A strong LED flashlight can work well in a dark room. However, a purpose-built egg candler can provide a more focused beam and make details easier to see.

    Before starting:

    • Wash and dry your hands.
    • Darken the room.
    • Handle eggs gently.
    • Keep the candling session brief.
    • Return incubating eggs promptly.

    For classroom or home projects, a small LED flashlight is a practical option. Penn State 4-H also lists an LED flashlight as suitable equipment for candling.

    How to Candle Eggs

    To learn how to candle eggs, follow these simple steps:

    1. Turn off bright room lights.
    2. Hold the egg over the light source.
    3. Place the larger end toward the light.
    4. Look for the air cell and internal shadows.
    5. Slowly rotate the egg if needed.
    6. Record what you see.
    7. Return the egg to the incubator.

    Do not shake the egg. Also, avoid keeping the egg away from proper incubation conditions longer than necessary.

    What You Can See During Candling

    Candling Eggs becomes more useful as incubation progresses. Early in development, an egg may show only a small dark area or developing blood vessels. Later, the embryo becomes larger and movement may become visible.

    A normal fertile egg can show:

    • Developing blood vessels
    • A growing dark embryo
    • An expanding embryo
    • Movement
    • A changing air cell

    However, not every egg will develop successfully. Seeing an embryo does not guarantee that the chick will hatch.

    Chicken eggs generally require about 21 days for full development under suitable incubation conditions.

    Candling Eggs: Best Times to Check

    There is no need to candle constantly. Frequent handling can disturb the incubation process.

    A practical schedule includes:

    • Early incubation: Check for early development.
    • Mid-incubation: Look for stronger blood vessels and embryo growth.
    • Late incubation: Confirm development before the hatching stage.

    Penn State’s classroom embryology program recommends candling eggs approximately three to five times during the incubation period.

    As a result, a few careful observations can provide plenty of useful information.

    Types of Eggs You May See

    Clear Eggs

    A clear egg may show the yolk but no developing blood vessels or embryo. This can indicate an infertile egg, although timing and lighting also matter.

    Developing Eggs

    A developing egg can show blood vessels, a dark embryo, and sometimes movement. These signs generally indicate ongoing development.

    Eggs With Stopped Development

    A non-moving embryo or visible blood ring can indicate that development has stopped. However, avoid making a decision from one quick observation alone.

    Buying and Decision Guide

    When choosing equipment for Candling Eggs, focus on practical features rather than price alone.

    Look for:

    • Bright LED illumination
    • A narrow, focused beam
    • Comfortable handling
    • Low heat output
    • Suitable size for your eggs
    • Easy cleaning

    Additionally, a dark room can make even a simple flashlight much more effective.

    Common Candling Mistakes to Avoid

    Avoid these common problems:

    • Candling in a bright room
    • Handling eggs roughly
    • Spending too long outside the incubator
    • Assuming every clear egg is infertile too early
    • Confusing a blood spot with embryo development
    • Ignoring incubation temperature and humidity
    • Opening eggs without understanding development stages

    Remember, Candling Eggs is an observation method, not a replacement for proper incubation management.

    Maintenance and Care Tips

    Clean equipment regularly, but do not introduce moisture or contaminants into the incubator. Also, wash your hands before and after handling eggs.

    Proper incubator management remains essential. Penn State Extension recommends monitoring temperature, adding water when needed, and turning eggs according to the incubation system being used.

    Furthermore, keep records of your observations. Write down the date, egg number, and what you see. This makes it easier to compare development and identify unusual changes.

    Frequency Ask Question

    Q1. When should you check an egg during incubation?
    A few checks during incubation are usually enough. Early, middle, and later stages can help you observe embryo growth.

    Q2. What does a healthy developing egg look like?
    You may see blood vessels, a growing dark area, and movement as development progresses.

    Q3. How can you tell if an egg has stopped developing?
    A lack of expected development or a visible blood ring may indicate that development has stopped. However, timing matters.

    Q4. Can you use a flashlight to check eggs?
    Yes. A bright LED flashlight can work well in a dark room, although a dedicated candler can provide better visibility.

    Q5. How long should an egg stay outside the incubator?
    Keep the inspection brief and return the egg to the correct incubation conditions as soon as possible.

    Conclusion

    Candling Eggs gives poultry keepers, hobbyists, farmers, and students a fascinating view inside the shell. With a bright light, a dark room, gentle handling, and good incubation practices, you can monitor fertile egg development without opening the egg.

    Additionally, careful observation helps you learn more about embryo growth and the hatching process. Start with a simple LED light, follow safe handling practices, and keep clear records. For more detailed guidance, use trusted poultry extension resources before making important incubation decisions.

  • Chick Hatching Stages: Amazing 2026 Guide

    Chick Hatching Stages: Amazing 2026 Guide

    Chick Hatching Stages: Amazing 2026 Guide

    Understanding the chick hatching stages helps poultry keepers know what to expect during incubation. Whether you are raising backyard chickens in the US or keeping a small flock elsewhere, watching an egg develop into a healthy chick is exciting.

    However, successful hatching requires stable temperature, proper humidity, good ventilation, and careful handling. This 2026 guide explains the main stages in simple terms.

    Why Chick Hatching Stages Matter

    Learning the chick hatching stages makes incubation easier to manage. Additionally, it helps you identify normal development and recognize possible problems early.

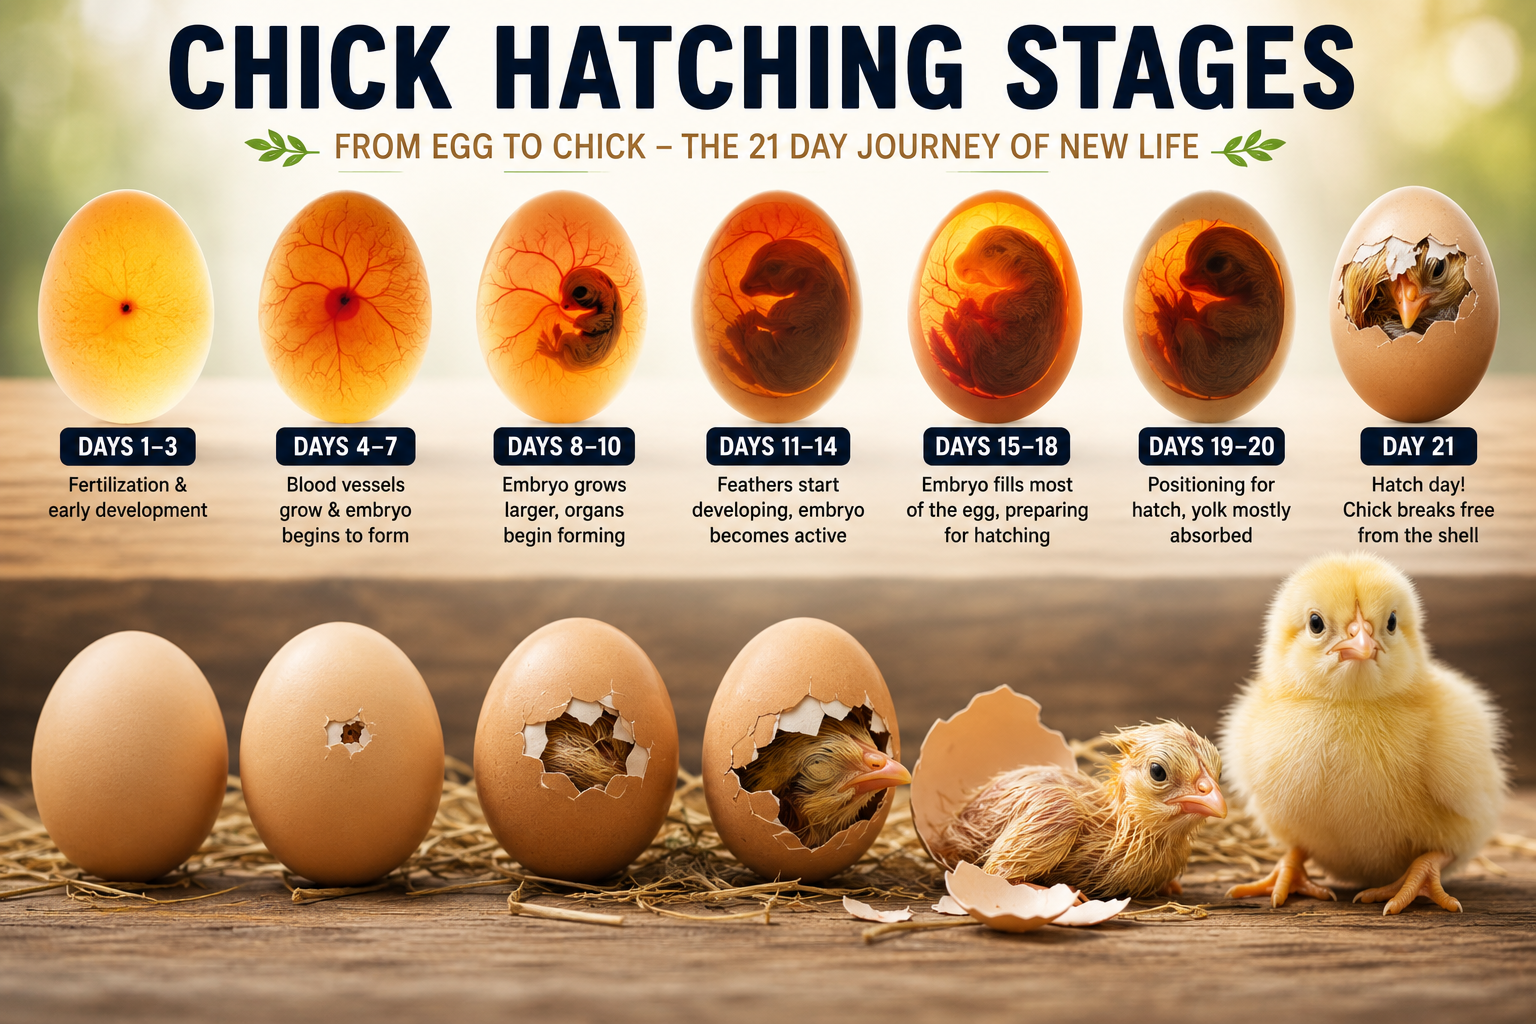
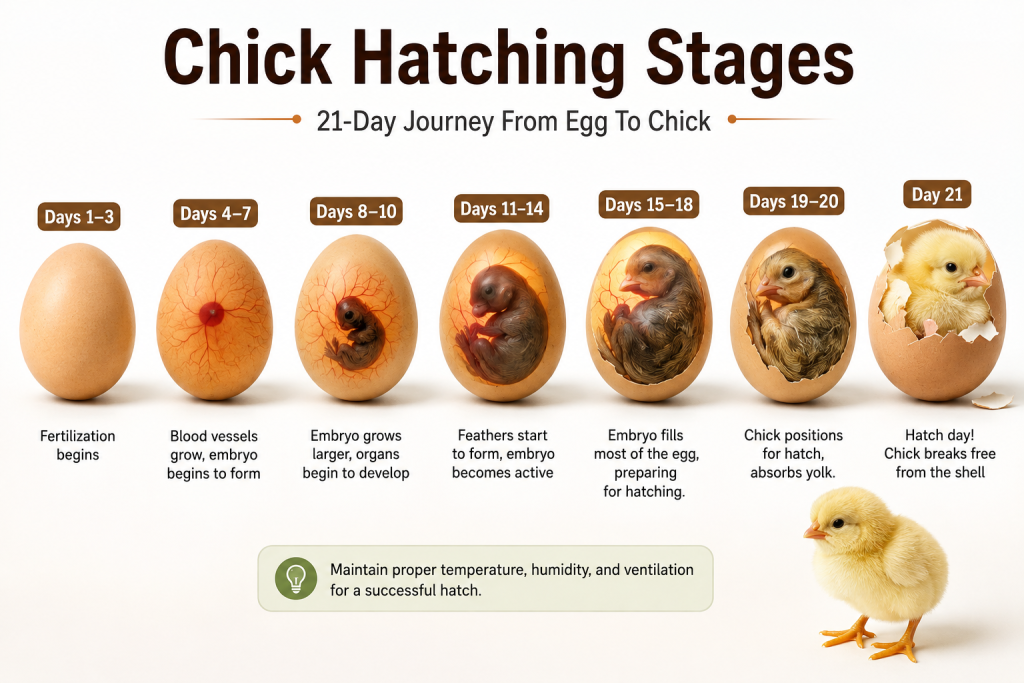
    Chicken eggs usually take about 21 days to hatch under suitable incubation conditions. However, some chicks may hatch slightly earlier or later.

    Knowing the timeline can help you:

    • Monitor egg development.
    • Understand when to candle eggs.
    • Prepare for hatch day.
    • Avoid unnecessary handling.
    • Provide proper care after hatching.

    Key Chick Hatching Stages

    The chick hatching stages can be divided into several important periods. Each stage brings major changes inside the egg.

    Days 1–7: Early Development

    During the first week, the embryo begins developing rapidly. The heart and early blood vessels form, while the basic body structure starts taking shape.

    Additionally, the embryo develops important organs. If you use a suitable candler, you may eventually see blood vessels spreading through the egg.

    This is an important period for chicken egg incubation, so keep the incubator conditions stable.

    Days 8–14: Rapid Chick Growth

    During the second week, the developing chick becomes more recognizable. Feathers begin forming, and bones, muscles, and other body parts continue developing.

    Furthermore, the chick becomes more active inside the egg. The embryo also uses nutrients from the yolk to support its growth.

    At this point, careful monitoring can help you understand the chick development inside egg without disturbing the eggs too often.

    Days 15–18: Preparing for Hatch

    The final development period is another major part of the chick hatching stages. The chick continues growing and gradually uses more of the available yolk.

    Additionally, the chick moves into a position that prepares it for hatching. The egg contains less available space as the chick grows.

    This is a good time to prepare your brooder, clean bedding, fresh water, and suitable chick starter feed.

    Days 19–21: Hatching Time

    The final phase of the chick hatching stages is known as hatch day. The chick usually moves into the correct position and begins breaking through the inner shell membrane.

    Next, it makes a small crack in the shell called a “pip.” The chick may then slowly work around the shell before pushing its way out.

    Importantly, do not rush to help a chick hatch unless there is a clear, serious problem. Hatching can take several hours.

    Types of Egg Incubation

    There are two common approaches to hatching chicken eggs.

    Natural Incubation

    A broody hen naturally provides warmth and turns the eggs. Therefore, this method requires less equipment.

    However, results depend heavily on the hen’s behavior and the environment.

    Artificial Incubation

    An incubator provides controlled heat and humidity. As a result, it gives keepers more control over the egg hatching process.

    Modern incubators can include automatic egg turning, digital temperature controls, and humidity monitoring.

    Buying and Decision Guide

    If you plan on incubating chicken eggs, choose equipment based on flock size and experience.

    Look for:

    • Reliable temperature control.
    • Easy-to-read humidity monitoring.
    • Good ventilation.
    • Automatic turning if possible.
    • Easy cleaning and maintenance.
    • Enough capacity for your needs.

    Additionally, always follow the manufacturer’s instructions because incubator designs can vary.

    Common Mistakes to Avoid

    Many failed hatches happen because of simple mistakes. Therefore, avoid these common problems:

    • Opening the incubator too frequently during hatch time.
    • Allowing temperature to fluctuate significantly.
    • Ignoring humidity requirements.
    • Using dirty or damaged eggs.
    • Failing to clean the incubator properly.
    • Handling developing eggs unnecessarily.

    Moreover, avoid washing hatching eggs unless you fully understand the risks, because the egg’s natural protective coating helps reduce contamination.

    Chick Hatch Day Care Tips

    After the chick hatching stages are complete, give the newborn chick time to dry and become active.

    The chick should remain in the incubator until it is dry and fluffy. Then, move it to a warm, safe brooder with suitable bedding.

    Provide:

    • Clean drinking water.
    • Quality chick starter feed.
    • Safe, dry bedding.
    • Appropriate brooder heat.
    • Protection from drafts and predators.

    Conclusion

    Understanding the chick hatching stages makes the incubation journey less stressful and more rewarding. From early embryo development to the first pip and final hatch, every stage has an important purpose.

    Therefore, maintain stable incubation conditions, avoid unnecessary disturbance, and prepare the brooder before hatch day. If you are starting your first batch in 2026, follow these steps carefully and enjoy watching your chicks begin life.

  • 7 Egg Production Tips: Proven Ways to Boost Laying

    7 Egg Production Tips: Proven Ways to Boost Laying

    Egg Production Tips: Boost Hen Laying in 2026

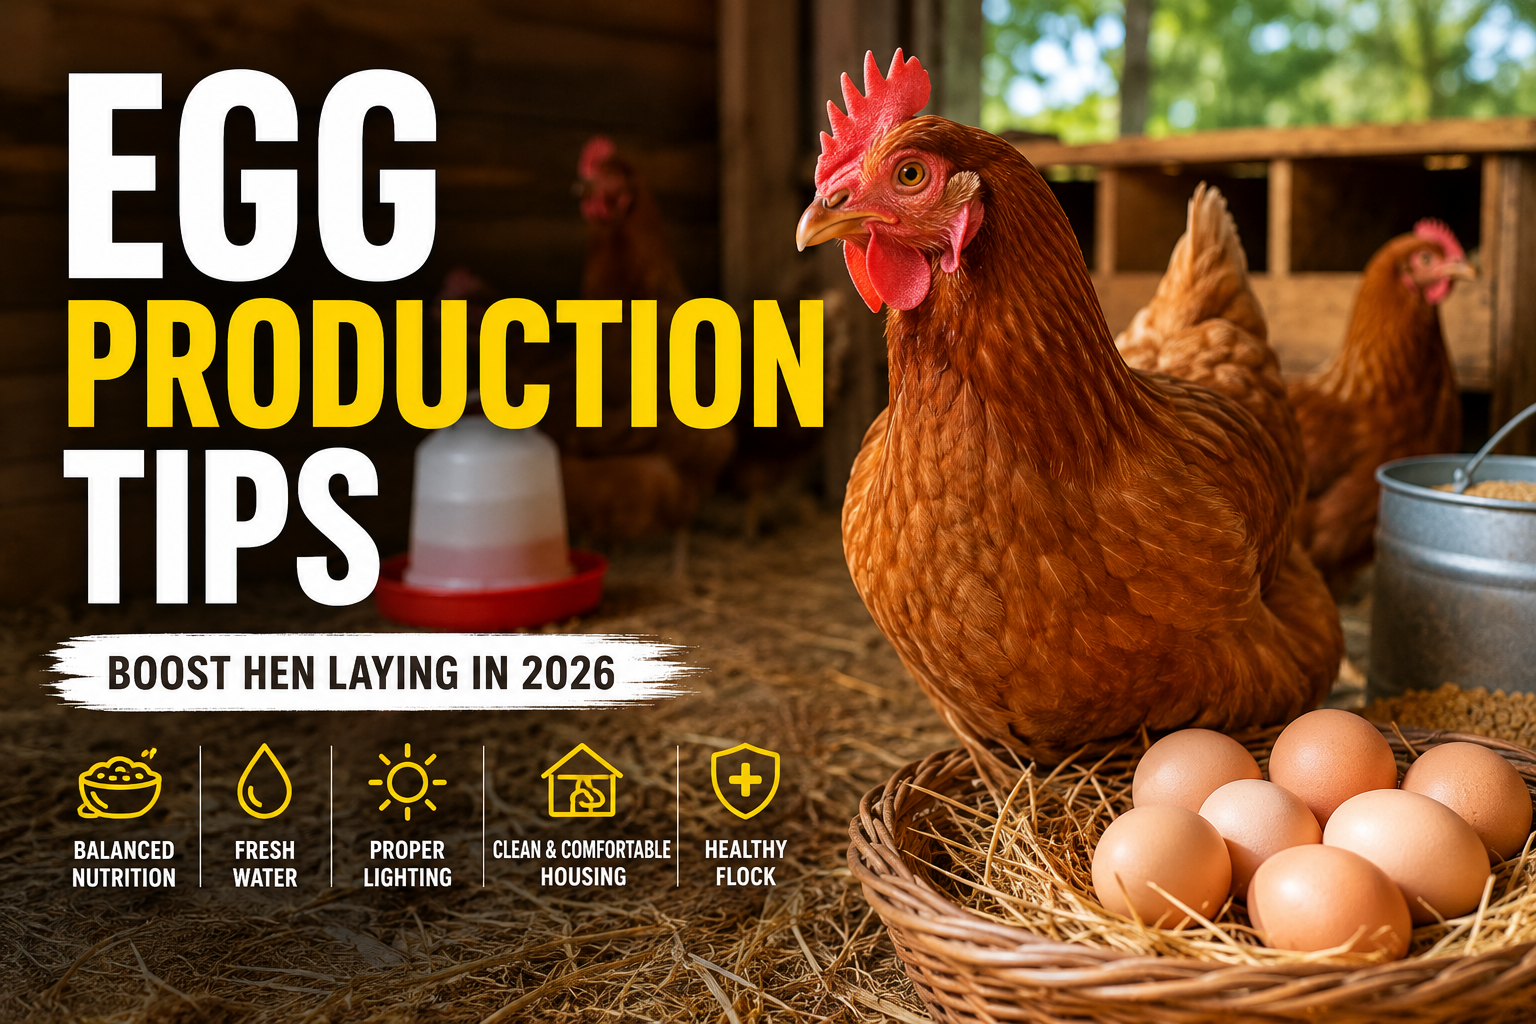
    Getting fewer eggs than expected can frustrate backyard chicken keepers and small-flock owners. The good news is that simple management changes can make a major difference. These Egg Production Tips focus on the basics that matter most in 2026, including nutrition, clean water, lighting, housing, and flock health.

    Hens do not produce eggs at the same rate throughout their lives. Breed, age, daylight, diet, stress, temperature, and health can all affect production. Therefore, improving daily care is often the best place to start.

    Why Egg Production Tips Matter

    Good flock management supports both egg quantity and egg quality. Additionally, healthy hens are more likely to maintain consistent laying patterns.

    According to University of Minnesota Extension, hens generally begin laying at around six months, while production is strongest during their earlier productive years. Daylight also has a major effect on laying behavior.

    For that reason, effective Egg Production Tips should focus on several areas rather than one quick fix.

    Key Egg Production Tips for 2026

    1. Provide a Complete Layer Feed

    Nutrition is one of the most important factors affecting laying performance. Use a complete feed designed specifically for laying hens rather than relying mainly on kitchen scraps or scratch grains.

    A suitable layer ration should provide adequate protein, vitamins, minerals, and calcium. Penn State Extension notes that layer diets commonly contain around 16–18% protein, while additional calcium such as oyster shell can be offered separately.

    Therefore, layer hen nutrition should be a daily priority.

    2. Keep Fresh Water Available

    Clean water is essential for digestion, health, and egg production. Moreover, hens can drink substantially more during hot weather.

    Clean drinkers regularly and check them several times during extreme heat. University extension guidance emphasizes that poor water availability can quickly reduce flock productivity.

    As a result, never allow drinkers to run dry.

    3. Manage Daylight Carefully

    Light strongly influences reproductive activity in laying hens. During shorter winter days, production can decline unless supplemental lighting is used.

    For flocks aiming for year-round production, extension guidance commonly recommends around 14–16 hours of total light per day. However, do not exceed 16 hours, and make lighting changes gradually.

    Use a reliable timer and provide a proper dark period for rest.

    4. Reduce Heat and Environmental Stress

    Hot weather can cause hens to eat less and drink more. Consequently, egg production and shell quality may suffer during heat stress.

    Provide shade, good airflow, and plenty of cool, clean water. Keep the coop dry and well ventilated. These simple chicken laying tips can help hens cope better with seasonal changes.

    Types of Factors That Affect Egg Production

    Breed and Age

    Some breeds naturally produce more eggs than others. Commercial hybrid layers can have very high annual production, while heritage breeds may lay fewer eggs.

    Age also matters. Production normally declines as hens grow older and may temporarily drop during molting.

    Housing and Nest Boxes

    A clean, secure coop helps reduce stress and health problems. Provide comfortable nest boxes with clean, dry bedding.

    A useful starting point is approximately one nest box for every four to five hens.

    You can also read our internal guide on chicken coop management for additional housing advice.

    Buying and Flock-Management Guide

    If you are building a flock for egg production, consider these points:

    1. Choose a breed known for reliable laying.
    2. Buy healthy pullets from a reputable source.
    3. Select age-appropriate feed.
    4. Provide continuous access to clean water.
    5. Plan a consistent lighting schedule.
    6. Check hens regularly for signs of illness or injury.

    Additionally, track weekly egg numbers. A simple record can help you identify gradual production changes before they become serious.

    Common Egg Production Mistakes to Avoid

    Avoid these common mistakes:

    • Feeding too many treats instead of complete feed.
    • Allowing waterers to become dirty or empty.
    • Changing lighting schedules suddenly.
    • Keeping hens in damp, poorly ventilated housing.
    • Ignoring heat stress.
    • Overcrowding the coop.
    • Failing to monitor changes in egg size or shell quality.

    Strong eggshells also depend on appropriate nutrition and calcium availability.

    Maintenance Tips for Better Production

    Daily care does not need to be complicated. First, check feed and water every morning. Next, inspect the flock for unusual behavior, injuries, or illness.

    Clean dirty drinkers and remove wet bedding. Additionally, collect eggs regularly and keep nesting areas clean and dry to support egg quality and hygiene.

    During summer, pay extra attention to water consumption and ventilation. During winter, monitor daylight and maintain a dry, well-ventilated coop.

    Frequently Asked Questions About Egg Production Tips

    1. What are the best Egg Production Tips for beginners?

    The best Egg Production Tips include providing balanced layer feed, fresh water, clean housing, enough space, and proper lighting. These basics help support healthy hens and consistent laying.

    2. Can Egg Production Tips help hens lay more eggs?

    Yes. Following practical Egg Production Tips can help create better conditions for laying. However, breed, age, season, health, and daylight also affect egg production.

    3. What feed should I use with Egg Production Tips?

    A complete layer feed with suitable protein, vitamins, minerals, and calcium is important. Combining good nutrition with effective Egg Production Tips can support healthy egg production.

    4. Do Egg Production Tips work during winter?

    Yes. Egg Production Tips can be especially useful during winter because shorter daylight hours may reduce laying. Proper lighting, nutrition, warmth, and fresh water can help maintain a healthy routine.

    5. How quickly do Egg Production Tips improve laying?

    Results vary between flocks. Some changes may help quickly, while others take several weeks. Consistent care and following reliable Egg Production Tips are more effective than expecting an instant increase.

    Final Thoughts

    The best Egg Production Tips are based on consistent care rather than a single supplement or quick solution. Give hens balanced feed, fresh water, suitable lighting, clean housing, enough space, and proper protection from temperature extremes.

    Most importantly, monitor your flock regularly and respond quickly when production changes. With the right routine, these Egg Production Tips can help backyard keepers and small-scale poultry owners support healthier hens and more consistent egg production throughout 2026.

    For more practical poultry advice, explore our latest chicken care guides.

  • Double Yolk Eggs: Causes, Safety & Facts in 2026

    Double Yolk Eggs: Causes, Safety & Facts in 2026

    Double Yolk Eggs: What Are They?

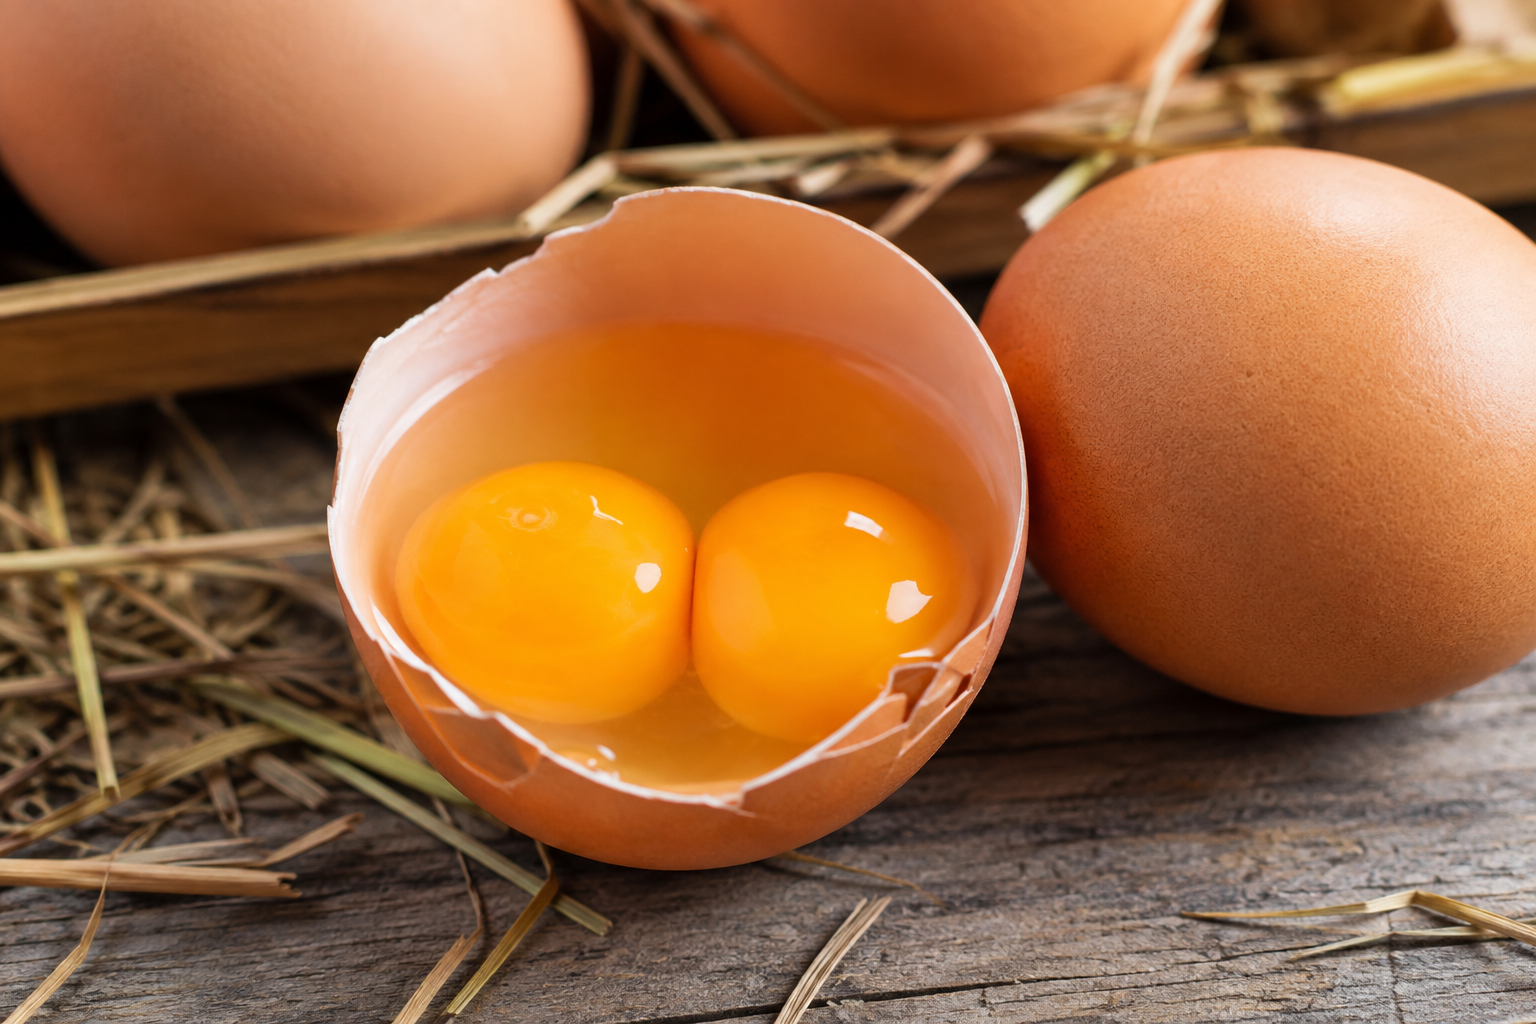
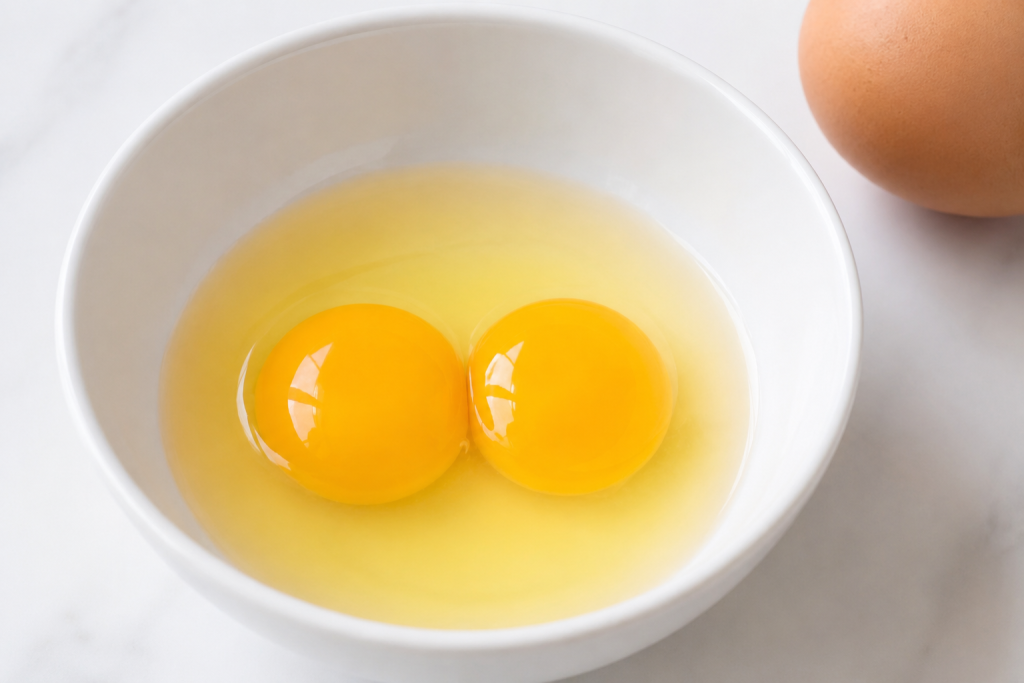
    Double yolk eggs are eggs that contain two yolks inside one shell. They can surprise shoppers, backyard chicken keepers, and home cooks, especially when they appear in a regular carton. However, this unusual egg is usually a natural result of the hen’s reproductive cycle.

    For many people, finding two yolks feels like a lucky discovery. In reality, there is a simple biological explanation. A hen can occasionally release two yolks close together, and both can become enclosed in the same shell.

    Why Do Double Yolk Eggs Happen?

    Young Hens and Changing Egg Production

    Young hens that are beginning to lay can produce unusual eggs while their reproductive systems become established. Therefore, backyard owners may notice more double-yolk eggs during this early laying period.

    Hens normally begin laying at around six months of age. Their production can remain strong for several years, although output changes with age and seasonal conditions.

    Double Yolk Eggs and Multiple Ovulation

    The main cause is multiple ovulation. Instead of releasing one yolk, the hen releases two around the same time. The oviduct can then form one shell around both yolks.

    Research from USDA’s Animal and Plant Health Inspection Service explains that multiple concurrent ovulations can produce large eggs containing two yolks.

    Are Double Yolk Eggs Safe to Eat?

    In most cases, yes. Double yolk eggs are safe to eat when they are fresh, properly handled, stored correctly, and thoroughly cooked.

    USDA agricultural researchers specifically address the safety of eggs containing two yolks. However, consumers should still follow normal egg-handling practices because the number of yolks does not remove the usual food-safety risks associated with raw or undercooked eggs.

    For safer preparation:

    • Keep eggs refrigerated according to local food-safety guidance.
    • Avoid using cracked or visibly contaminated eggs.
    • Wash hands and cooking surfaces after handling raw eggs.
    • Cook egg dishes thoroughly.

    Double Yolk Eggs Nutrition

    Are two yolks twice as nutritious? Not exactly. Because a double-yolk egg contains more yolk than a typical single-yolk egg, it can provide more calories, fat, protein, vitamins, and minerals than one ordinary egg.

    However, the exact nutritional value depends on the size of the egg and its two yolks. Therefore, people tracking calories or nutrients should consider the entire egg rather than assuming it equals two standard eggs.

    For general diets, eggs can provide useful nutrients, but portion size and overall dietary balance still matter.

    Types of Double Yolk Eggs

    Naturally Occurring Eggs

    Naturally occurring eggs with two yolks develop inside the hen without special processing. They are most commonly associated with hens experiencing multiple ovulation.

    Extra-Large Double-Yolk Eggs

    Some double-yolk eggs are noticeably larger than standard eggs because one shell contains two yolks. As a result, they can be useful in recipes where extra yolk is desirable.

    Fertile Double-Yolk Eggs

    A fertile double-yolk egg can theoretically contain two developing embryos. However, successful development is extremely difficult because two embryos must share the same limited space and resources inside one egg.

    Therefore, double-yolk eggs are generally not preferred for hatching chicks.

    Should You Buy Double Yolk Eggs?

    If you find double yolk eggs at a shop or from backyard hens, there is usually no reason to avoid them simply because they have two yolks.

    Before buying or using them, consider:

    1. Shell condition: Choose eggs without cracks.
    2. Freshness: Check the date and storage conditions.
    3. Size: Remember that a double-yolk egg may be larger than normal.
    4. Intended use: Extra yolk can work well in baking and rich dishes.
    5. Food safety: Handle and cook them properly.

    For backyard chicken owners, consistent access to clean water, suitable feed, good housing, and proper flock management can support healthy egg production.

    Common Mistakes to Avoid

    Some myths make double-yolk eggs seem dangerous. However, finding two yolks does not automatically mean that the hen is sick.

    Avoid these mistakes:

    • Assuming every double-yolk egg contains a health problem.
    • Eating eggs raw without considering food-safety risks.
    • Trying to hatch every double-yolk egg.
    • Changing a hen’s diet simply because she produces an occasional unusual egg.
    • Confusing shell defects with double yolks.

    If a flock suddenly produces many abnormal eggs, monitor the hens and review their nutrition and management. Persistent production problems may require advice from a poultry veterinarian or extension specialist.

    How to Handle and Store Them

    Good egg care starts before cooking. Collect backyard eggs regularly and keep nesting areas clean. Additionally, store eggs according to the food-safety practices recommended in your country.

    If an egg has a cracked shell, use caution because cracks can increase contamination risks. USDA research identifies shell microcracks as an important food-safety concern.

    For more chicken-care information, see our internal guide on healthy egg production. For official food-safety information, visit USDA Egg Safety.

    Final Thoughts on Double Yolk Eggs

    Double yolk eggs are a fascinating natural variation that occurs when a hen releases two yolks close together. They are usually safe to eat when handled and cooked properly, and their extra yolk can make them especially interesting for home cooks.

    So, the next time you crack an egg and discover two golden yolks, there is no need to panic. Instead, enjoy the unusual find and continue following good egg-handling practices. For backyard keepers, occasional double yolks are generally more interesting than alarming.