Author: kinzapadhyair@gmail.com

  • Chicken Fencing: Best Options for 2026

    Chicken Fencing: Best Options for 2026

    Chicken Fencing: Best Options for 2026

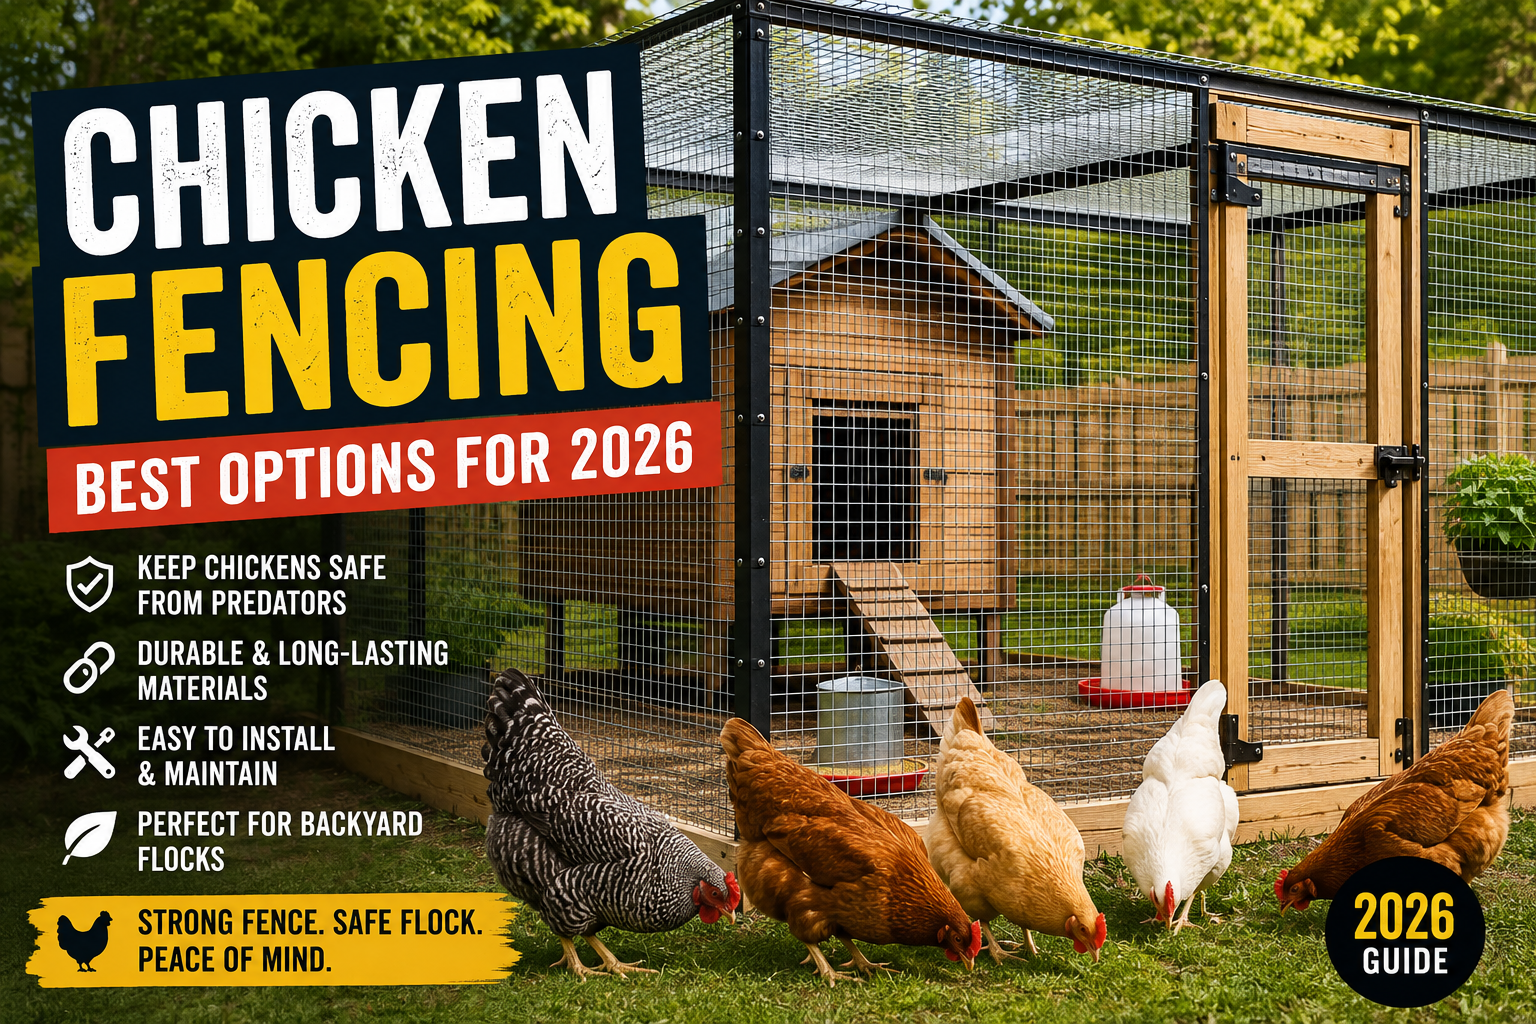
    If you keep backyard chickens, Chicken Fencing is one of the most important investments you can make. A strong fence keeps your flock inside while helping protect it from foxes, raccoons, dogs, hawks, and other predators. In 2026, poultry owners are also paying more attention to secure outdoor runs and better protection from wild birds.

    For US homeowners, the right setup can make daily chicken care easier. However, fencing should do more than mark a boundary. It should provide real protection without creating sharp edges or dangerous gaps.

    Why Chicken Fencing Matters

    Good Chicken Fencing gives chickens a safe area to scratch, forage, dust-bathe, and move around. Additionally, a secure enclosure can reduce the risk of predator attacks and prevent birds from wandering into gardens, roads, or neighboring properties.

    Penn State Extension recommends covered outdoor runs, secure nighttime housing, buried fencing, and small mesh openings to improve poultry protection.

    A well-designed enclosure can also help with flock management. As a result, owners can spend less time chasing escaped birds and more time checking feed, water, eggs, and overall flock condition.

    Key Features to Consider in Chicken Fencing

    Mesh Size

    Mesh size matters because predators can squeeze through surprisingly small openings. Therefore, choose a strong, small-mesh material when predator protection is the main goal.

    Hardware cloth is often a better security choice than lightweight chicken wire. Small openings can also reduce contact between chickens and wild birds.

    Height and Coverage

    The fence should be tall enough to discourage chickens from flying or jumping over it. Additionally, covering the top of the run can help protect birds from hawks and owls.

    Penn State Extension recommends covering outdoor runs with mesh wire or netting to reduce risks from flying predators.

    Underground Protection

    A fence can fail if predators simply dig underneath it. For this reason, bury the lower portion of the fencing or create an outward-facing buried apron.

    Penn State Extension recommends burying wire along the pen border and extending part of it outward to discourage digging predators.

    Types of Chicken Fencing

    Hardware Cloth

    Hardware cloth is a popular choice for secure Chicken Fencing. It provides smaller openings and strong protection around coops, doors, windows, and runs.

    However, quality varies. Choose a durable galvanized product designed for outdoor use.

    Poultry Netting

    Poultry netting works well when you need a lightweight boundary. It is especially useful for temporary areas and movable chicken runs.

    However, lightweight netting alone may not stop determined predators. Therefore, combine it with stronger barriers where predator pressure is high.

    Electric Poultry Fencing

    Electric fencing can provide an additional layer of protection. Penn State Extension notes that electric fencing can help deter predators around poultry areas, particularly where digging or climbing creates problems.

    How to Choose the Right Chicken Fencing

    Before buying, consider these factors:

    1. Predators: Identify foxes, raccoons, dogs, coyotes, snakes, or birds of prey common in your area.
    2. Flock size: Larger flocks need more outdoor space.
    3. Location: Check slopes, drainage, trees, and possible digging points.
    4. Permanence: Decide whether you need a permanent run or movable fencing.
    5. Budget: Spend more on critical security points rather than decorative features.

    Also, check local city, county, or homeowners’ association rules before building a permanent poultry enclosure. Poultry regulations can vary by location.
    Common Chicken Fencing Mistakes

    Even expensive fencing can fail because of poor installation. Avoid these common mistakes:

    • Leaving gaps around gates and doors
    • Using weak mesh against strong predators
    • Failing to secure the fence bottom
    • Leaving sharp or loose wire exposed
    • Not covering the top of the outdoor run
    • Forgetting to lock chickens inside at night

    Additionally, inspect the entire enclosure after storms or heavy wind. A small opening can quickly become a major escape or predator problem.

    Chicken Fencing Maintenance Tips

    Regular maintenance keeps Chicken Fencing effective throughout the year. Walk around the enclosure every week and check for holes, loose posts, damaged mesh, and signs of digging.

    Trim vegetation near the fence when it becomes difficult to inspect the ground. Also, repair damaged sections immediately instead of waiting for a larger problem.

    Wild birds can create additional biosecurity concerns. Current poultry guidance recommends separating backyard flocks from wild birds and using enclosed shelters and fenced outdoor areas where practical.

    Conclusion

    The best Chicken Fencing depends on your flock, property, budget, and local predator pressure. However, strong mesh, secure gates, buried protection, and an enclosed top can create a much safer chicken run.

    In 2026, focus on protection rather than appearance alone. Choose durable materials, inspect the enclosure regularly, and improve weak points before predators find them. With the right Chicken Fencing, your chickens can enjoy outdoor space while you gain greater peace of mind.

    Ready to upgrade your flock’s protection? Start by checking your current fence for gaps, weak mesh, and digging points today.

  • DIY Chicken Coop: 2026 Build Guide

    DIY Chicken Coop: 2026 Build Guide

    DIY Chicken Coop: Complete 2026 Guide

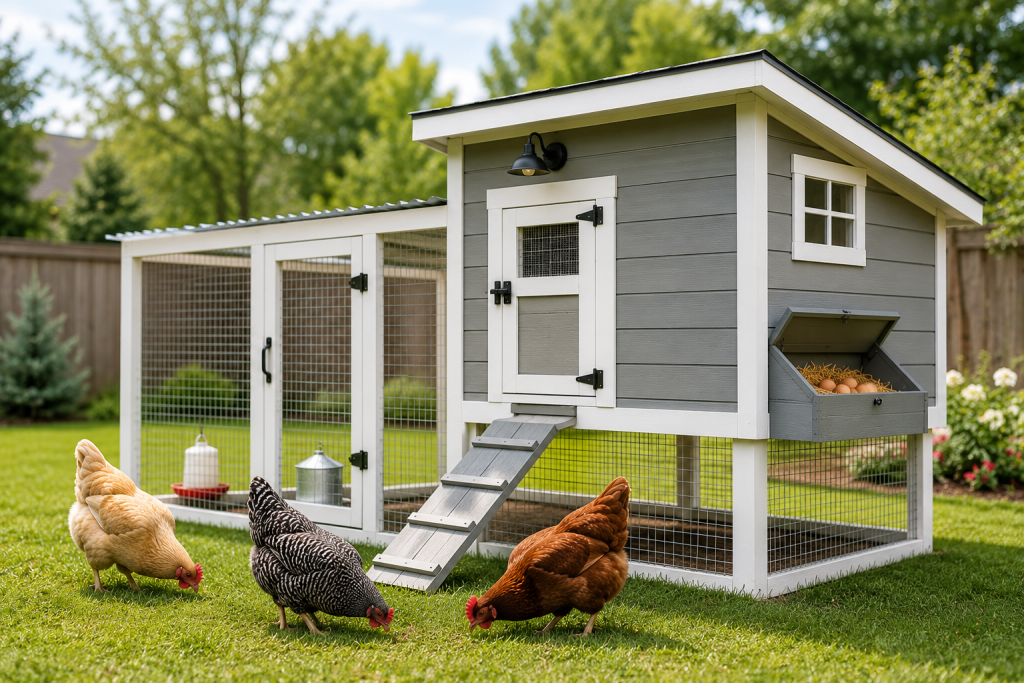
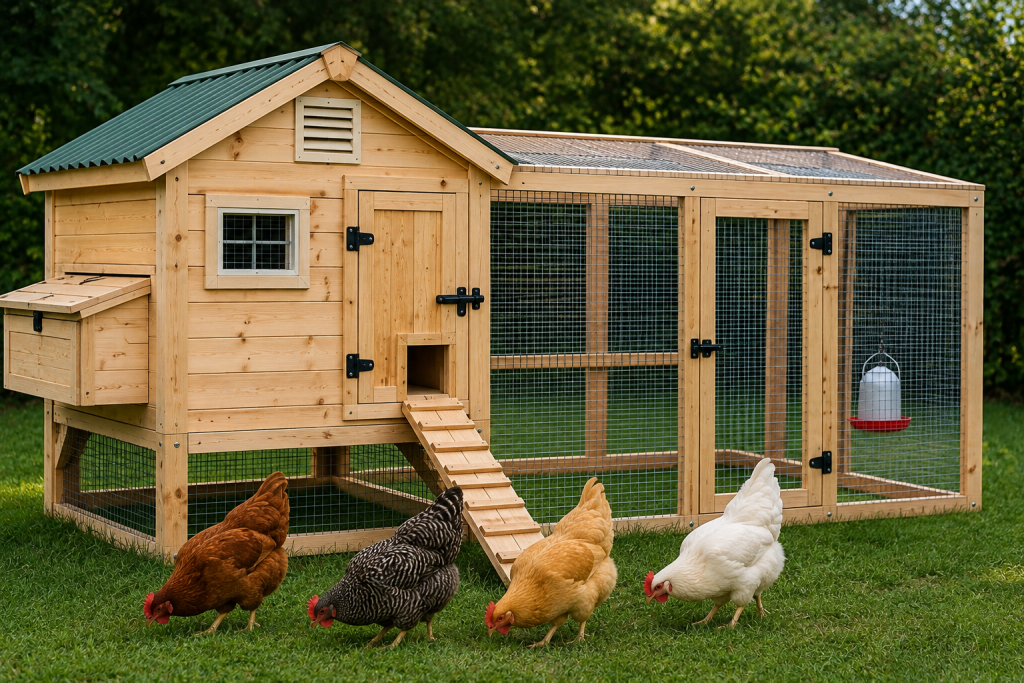
    Building a DIY Chicken Coop can save money while giving your flock a safer, more comfortable home. In 2026, backyard chicken keeping remains popular with families who want fresh eggs and a more self-sufficient lifestyle. However, a good coop needs more than four walls and a roof. It must provide enough space, fresh air, protection, and easy access for daily care.

    Why Build a DIY Chicken Coop?

    A well-planned DIY Chicken Coop gives you control over the design, materials, and budget. Additionally, you can adapt the structure to your climate, yard size, and flock.

    The main benefits include:

    • Lower construction costs
    • Custom sizing for your flock
    • Easier cleaning and egg collection
    • Better predator protection
    • Flexible ventilation and shade
    • Reuse of suitable wood and other materials

    As a result, a homemade coop can be more practical than a small prebuilt model.

    DIY Chicken Coop Size and Key Features

    Before buying materials, calculate your flock size. Oregon State University Extension recommends at least 3 square feet of indoor space per bird when chickens have outdoor access, while birds without outdoor access need considerably more room.

    DIY Chicken Coop Ventilation

    Fresh air is essential. However, ventilation should not create cold drafts directly around roosting birds. Place vents high on walls or near the roof so warm, moist air can escape.

    Predator Protection

    A predator-proof chicken coop should protect birds from animals that dig, climb, squeeze, or attack from above. Use strong welded mesh around openings and secure doors with reliable latches.

    Additionally, extend fencing below ground or create an outward-facing barrier around the run. Penn State Extension recommends burying wire around the perimeter to discourage digging predators.

    Nest Boxes and Roosts

    Provide approximately one nest box for every three to four hens. Place the boxes below the roosting bars so chickens are less likely to sleep inside them.

    For roosts, use smooth lumber with rounded edges. Most importantly, remove sharp screws, exposed wire, and other hazards.

    Types of DIY Chicken Coop Designs

    Raised Chicken Coop

    A raised design keeps the floor away from damp ground and can improve airflow underneath. It also makes cleaning easier in some yards.

    Walk-In Coop

    A walk-in DIY Chicken Coop provides excellent access for cleaning, collecting eggs, and checking birds. Therefore, it works especially well for larger flocks.

    Converted Shed Coop

    An unused shed can become a practical backyard chicken coop. Add ventilation, nesting boxes, roosts, secure doors, and predator-resistant mesh. A 2026 guide from the Old Farmer’s Almanac also highlights shed conversion as a practical coop approach.

    DIY Chicken Coop Buying and Building Guide

    Before construction, make a simple plan and shopping list.

    1. Check local chicken and zoning rules.
    2. Decide how many birds you will keep.
    3. Choose a dry, well-drained location.
    4. Measure the indoor coop and outdoor run.
    5. Select weather-resistant materials.
    6. Plan doors, nest boxes, roosts, and ventilation.
    7. Add predator protection before bringing chickens home.

    Local rules vary widely. Therefore, contact your city or county planning office before construction, especially in urban or suburban areas.

    Common DIY Chicken Coop Mistakes

    Even a simple project can fail when planning gets rushed. Avoid these common problems:

    • Making the coop too small
    • Using weak fencing against predators
    • Blocking ventilation during winter
    • Leaving gaps around doors and windows
    • Building on poorly drained ground
    • Placing nest boxes above roosts
    • Choosing difficult-to-clean flooring
    • Forgetting shade in hot climates

    Additionally, do not assume that “chicken wire” provides complete predator protection. Stronger welded hardware cloth offers better security for vulnerable openings.

    DIY Chicken Coop Maintenance Tips

    A DIY Chicken Coop needs regular care. Clean wet bedding quickly and check the floor, roof, mesh, hinges, and locks for damage.

    Every few days, inspect water and feeders. Furthermore, look for signs of digging around the run. Repair weak points immediately rather than waiting for a predator to find them.

    In hot weather, increase shade and airflow. In cold weather, keep the coop dry and draft-free while maintaining necessary ventilation. Chickens generally handle cold better when their housing stays dry.

    Final Thoughts

    A successful DIY Chicken Coop does not need to look complicated. Instead, focus on space, ventilation, drainage, easy cleaning, and strong predator protection. Start with a clear chicken coop plan, build slightly beyond your minimum space needs, and inspect the finished structure carefully.

    Ready to start? Sketch your DIY Chicken Coop today, check your local rules, gather your materials, and build a safe home your flock can enjoy throughout 2026.

  • Coop Bedding Guide 2026: Best Bedding Choices

    Coop Bedding Guide 2026: Best Bedding Choices

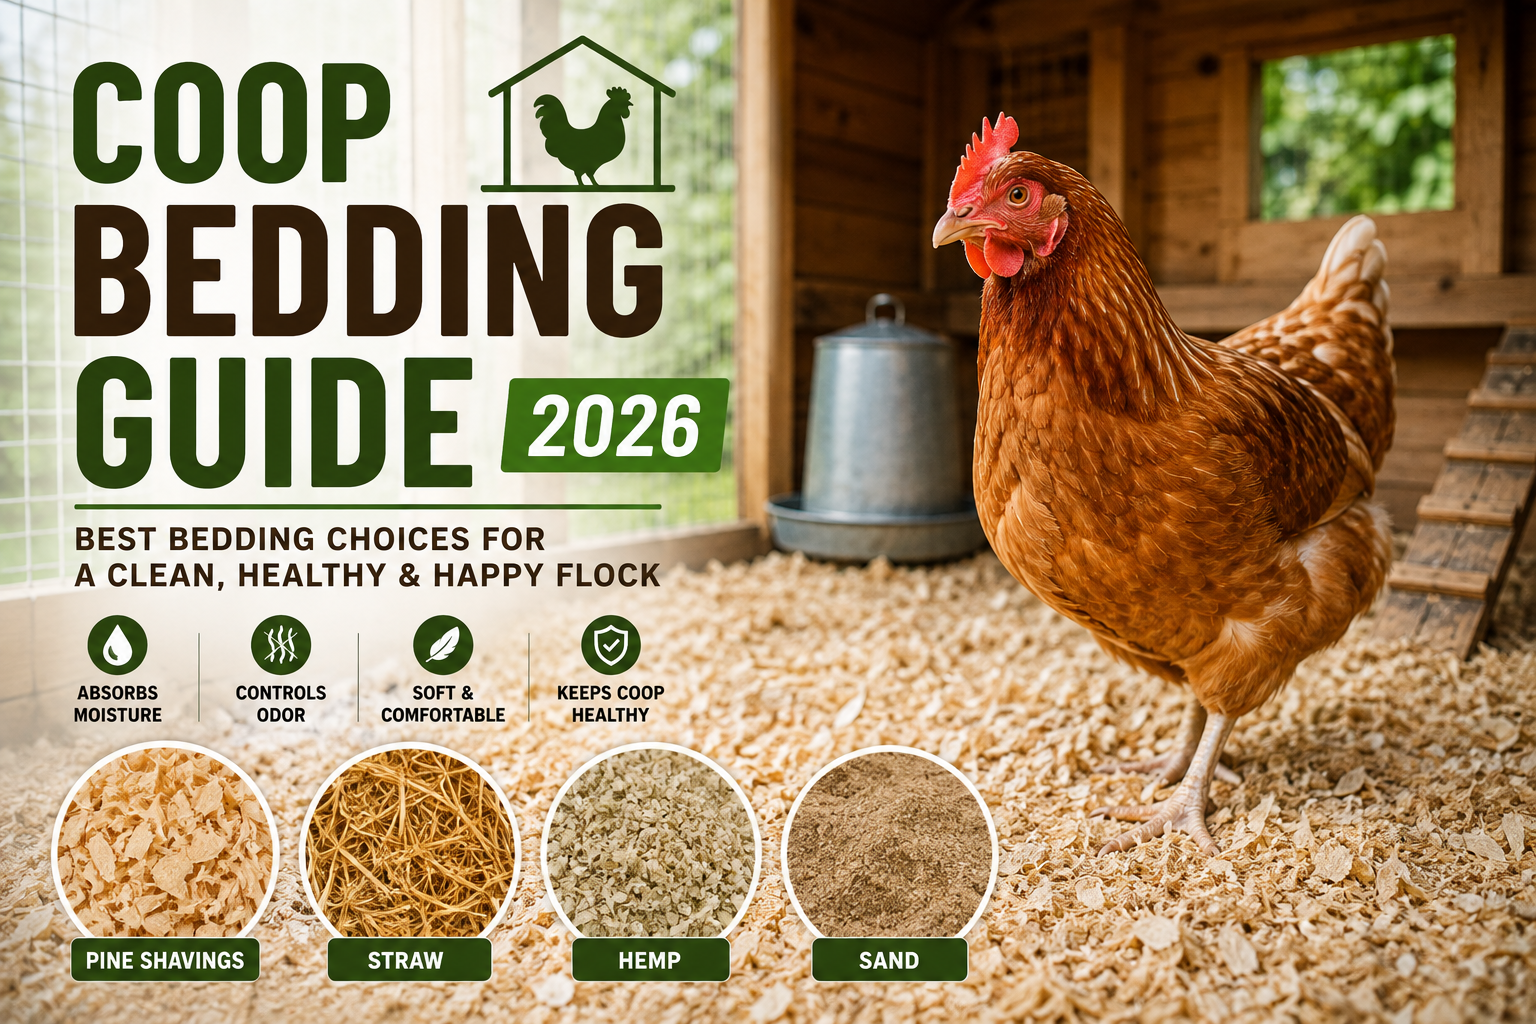
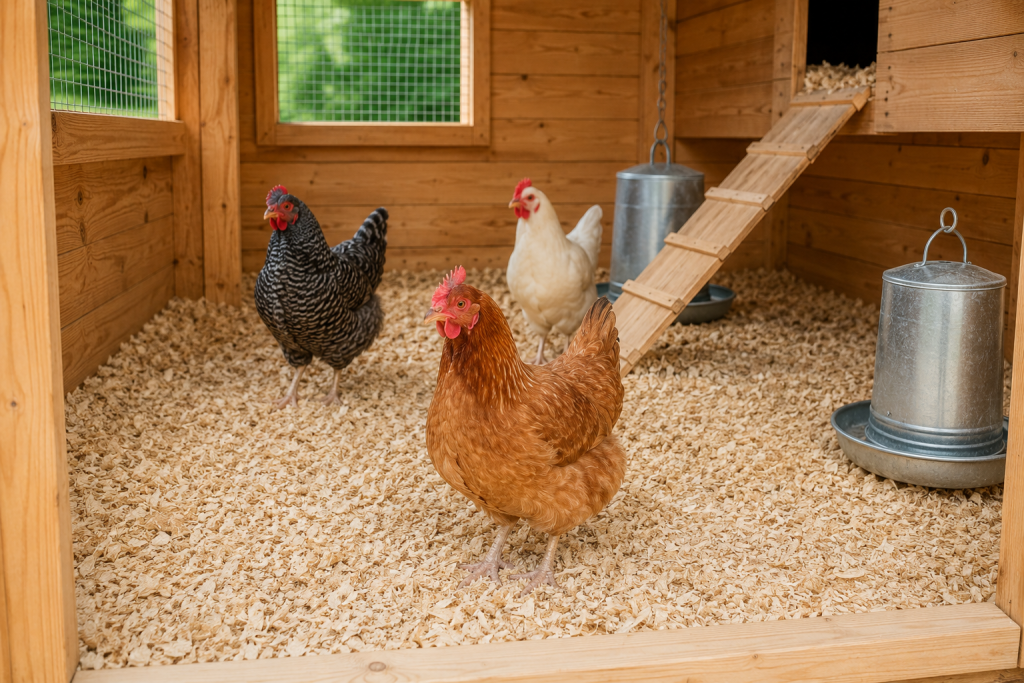
    A good Coop Bedding Guide can make chicken keeping easier, cleaner, and healthier in 2026. The right bedding helps control moisture, reduce odors, protect feet, and keep your flock comfortable throughout the year.

    For backyard chicken owners, bedding is more than something placed on the coop floor. It affects cleanliness, maintenance, and even how often you need to clean the coop. Therefore, choosing the right material can save time and money.

    If you are setting up a new coop or replacing old bedding, this guide explains the best options and practical care tips.

    Why a Coop Bedding Guide Matters

    The right bedding absorbs moisture from droppings and spilled water. As a result, the coop stays drier and develops fewer unpleasant odors.

    Good bedding also provides a soft surface for chickens to walk and rest on. Additionally, it can help reduce contact with wet flooring.

    A quality Coop Bedding Guide should help you choose material based on:

    • Absorption
    • Comfort
    • Odor control
    • Availability
    • Cost
    • Ease of cleaning

    For more general flock-care advice, add an internal link here: [Chicken Coop Maintenance Guide].

    Coop Bedding Guide: Key Factors to Consider

    1. Moisture Control

    Moisture is one of the biggest problems inside a chicken coop. Wet bedding can become compacted and dirty quickly. Therefore, choose an absorbent material and replace damp areas regularly.

    2. Comfort and Safety

    Chickens spend many hours standing and resting on the floor. Soft, clean bedding provides a more comfortable surface. However, avoid materials that contain sharp pieces, excessive dust, or chemicals.

    3. Odor Management

    Good chicken bedding materials help control odors by absorbing moisture. Additionally, proper ventilation is essential. Bedding alone cannot solve an odor problem caused by poor airflow.

    Types of Chicken Coop Bedding

    Pine Shavings

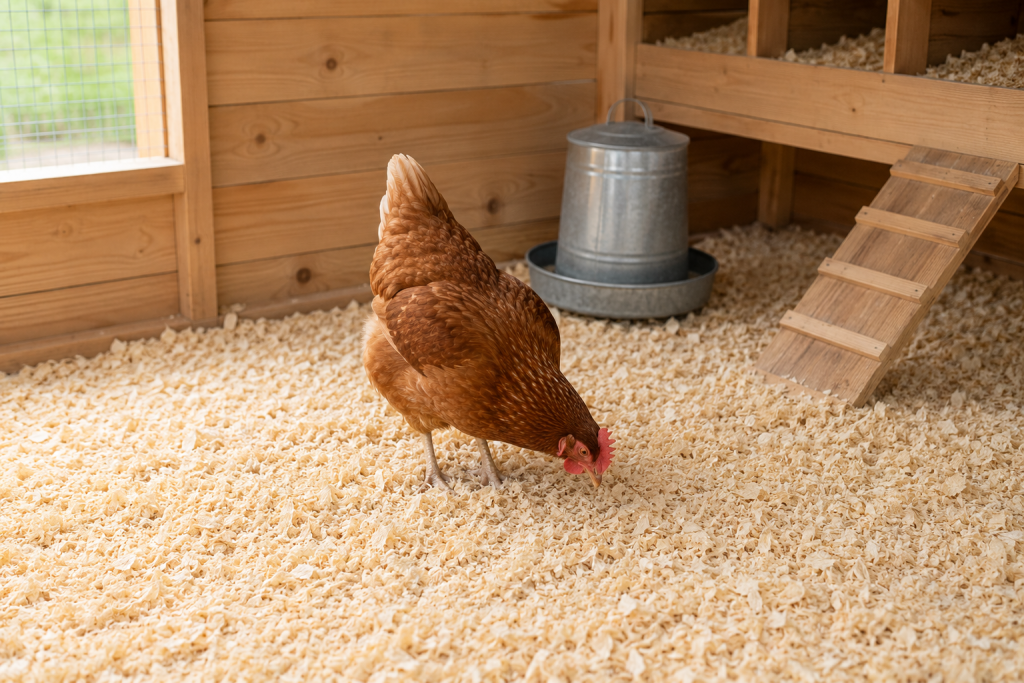
    Pine shavings remain a popular choice for backyard flocks. They are lightweight, relatively absorbent, and easy to spread.

    However, use clean, untreated shavings designed for animal bedding. Avoid dusty or heavily scented products.

    Straw

    Straw is affordable and widely available in many areas. It provides good insulation during colder weather and gives chickens a comfortable surface.

    However, straw can hold moisture if it becomes wet. Therefore, inspect it often and remove damp sections.

    Hemp Bedding

    Hemp bedding has become increasingly popular because it can absorb moisture and help control odors. It can also last longer between complete cleanouts when managed correctly.

    However, availability and price vary by location.

    Sand

    Coarse, washed sand can work well in some coop setups. It drains moisture effectively and can make droppings easier to remove.

    Nevertheless, choosing the right type matters. Avoid fine construction sand or materials that create excessive dust.

    Coop Bedding Guide: Deep Litter Method

    The deep litter method allows bedding to build gradually while you manage moisture and droppings. Instead of removing everything every few days, you add fresh dry bedding when needed.

    This approach can reduce routine cleaning. Additionally, properly managed deep litter may generate some natural heat during colder months.

    However, it requires regular monitoring. If the bedding becomes wet, smells strongly, or forms unhealthy buildup, clean the affected area immediately.

    How to Choose the Best Bedding

    Use this simple decision process:

    1. Check your climate. Wet or humid areas require strong moisture control.
    2. Consider availability. Choose material you can buy consistently.
    3. Compare costs. Calculate the cost per cleaning cycle rather than only the bag price.
    4. Check dust levels. Avoid excessively dusty materials.
    5. Watch your chickens. Change the bedding if birds show discomfort or the coop becomes excessively dirty.

    A good Coop Bedding Guide should always focus on your flock’s specific environment rather than recommending one material for everyone.

    Common Bedding Mistakes to Avoid

    Many beginners make simple bedding mistakes. For example, they may leave wet bedding in the coop because the rest still looks clean.

    Avoid these problems:

    • Letting bedding stay wet
    • Using heavily dusty materials
    • Ignoring spilled water
    • Blocking ventilation
    • Adding fresh bedding over badly contaminated areas
    • Waiting too long between inspections

    Additionally, keep feeders and waterers positioned carefully to reduce spills.

    Coop Bedding Guide: Maintenance Tips

    Inspect the bedding several times each week. Remove wet or heavily soiled sections as soon as possible.

    Furthermore, stir or turn bedding when appropriate to improve airflow and distribute moisture. Add a fresh layer when the existing material becomes thin.

    Keep the coop well ventilated without creating direct drafts at roosting height. Also, clean feeders and waterers regularly because spilled feed and water can quickly damage bedding quality.

    Conclusion

    Choosing the right bedding can make everyday chicken care much easier. Pine shavings, straw, hemp, and suitable sand can all work when used correctly and maintained regularly.

    Use this Coop Bedding Guide to compare materials, control moisture, reduce odors, and create a cleaner environment for your flock. Start with a practical bedding option, monitor your chickens, and adjust your routine as the seasons change.

  • Coop Maintenance 2026: Essential Care Guide

    Coop Maintenance 2026: Essential Care Guide

    Coop Maintenance 2026: Complete Chicken Coop Care Guide

    Coop Maintenance is one of the most important parts of keeping a healthy backyard flock in 2026. A clean, dry, secure coop protects chickens from disease, pests, predators, moisture, and extreme weather. For US chicken keepers and flock owners worldwide, a simple maintenance routine can prevent expensive problems later.

    Good Coop Maintenance does not have to take hours every day. Instead, a consistent schedule makes cleaning easier and gives you a chance to spot problems before they affect your birds.

    Why Coop Maintenance Matters

    Regular Coop Maintenance improves both chicken welfare and flock management. Wet bedding, manure buildup, poor airflow, and dirty water can create unhealthy conditions.

    For example, University of Minnesota Extension recommends regular coop cleaning to control sanitation and odor. It also advises cleaning feeders and waterers regularly and completing a thorough cleaning at least once a year.

    Additionally, proper ventilation helps remove moisture and ammonia. Penn State Extension notes that good airflow should bring in fresh air while removing excess moisture and gases from the coop.

    Key Coop Maintenance Factors

    1. Chicken Coop Cleaning

    Coop Maintenance should include regular removal of manure, wet bedding, spilled feed, feathers, and debris.

    A practical routine includes:

    • Remove wet or heavily soiled bedding.
    • Clean dirty areas around roosts and nests.
    • Wash feeders and waterers regularly.
    • Remove cobwebs and accumulated dust.
    • Deep-clean the coop periodically.
    • Allow cleaned surfaces to dry before adding fresh bedding.

    Clean surroundings also help reduce odors and pests. UMN Extension recommends weekly cleaning or cleaning as needed to control manure and odor buildup.

    2. Chicken Coop Ventilation

    Good Coop Maintenance also means checking airflow throughout the year. Ventilation removes stale air and moisture, but openings should not create strong drafts directly over roosting birds.

    Check vents, windows, and roof openings for:

    • Blockages
    • Dust buildup
    • Broken screens
    • Water leaks
    • Poor airflow

    If you smell ammonia or see condensation, improve ventilation and remove wet manure or bedding.

    3. Chicken Bedding Maintenance

    Dry bedding is essential. Wood shavings and properly managed straw can help keep the floor comfortable and reduce moisture.

    However, remove wet patches quickly, especially around waterers. Wet litter can increase ammonia and create an uncomfortable environment for chickens.

    Types of Coop Maintenance

    Daily Maintenance

    Daily Coop Maintenance should focus on basic checks:

    • Provide clean, fresh water.
    • Check feed supplies.
    • Remove obvious wet bedding.
    • Collect eggs.
    • Observe chickens for unusual behavior.
    • Check doors and locks.

    Weekly Maintenance

    Weekly tasks should include more detailed Coop Maintenance:

    1. Clean feeders and waterers.
    2. Remove accumulated manure.
    3. Replace badly soiled bedding.
    4. Inspect nest boxes.
    5. Check vents and windows.
    6. Look for signs of rodents or pests.
    7. Inspect fences and doors.

    Seasonal Maintenance

    Seasonal checks are also important. Before winter, inspect cracks, drafts, insulation, ventilation, and water systems. During hot weather, prioritize airflow, shade, and reliable access to fresh water.

    How to Build a Simple Maintenance Routine

    A good Coop Maintenance schedule should be realistic for your flock size.

    Every day: check birds, water, feed, doors, and obvious messes.

    Every week: clean equipment, refresh bedding, remove manure, and inspect the structure.

    Every month: inspect for parasites, rodents, damaged hardware, leaks, and ventilation problems.

    At least once a year: perform a deeper cleaning and inspect the entire coop and surrounding run.

    Common Coop Maintenance Mistakes to Avoid

    Even experienced chicken keepers can overlook small problems. Avoid these common mistakes:

    • Closing every ventilation opening during cold weather.
    • Allowing wet bedding to remain for too long.
    • Leaving spilled feed around the coop.
    • Ignoring small holes that rodents or predators can use.
    • Forgetting to clean waterers.
    • Using strong cleaning products incorrectly.
    • Overcrowding the coop.
    • Failing to inspect the roof for leaks.

    Biosecurity matters as well. Penn State Extension recommends limiting contact with wild birds, controlling rodents, cleaning equipment, and using appropriate biosecurity practices to reduce disease risks.

    Smart Coop Maintenance Tips for 2026

    Modern flock owners can make Coop Maintenance easier with simple upgrades.

    Consider using:

    • Automatic chicken doors
    • Easy-clean nest boxes
    • Removable manure trays
    • Covered feeders
    • Automatic water systems
    • Predator-resistant hardware cloth
    • Ventilation monitors
    • Motion-activated security lights

    These tools can reduce daily work while improving safety and cleanliness.

    University of Minnesota Extension chicken care guide

    Conclusion

    Effective Coop Maintenance protects your chickens and makes flock ownership easier. By keeping bedding dry, maintaining ventilation, cleaning equipment, controlling pests, and checking for structural problems, you can create a safer environment throughout 2026.

    Start with a simple daily, weekly, monthly, and seasonal routine. As a result, Coop Maintenance becomes a manageable habit instead of a difficult chore. Take a few minutes today to inspect your coop and fix the first problem you find.

  • Chicken Coop Flooring: Best Options for 2026

    Chicken Coop Flooring: Best Options for 2026

    Chicken Coop Flooring: Best Options for 2026

    Choosing the right Chicken Coop Flooring can make a major difference in flock health, cleaning time, and coop life. For backyard chicken keepers in the US and around the world, the best floor should stay dry, resist moisture, provide good footing, and remain easy to clean.

    However, there is no single flooring material that works perfectly for every climate. Your weather, coop design, budget, and cleaning routine should guide your choice.

    Why Chicken Coop Flooring Matters

    Good Chicken Coop Flooring protects the structure while giving your birds a clean and comfortable surface. Additionally, a well-designed floor can help control moisture, odors, pests, and waste.

    Penn State Extension recommends keeping poultry housing dry and well-drained because prolonged dampness can create poor conditions for birds.

    A good floor should provide:

    • Moisture resistance
    • Easy cleaning
    • Safe traction
    • Predator and rodent protection
    • Good durability
    • Compatibility with suitable bedding

    As a result, choosing the floor material before building the coop can save money and maintenance work later.

    Key Chicken Coop Flooring Factors

    Climate and Drainage

    Climate should be one of your first considerations. In wet regions, choose a surface that prevents water from soaking into the structure. Furthermore, raising the coop above poorly drained ground can reduce moisture problems.

    In hot and dry climates, coarse sand can work well because it dries quickly. However, cold climates may benefit more from an insulated floor combined with deep bedding.

    Durability and Cleaning

    Your Chicken Coop Flooring should handle scratching, moisture, manure, and regular cleaning. Sealed plywood, concrete, and durable sheet flooring can make cleaning easier.

    Additionally, avoid leaving untreated wood exposed to repeated moisture. Water from drinkers can eventually cause swelling, rot, or structural damage.

    Safety and Footing

    Chickens need secure footing. Slippery surfaces can cause injuries, especially for young birds. Penn State Extension specifically warns against raising young fowl on slippery surfaces because poor traction can contribute to leg problems.

    Types of Chicken Coop Flooring

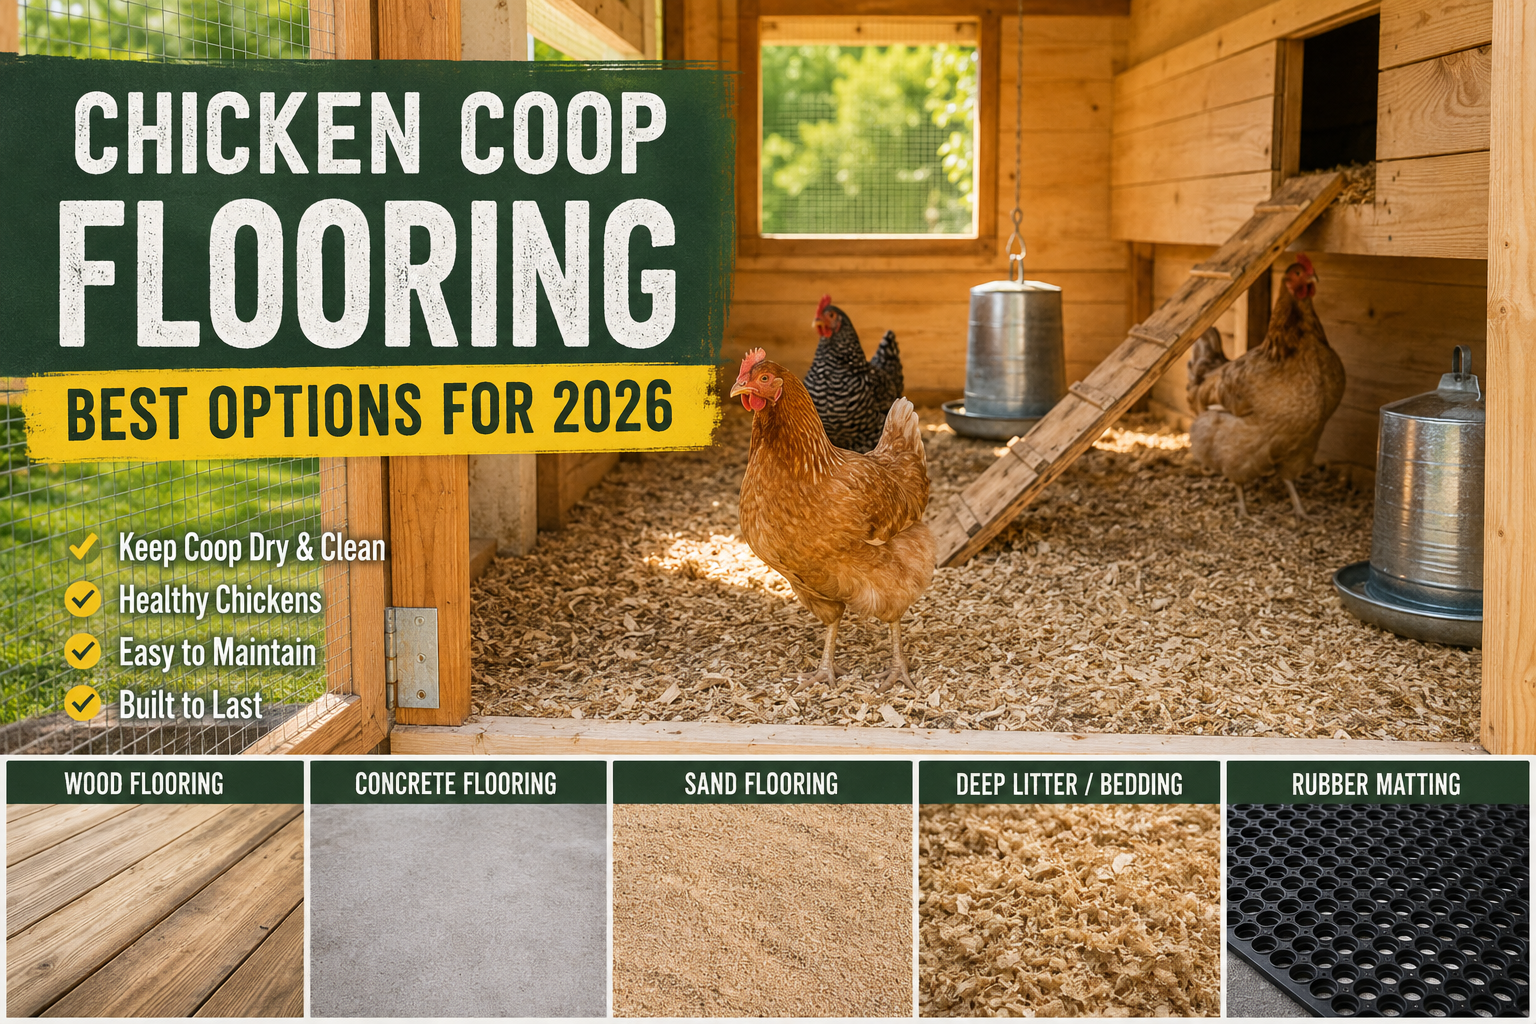
    Wood Flooring

    Wood remains a popular choice because it is affordable and easy to install. Sealing the surface can improve moisture resistance.

    However, wood needs protection from water. Add suitable chicken coop bedding such as clean pine shavings to protect the surface and improve comfort.

    Concrete Flooring

    Concrete offers excellent durability and makes washing and disinfecting easier. Moreover, it can provide strong protection against rodents and digging predators when properly constructed.

    The downside is that concrete can feel cold and hard. Therefore, add suitable bedding to provide insulation and comfort.

    Sand Flooring

    Coarse sand is another option, particularly for covered areas and warmer climates. It drains quickly and allows keepers to remove droppings with a scoop.

    However, avoid fine, dusty sand. Coarse construction-grade sand is generally a better choice for this application.

    Dirt or Ground Flooring

    A dirt floor costs little and feels natural. Nevertheless, it can become muddy, difficult to sanitize, and vulnerable to digging predators.

    For that reason, dirt flooring works best when the site has excellent drainage and strong predator protection.

    Choosing Chicken Coop Flooring for Your Needs

    Before selecting your floor, ask these questions:

    1. Is my climate wet, dry, hot, or cold?
    2. How often can I clean the coop?
    3. Does the floor resist moisture?
    4. Can rodents or predators dig underneath?
    5. Will my chickens have safe traction?
    6. What bedding will I use?

    For many backyard keepers, sealed wood with absorbent bedding offers a practical balance. Meanwhile, concrete suits owners who prioritize durability and easy cleaning.

    A newer 2026 trend is greater interest in hemp bedding because of its absorbency and low-dust characteristics. Pine shavings remain a widely used budget-friendly choice, while coarse sand continues to appeal to keepers in suitable climates.

    Common Mistakes to Avoid

    Even excellent Chicken Coop Flooring can fail when the surrounding setup is poor.

    Avoid these common mistakes:

    • Leaving untreated wood exposed to water
    • Using slippery surfaces without bedding
    • Choosing fine, dusty sand
    • Allowing drinkers to leak continuously
    • Ignoring poor ventilation
    • Letting bedding remain wet
    • Building on poorly drained ground
    • Forgetting predator protection

    Additionally, do not assume that deep bedding means you never need to clean. Wet or compacted litter should be managed promptly.

    Chicken Coop Flooring Maintenance Tips

    Regular maintenance keeps the floor healthier and extends its life. Check the coop frequently, especially around waterers and feeders.

    With pine bedding, Penn State Extension advises cleaning a roughly 3-inch litter bed at least every six weeks, or sooner when it becomes wet or develops an odor.

    For easier Chicken Coop Flooring maintenance:

    • Remove wet bedding quickly.
    • Keep waterers stable and leak-free.
    • Improve ventilation without creating harmful drafts.
    • Replace damaged or rotting flooring.
    • Keep litter dry and loose.
    • Check corners for rodents and pests.

    The deep litter method can also reduce routine cleaning when managed correctly. However, it requires attention to moisture and ammonia rather than simply allowing waste to build up.

    Final Verdict

    The best Chicken Coop Flooring depends on your climate, flock, budget, and maintenance habits. Wood, concrete, sand, and dirt can all work when installed and managed correctly.

    For most backyard setups, a durable moisture-resistant base combined with clean, dry bedding provides a practical solution. Choose a floor that keeps your chickens dry, comfortable, and safe, then maintain it regularly for a healthier flock in 2026.

  • Best Coop Lighting 2026: Safe, Smart & Energy-Efficient

    Best Coop Lighting 2026: Safe, Smart & Energy-Efficient

    Best Coop Lighting 2026: Safe, Smart & Energy-Efficient

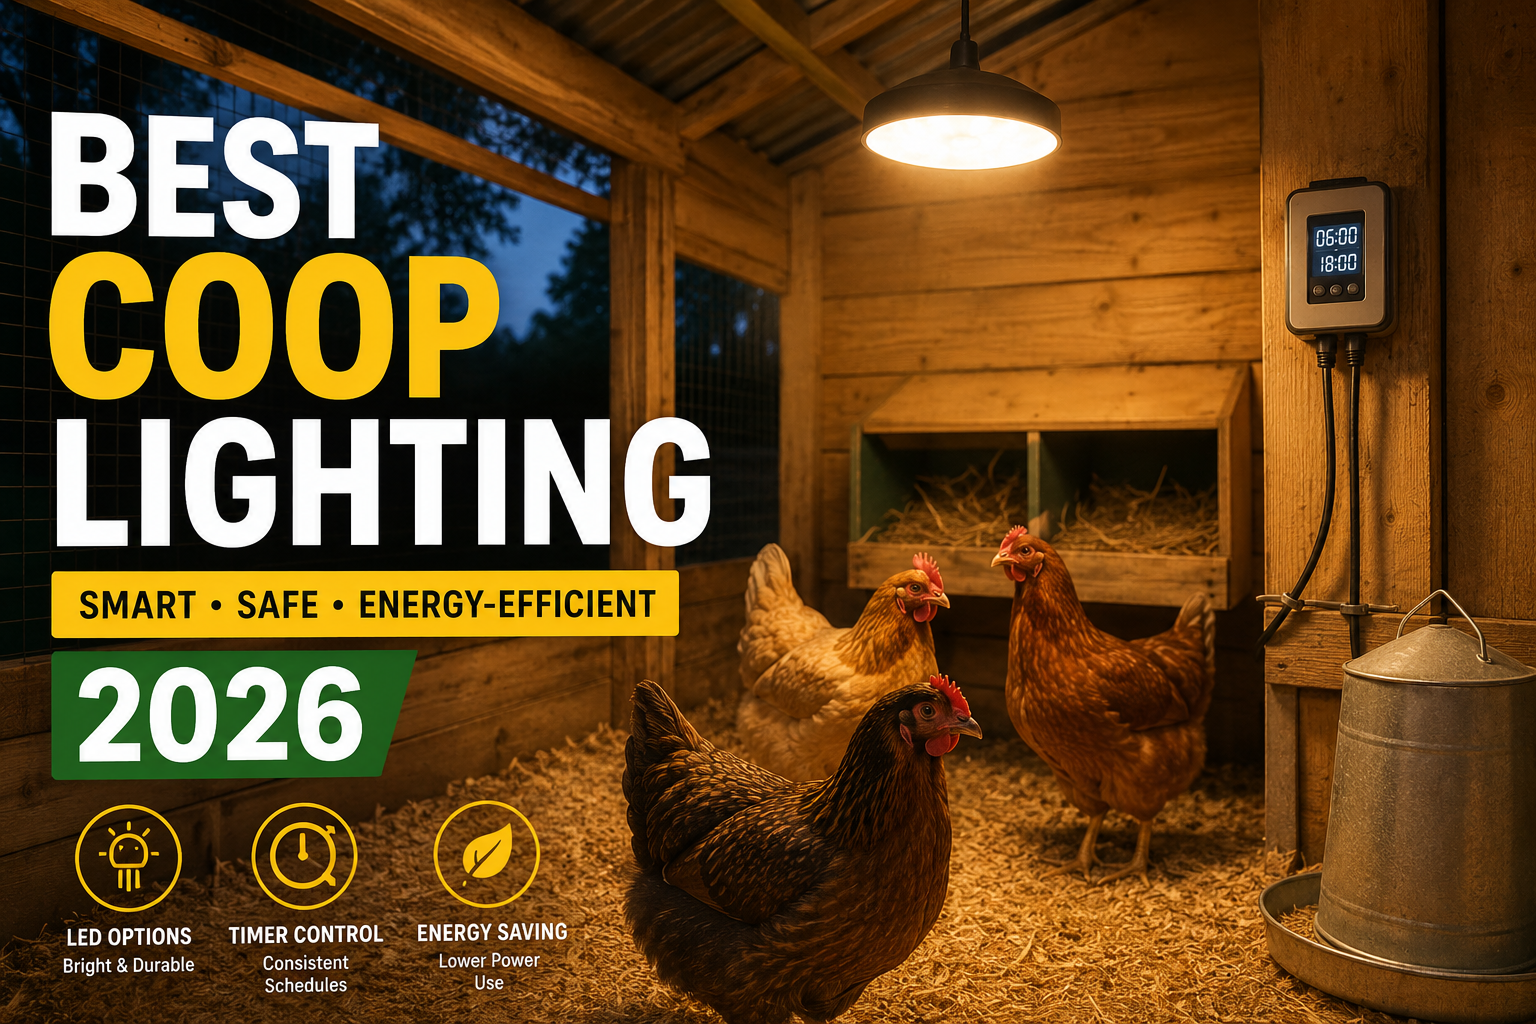
    Choosing the Best Coop Lighting can improve visibility, support a steady laying routine, and make daily flock care easier. For backyard chicken keepers in the US and around the world, lighting matters even more during short winter days. However, good lighting is not simply about making a coop bright. It is about using the right light, schedule, placement, and safety measures.

    Today’s 2026 update: Recent extension guidance continues to support controlled supplemental lighting for laying hens while stressing the need for a consistent dark period.

    Why the Best Coop Lighting Matters

    Light affects the natural reproductive cycle of chickens. As daylight becomes shorter, hens may naturally reduce egg production. Therefore, carefully managed supplemental lighting can help maintain production during darker months.

    The right setup can also help you:

    • Inspect birds after dark.
    • Find feeders and waterers more easily.
    • Maintain a consistent daily routine.
    • Reduce unnecessary electricity use.
    • Improve visibility inside the coop.

    Additionally, modern chicken coop LED lighting can provide efficient illumination without producing the heat associated with traditional incandescent bulbs.

    Key Features of the Best Coop Lighting

    1. Choose the Right Light Color

    Warm or warm-white lighting is a popular choice for laying hens because orange and red wavelengths support reproductive activity. Penn State Extension recommends warm bulbs below about 3500K for supplemental lighting.

    Therefore, avoid choosing a bulb only because it looks bright to humans. Color temperature matters too.

    2. Use a Reliable Timer

    A chicken coop lighting timer makes your schedule more consistent. It also removes the need to switch lights manually every morning.

    For laying hens, current extension guidance commonly targets roughly 14–16 hours of total light per day, depending on the flock and management system. Do not keep lights running continuously. Hens need a proper dark period for rest.

    3. Consider Light Intensity

    Brighter is not always better. Excessive light can increase stress and undesirable behavior. In small-flock systems, moderate illumination that lets you clearly see birds, feed, water, and the coop floor is usually more useful than intense lighting.

    4. Prioritize Safety

    Electrical equipment faces dust, moisture, bedding, and curious birds. As a result, select fixtures designed for the environment, secure cables, and keep electrical connections away from water.

    Never use a heat lamp simply as a lighting solution. Extension guidance warns that heat lamps can create serious fire risks.

    Types of the Best Coop Lighting

    LED Coop Lights

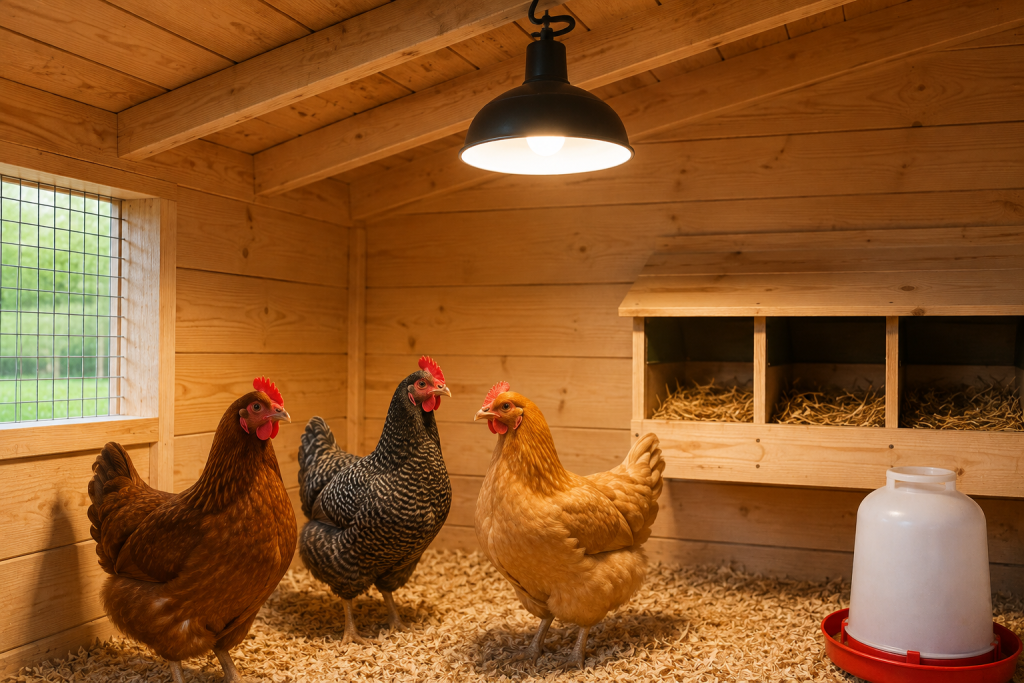
    LEDs are an excellent choice for many modern coops. They use little electricity, offer long service life, and can provide consistent illumination.

    However, choose a fixture suitable for damp or agricultural environments rather than assuming every household LED is appropriate.

    Solar Coop Lights

    Solar lights can work well where reliable grid electricity is unavailable. They are especially useful for simple nighttime visibility.

    However, battery capacity and winter sunlight can affect performance. Therefore, check the expected runtime before relying on solar lighting.

    Incandescent Lights

    Incandescent bulbs remain simple and inexpensive. However, they waste more energy as heat than LEDs. For most new installations, an efficient LED system is usually the better long-term option.

    How to Choose the Best Coop Lighting

    Use this simple decision guide:

    1. For winter egg production: Choose a warm LED with a reliable timer.
    2. For basic visibility: Use a low-power LED fixture.
    3. For off-grid coops: Consider a solar system with battery backup.
    4. For damp areas: Select a moisture-resistant fixture.
    5. For automated care: Use a programmable timer or smart controller.

    Additionally, introduce schedule changes gradually. Sudden changes in lighting can stress birds, while a gradual transition helps them adjust.

    Common Coop Lighting Mistakes

    Avoid these frequent problems:

    • Leaving lights on 24 hours a day.
    • Making the coop unnecessarily bright.
    • Using heat lamps as ordinary light sources.
    • Installing exposed wires near water.
    • Creating strong shadows across feeding areas.
    • Changing the lighting schedule too quickly.
    • Ignoring the manufacturer’s moisture and safety ratings.

    A proper dark period remains essential. For example, some welfare standards require substantial uninterrupted darkness for laying birds.

    Maintenance Tips for Coop Lighting

    Good maintenance keeps your winter chicken coop lighting system reliable.

    First, inspect bulbs, fixtures, timers, and cables regularly. Next, remove dust and dirt from light fixtures because buildup can reduce light output. Also, check for damaged insulation, loose connections, or moisture.

    Finally, review the timer as seasons change. Natural daylight changes throughout the year, so your supplemental schedule may need adjustment.

    Final Thoughts

    The Best Coop Lighting in 2026 combines efficiency, safety, suitable brightness, and a dependable schedule. For most backyard flocks, a properly installed warm LED paired with a timer offers a practical balance of energy savings and flock management.

    However, lighting should support good husbandry rather than replace it. Provide clean water, balanced feed, ventilation, secure housing, and adequate darkness as well. Ready to upgrade your setup? Choose the Best Coop Lighting based on your flock, climate, coop size, and daily routine.

  • Coop Heating 2026: Safe Tips for Warm Chickens

    Coop Heating 2026: Safe Tips for Warm Chickens

    Coop Heating: A Safe 2026 Guide for Chicken Owners

    Coop Heating becomes an important topic when temperatures drop. Chickens can handle cold weather better than many people expect, but extreme cold, drafts, moisture, and poor ventilation can create serious problems. Therefore, choosing the right heating method matters for flock safety and comfort.

    For backyard chicken owners, the goal is not to make the coop feel like a warm house. Instead, you should provide protection from extreme conditions while keeping the coop dry and well ventilated. In addition, proper winter chicken care can reduce cold-related stress.

    Why Coop Heating Matters

    Good Coop Heating can help chickens during unusually cold weather, especially when temperatures reach dangerous levels or when vulnerable birds need extra support.

    However, healthy adult chickens often tolerate cold conditions when they have proper shelter, dry bedding, and protection from strong drafts. Their feathers provide natural insulation.

    Benefits of Proper Heating

    A carefully planned heating setup can:

    • Reduce cold stress during extreme weather.
    • Support vulnerable or older chickens.
    • Help protect water from freezing.
    • Make winter management easier.
    • Provide additional protection during severe cold snaps.

    Additionally, always consider the breed, age, health, and local climate before adding heat.

    Key Factors to Consider for Coop Heating

    Chicken Coop Temperature

    There is no single temperature that works for every flock. Healthy, fully feathered adult chickens usually adapt to gradual temperature changes. Therefore, focus on their behavior rather than trying to maintain a specific indoor temperature.

    Watch for signs such as:

    • Chickens constantly huddling together.
    • Raised feathers for long periods.
    • Reduced activity.
    • Difficulty accessing unfrozen water.
    • Signs of frostbite on combs or wattles.

    Ventilation and Draft Control

    Good ventilation remains essential during winter. Moisture from chicken droppings and breathing can build up inside a closed coop. As a result, poor airflow can increase humidity and contribute to frostbite and respiratory problems.

    Keep ventilation openings above the birds while blocking direct drafts at roost level.

    Types of Coop Heating

    Radiant Chicken Coop Heater

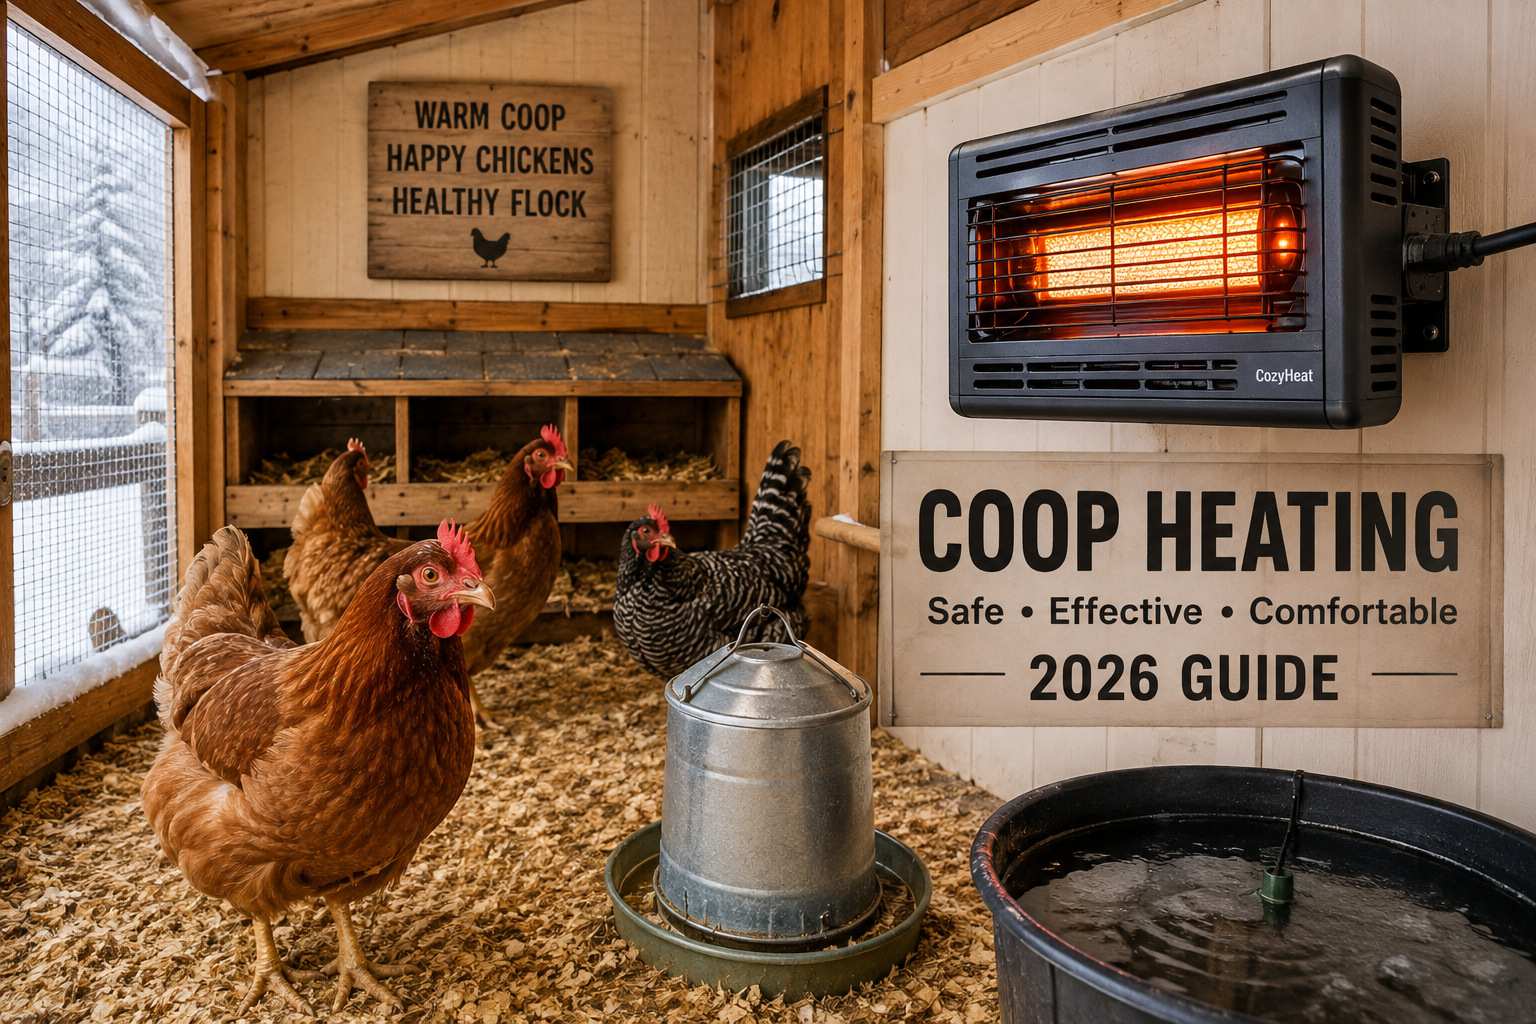
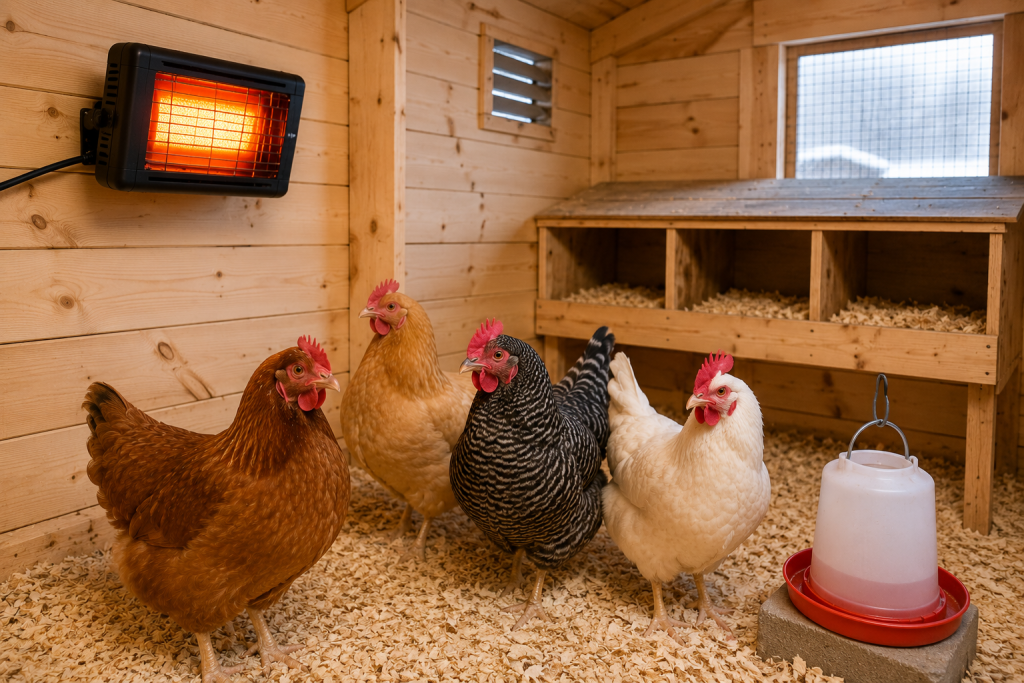
    A radiant heater provides targeted warmth rather than heating the entire building. This option can work well when you want a safer, localized heat source.

    Heated Pads

    Heated panels or pads can provide a warm area for chickens without creating excessive heat throughout the coop. However, always use products specifically designed for poultry or agricultural environments.

    Heat Lamps

    Heat lamps can produce substantial heat, but they require extra caution. A damaged cord, loose fixture, or contact with bedding can create a fire hazard.

    For that reason, never rely on improvised mounting systems.

    How to Choose a Safe Coop Heater

    Before purchasing a heater, consider these points:

    1. Safety: Choose equipment designed for animal housing where possible.
    2. Construction: Look for durable materials and protected electrical components.
    3. Placement: Keep heating equipment away from bedding and flammable materials.
    4. Power: Check that your electrical system can safely handle the device.
    5. Controls: A thermostat or temperature control can improve consistency.
    6. Monitoring: Check the coop regularly, particularly during severe weather.

    Furthermore, avoid using indoor household heating devices unless the manufacturer specifically approves them for the intended environment.

    Common Coop Heating Mistakes to Avoid

    Many problems happen because owners try to make the coop too warm. Chickens can become less prepared for outdoor conditions when temperatures change suddenly.

    Avoid these common mistakes:

    • Overheating the entire coop.
    • Blocking all ventilation.
    • Using damaged extension cords.
    • Placing heaters beside dry bedding.
    • Leaving unsafe equipment unattended.
    • Ignoring frozen water.
    • Making sudden temperature changes.

    As a result, a simple and carefully monitored setup is usually better than excessive heating.

    Maintenance and Winter Care Tips

    Regular checks are essential for safe Coop Heating. Inspect cords, plugs, mounting points, and heater surfaces frequently. Also, remove wet bedding and maintain good airflow.

    Keep fresh water available at all times. If freezing becomes a problem, consider a safe poultry water-heating solution rather than placing unsafe electrical equipment near water.

    Additionally, check your chickens each day. Their behavior can tell you whether conditions are comfortable.

    Final Thoughts

    Safe Coop Heating is about protection, not turning a chicken coop into a heated room. Healthy chickens can naturally cope with cold weather when they have dry bedding, proper ventilation, nutritious feed, and shelter from harsh wind.

    However, extreme weather may require additional support. Choose equipment carefully, reduce fire risks, monitor your flock, and maintain the coop throughout winter. With the right approach, Coop Heating can become a useful part of responsible chicken care in 2026.

  • Chicken Coop Flooring: Best Options for 2026

    Chicken Coop Flooring: Best Options for 2026

    Smart Chicken Coop Ideas 2026: Modern Backyard Guide

    Keeping chickens is easier when your coop works with you, not against you. Smart Chicken Coop Ideas can help backyard keepers create a safer, cleaner, and more efficient space for their flock. In 2026, modern chicken owners can combine simple designs with useful technology to save time and improve daily care.

    Whether you keep three hens or a larger flock, the right setup matters. However, a smart coop does not need to be expensive or complicated. Good planning, proper ventilation, secure doors, and easy cleaning can make a major difference.

    Why Smart Chicken Coop Ideas Matter

    A well-designed coop protects chickens from weather, predators, and overcrowding. Additionally, it can make feeding, watering, cleaning, and egg collection much easier.

    The best Smart Chicken Coop Ideas focus on practical improvements rather than unnecessary gadgets. For example, automatic doors can reduce daily work, while strong locks can improve nighttime security.

    Key benefits include:

    • Better protection from predators
    • Easier daily cleaning
    • Improved airflow and comfort
    • Convenient egg collection
    • Better use of limited backyard space
    • Reduced daily maintenance

    You can also connect your coop design with a simple backyard chicken coop setup that gives hens enough room to move, rest, and forage.

    Key Features of Smart Chicken Coop Ideas

    1. Automatic Chicken Door

    An automatic door can open in the morning and close at night. As a result, you do not need to remember this task every day.

    When choosing an automatic chicken coop door, look for a reliable timer or light sensor. Also, choose a model that fits your coop and provides secure closing.

    2. Smart Ventilation

    Good airflow helps control moisture and reduces unpleasant odors. However, ventilation should not create strong drafts directly over sleeping chickens.

    Use high vents, screened openings, and adjustable airflow where possible. For more information, add an internal link here

    3. Predator Protection

    Predators can attack quickly, especially at night. Therefore, use strong wire mesh, secure latches, and protected openings.

    Hardware cloth is generally more secure than lightweight chicken wire for vulnerable areas. Additionally, burying protective mesh around the run can make digging harder for predators.

    4. Easy Cleaning

    A smart coop should be simple to maintain. Removable trays, wide doors, and smooth surfaces can reduce cleaning time.

    Consider adding a droppings board beneath the roost. This simple feature can make routine cleaning much faster.

    Types of Smart Chicken Coop Ideas

    Compact Urban Coop

    A compact design works well for small backyards. It should use vertical space efficiently while still providing enough room for the flock.

    Additionally, raised nesting boxes and external egg-access doors can save valuable floor space.

    Walk-In Smart Coop

    A walk-in coop provides easier access for cleaning and checking chickens. Therefore, it can be a strong option for larger flocks or keepers who want convenient maintenance.

    Solar-Powered Coop

    Solar power can operate lights, cameras, sensors, or automatic doors. However, choose equipment carefully and protect electrical components from moisture.

    For larger projects, consider this resource:

    How to Choose the Right Coop

    Before building or buying, consider these factors:

    1. Flock size: Plan enough space for every chicken.
    2. Climate: Provide shade, ventilation, and weather protection.
    3. Security: Check every opening for possible predator access.
    4. Cleaning: Choose surfaces and features that are easy to wash.
    5. Access: Make feeding and egg collection convenient.
    6. Expansion: Leave room to increase your flock later.

    The most useful Smart Chicken Coop Ideas balance comfort, security, cost, and convenience.

    Common Mistakes to Avoid

    Even a modern coop can fail because of poor planning. Avoid overcrowding because it can increase stress and hygiene problems.

    Also, do not block ventilation completely during cold weather. Instead, control airflow while keeping the sleeping area dry.

    Another common mistake is relying only on technology. Batteries can fail, sensors can malfunction, and automatic doors may stop working. Therefore, check smart equipment regularly and keep a manual backup plan.

    Maintenance Tips for 2026

    Inspect your coop every week. Check doors, locks, wire mesh, nesting boxes, and ventilation openings.

    Additionally, clean droppings regularly and replace dirty bedding when needed. Check water containers daily because clean water remains essential for healthy chickens.

    Every few weeks, inspect the structure for loose boards, gaps, rust, or signs of predators. These simple checks can prevent bigger problems later.

    Conclusion

    A modern chicken coop should make poultry care safer and simpler. The best Smart Chicken Coop Ideas combine secure construction, good ventilation, easy cleaning, and useful automation without adding unnecessary complexity.

    Start with your flock size, climate, budget, and daily routine. Then choose features that solve real problems. With thoughtful planning, your coop can become a comfortable and efficient home for your chickens throughout 2026.

  • Why Chickens Stop Laying Eggs: 2026 Guide

    Why Chickens Stop Laying Eggs: 2026 Guide

    If you keep backyard chickens or manage a small flock, why chickens stop laying eggs can become a frustrating question. In 2026, poultry owners worldwide continue to face seasonal changes, heat, stress, nutrition problems, and normal laying cycles that can reduce egg production.

    The good news is that a sudden drop does not always mean your hens are sick. Often, you can identify the cause by checking their age, daylight, diet, water, environment, and overall behavior.

    Why Chickens Stop Laying Eggs: The Main Causes

    Egg production depends on several factors working together. Therefore, even a healthy hen may temporarily stop producing eggs.

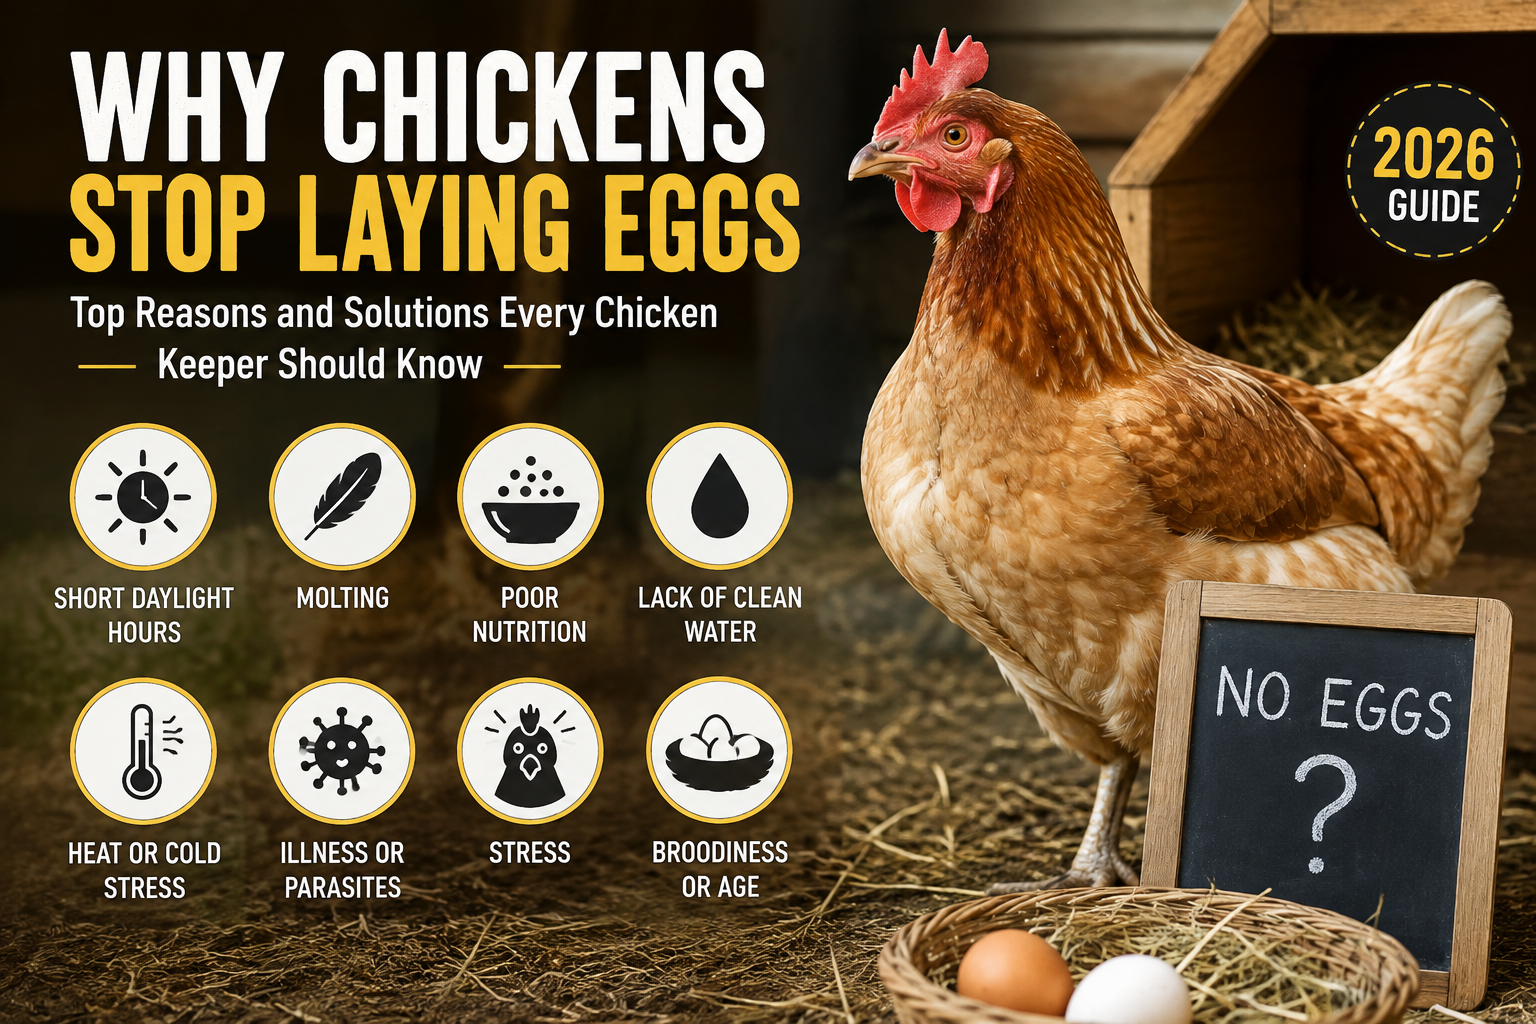
    Here are the most common reasons:

    • Shorter daylight hours
    • Molting
    • Poor nutrition
    • Lack of clean water
    • Heat or cold stress
    • Illness or parasites
    • Stress from environmental changes
    • Broodiness
    • Increasing age

    According to Penn State Extension, daylight plays a major role in reproductive activity. When daylight decreases, hens can reduce or stop laying and may begin molting.

    Why Chickens Stop Laying Eggs in Fall and Winter

    One of the biggest seasonal causes is reduced daylight. Hens need adequate light stimulation to maintain reproductive activity. As autumn and winter shorten the day, egg production commonly falls.

    For year-round production, poultry experts commonly recommend around 14–16 hours of total light per day, while still giving hens a proper dark period.

    However, do not suddenly change the lighting schedule. Gradual adjustments can reduce stress and help maintain a stable laying routine.

    Molting Can Temporarily Stop Egg Production

    Molting is another natural explanation for why chickens stop laying eggs. During a molt, hens lose old feathers and grow new ones. Their bodies redirect energy toward feather growth, so egg production may slow dramatically or stop.

    Natural molting often occurs when daylight decreases. Most hens eventually return to laying after the molt finishes.

    Nutrition and Water Problems

    A balanced layer diet is essential for consistent egg production. Hens need adequate protein, energy, minerals, and calcium to support both egg formation and strong shells.

    Therefore, avoid relying heavily on scratch grains, corn, or household leftovers. These foods can dilute a complete ration and leave hens short of important nutrients.

    Clean water matters just as much. Additionally, check drinkers every day, especially during hot weather.

    Stress, Heat, and Environmental Changes

    Stress can also explain why chickens stop laying eggs. Moving birds, introducing new chickens, predators, excessive noise, overcrowding, or sudden changes in routine can affect production.

    Extreme temperatures may also reduce laying performance. Therefore, provide shade and ventilation during hot weather and protect birds from severe cold, drafts, and wet conditions.

    Good housing should provide:

    • Fresh air without strong drafts
    • Clean, dry bedding
    • Reliable access to feed and water
    • Safe nesting areas
    • Enough space for normal movement

    Age, Broodiness, and Natural Laying Cycles

    Age is another important factor when investigating why chickens stop laying eggs. Hens usually reach peak production during their earlier laying years. Production normally declines as they get older.

    Broodiness can also temporarily stop a hen from laying. A broody hen may spend long periods sitting in a nest and may continue this behavior even when no fertile eggs are present.

    Furthermore, individual breeds differ. Some hens naturally produce more eggs than others, so comparing every bird to a high-producing commercial layer can create unrealistic expectations.

    What to Check When Hens Stop Laying

    If you notice hens not laying eggs, use this simple checklist:

    1. Check the flock’s age.
    2. Measure the available daylight.
    3. Look for signs of molting.
    4. Review the feed quality.
    5. Make sure clean water is always available.
    6. Check for parasites, injuries, or unusual behavior.
    7. Inspect the coop for predators or other stressors.
    8. Check whether eggs are being hidden or eaten.

    If several birds stop laying suddenly or show signs such as weakness, breathing problems, diarrhea, weight loss, or unusual behavior, contact a qualified veterinarian or poultry health professional.

    Common Mistakes to Avoid

    When trying to improve why chickens stop laying eggs, avoid making several changes at once.

    Do not overfeed treats. Do not use excessive artificial light. Also, never ignore a sick-looking bird simply because seasonal changes can reduce production.

    Instead, change management gradually and keep simple records of feed, lighting, health, weather, and daily egg numbers. These records can help you identify patterns over time.

    How to Support Healthy Egg Production

    To improve egg production naturally, focus on the basics:

    • Feed a complete layer ration.
    • Provide fresh water every day.
    • Keep nesting boxes clean and dry.
    • Maintain suitable ventilation.
    • Reduce unnecessary stress.
    • Monitor body condition and behavior.
    • Provide appropriate daylight or carefully managed supplemental lighting.

    Penn State Extension recommends gradual lighting changes and warns against exceeding 16 hours of light per day for laying hens.

    Conclusion

    Understanding why chickens stop laying eggs helps poultry owners respond instead of worrying. In many cases, reduced daylight, molting, age, nutrition, stress, or normal reproductive cycles explain the change.

    Start by checking the simple factors first: light, food, water, housing, and health. Then keep records and watch for unusual symptoms. With consistent care, you can support healthier hens and more predictable chicken egg production throughout 2026 and beyond.

  • Egg Color Guide: What Eggshell Colors Mean in 2026

    Egg Color Guide: What Eggshell Colors Mean in 2026

    Egg Color Guide: What Eggshell Colors Mean in 2026

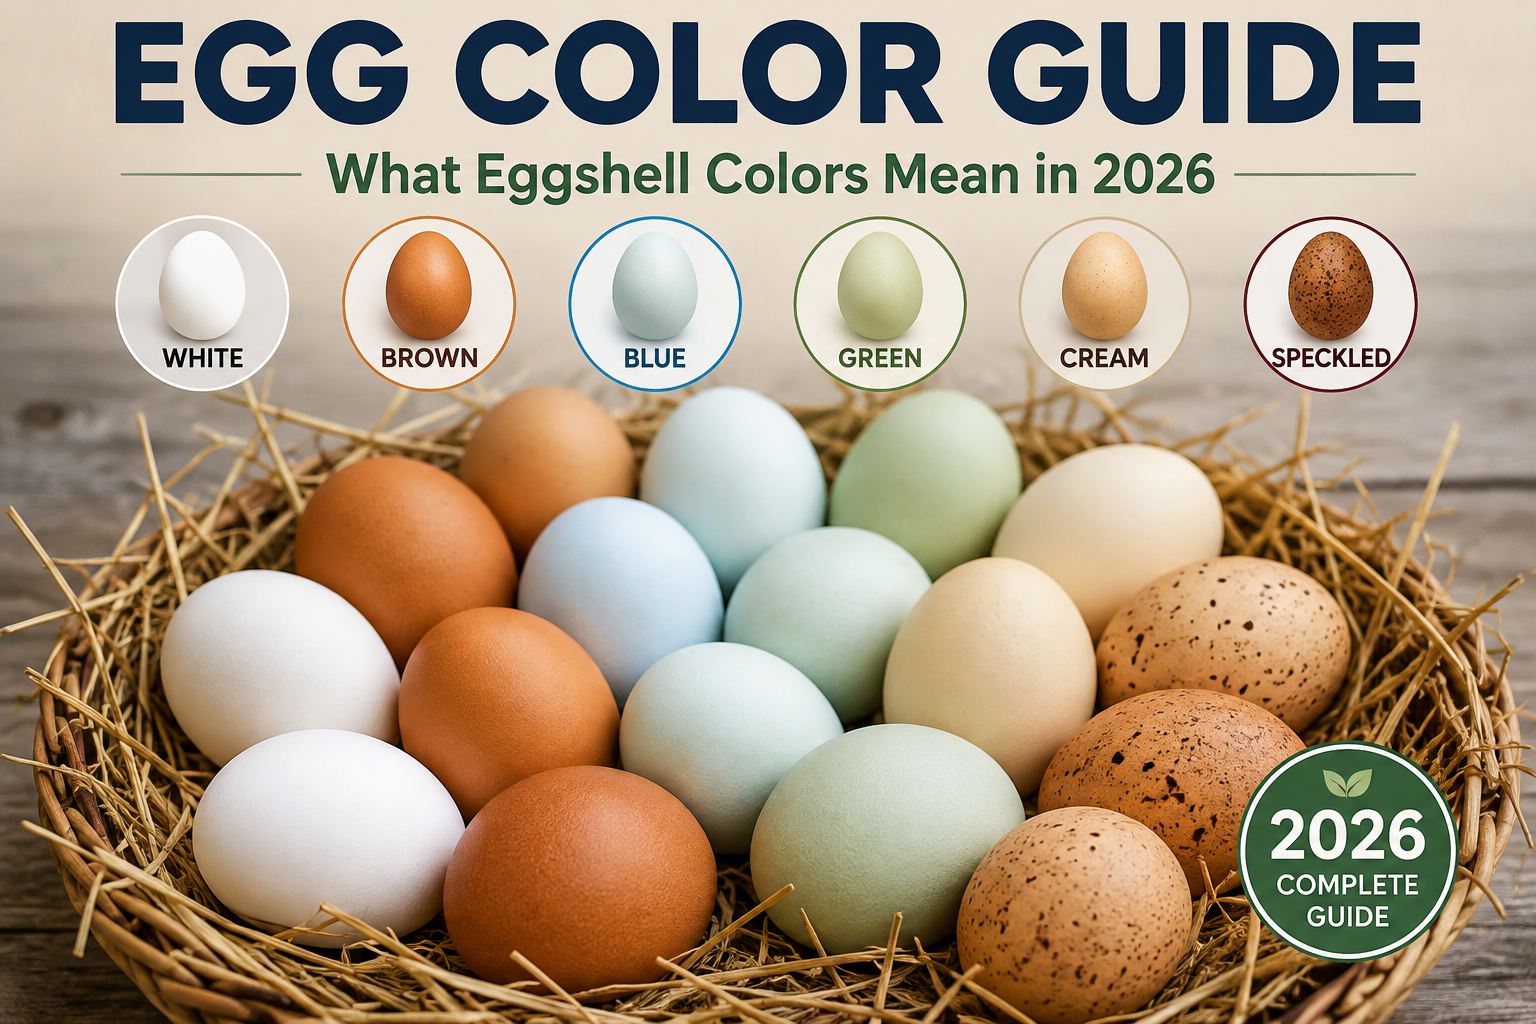
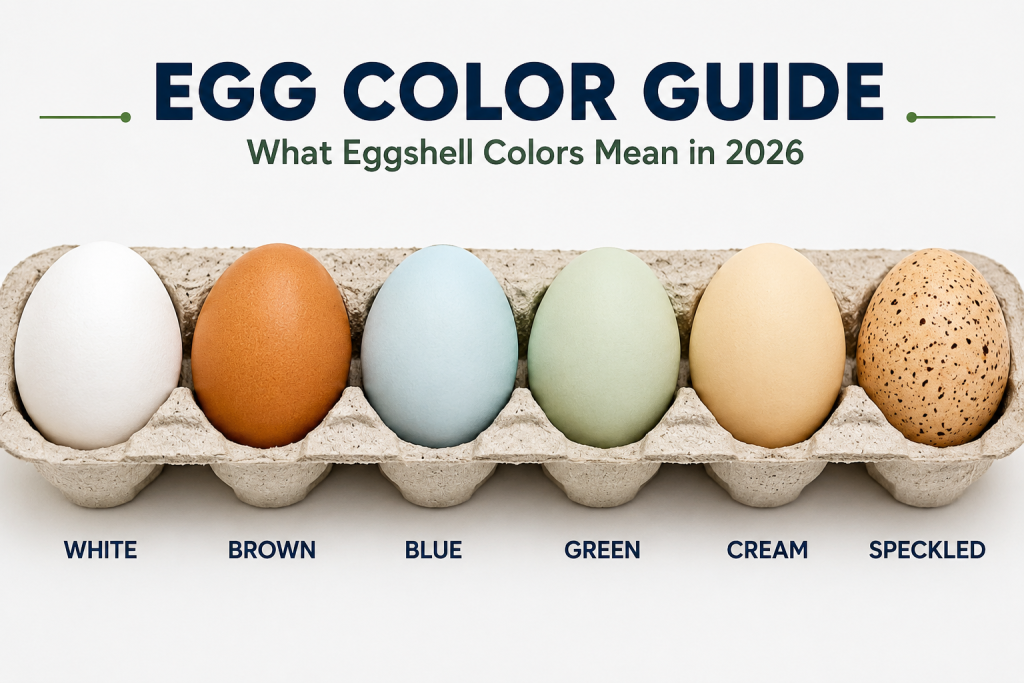
    Walk through almost any U.S. grocery store, and you will see eggs in several shades. White and brown remain common, but blue, green, cream, and speckled eggs also attract attention. This Egg Color Guide explains what those colors mean and helps shoppers make smarter choices in 2026.

    The good news is simple: shell color usually does not tell you how nutritious an egg is. Instead, genetics, especially the chicken breed, largely determines shell color. However, farming methods, freshness, size, and labeling can matter much more when you buy eggs.

    Why Egg Color Matters

    Many shoppers assume darker shells contain more nutrients. However, shell color mainly comes from pigments deposited during egg formation.

    White eggs generally lack significant shell pigment. Brown eggs receive brown pigments called protoporphyrins. Meanwhile, blue and green shells can result from pigments related to biliverdin.

    As a result, egg shell colors can tell you something interesting about the hen. They do not, by themselves, provide a reliable measure of nutrition or quality.

    For shoppers, the Egg Color Guide offers three useful benefits:

    • It helps explain why eggs look different.
    • It makes it easier to identify eggs from specialty breeds.
    • It prevents common myths about nutrition and freshness.

    Egg Color Guide: Key Factors to Consider

    Chicken Breed and Genetics

    Genetics play the biggest role in shell color. Certain breeds consistently produce particular colors.

    For example, Leghorns commonly lay white eggs. Rhode Island Reds often produce brown eggs. Araucana-related breeds can produce blue eggs, while some hybrid breeds produce green or olive shades.

    Therefore, chicken breeds and egg color are closely connected. A hen’s breed can often give you a good idea of the shell color you can expect.

    Pigment and Shell Formation

    Shell color develops near the end of the egg-laying process. The hen adds pigments to the shell as the egg forms.

    Interestingly, some brown eggs appear darker than others. This difference can happen because individual hens deposit different amounts of pigment.

    Age of the Hen

    A hen’s age can also affect shell appearance. As some hens get older, their eggs may become lighter or show subtle changes in shell quality.

    However, this does not mean a lighter egg is automatically less fresh or less nutritious.

    Types of Egg Colors

    White Eggs

    White eggs are among the most familiar choices in supermarkets. They are often associated with breeds such as Leghorns.

    Nutritionally, white eggs can be very similar to brown eggs when hens receive comparable diets and production conditions.

    Brown Eggs

    Brown eggs get their color from natural pigments added to the shell. They are popular in many markets and often appear in premium or farm-style packaging.

    However, brown vs white eggs is not a simple nutrition contest. Shell color alone does not make one option healthier.

    Blue Eggs

    Blue eggs create strong visual appeal. Breeds such as Ameraucana-type chickens can produce blue shells.

    The blue shade comes from pigment deposited into the shell structure. Depending on the breed, the color may range from pale blue to a deeper blue-green shade.

    Green and Speckled Eggs

    Some chickens produce green, olive, cream, or speckled eggs. These unusual shades can come from combinations of shell pigments and genetic traits.

    For hobby farmers and backyard chicken keepers, these colors can add variety to an egg basket.

    Egg Color Guide: Buying and Decision Guide

    When choosing eggs, look beyond the shell color. Instead, compare the information that actually affects your purchase.

    1. Check the date. Look at the package date and storage guidance.
    2. Inspect the carton. Avoid cracked or dirty eggs.
    3. Compare labels. Review terms such as organic, free-range, pasture-raised, or conventional.
    4. Consider your budget. Brown and specialty eggs can cost more without offering a major nutritional advantage.
    5. Choose your priorities. Farming practices, animal welfare, and local sourcing may matter more than shell color.

    In other words, use egg color meaning as useful background information, not as your main buying factor.

    Common Egg Color Mistakes to Avoid

    Several myths continue to influence egg purchases. However, the science is much simpler.

    • Mistake 1: Assuming brown eggs are always healthier.
    • Mistake 2: Thinking blue eggs contain dramatically different nutrients.
    • Mistake 3: Using shell color to judge freshness.
    • Mistake 4: Believing darker shells always indicate better quality.
    • Mistake 5: Ignoring storage and safe handling because an egg looks clean.

    The Egg Color Guide shows why appearance can be interesting without being a complete quality test.

    Care and Storage Tips

    Regardless of shell color, handle eggs carefully. Keep refrigerated eggs cold and follow the storage instructions on the carton.

    Additionally, wash your hands after handling raw eggs and clean surfaces that come into contact with them. Cook eggs thoroughly when required for food safety.

    Do not rely on shell appearance to determine whether an egg is safe to eat. Proper refrigeration, handling, and cooking practices are more important.

    Egg Color Guide: What Should You Choose?

    The best egg depends on your personal priorities. If price matters most, compare similar products and choose the option that fits your budget. If you care about farming practices, read the carton labels carefully.

    Likewise, if you keep chickens, research chicken breeds and egg color before choosing hens. Breed selection can help you create the mix of white, brown, blue, green, or tinted eggs you want.

    Ultimately, shell color is a fascinating part of egg biology. It can reveal clues about genetics and breed, but it does not automatically determine taste, freshness, or nutrition.

    Conclusion

    The Egg Color Guide makes one point clear: eggs come in many beautiful colors, but shell color alone does not determine quality or health benefits. In 2026, shoppers should focus on freshness, safe handling, nutrition, labeling, farming practices, and price. Use this Egg Color Guide to understand the shell, then look beyond color to choose the eggs that best fit your needs.