Chick Hatching Stages: Amazing 2026 Guide
Understanding the chick hatching stages helps poultry keepers know what to expect during incubation. Whether you are raising backyard chickens in the US or keeping a small flock elsewhere, watching an egg develop into a healthy chick is exciting.
However, successful hatching requires stable temperature, proper humidity, good ventilation, and careful handling. This 2026 guide explains the main stages in simple terms.
Why Chick Hatching Stages Matter
Learning the chick hatching stages makes incubation easier to manage. Additionally, it helps you identify normal development and recognize possible problems early.
Chicken eggs usually take about 21 days to hatch under suitable incubation conditions. However, some chicks may hatch slightly earlier or later.
Knowing the timeline can help you:
- Monitor egg development.
- Understand when to candle eggs.
- Prepare for hatch day.
- Avoid unnecessary handling.
- Provide proper care after hatching.
Key Chick Hatching Stages
The chick hatching stages can be divided into several important periods. Each stage brings major changes inside the egg.
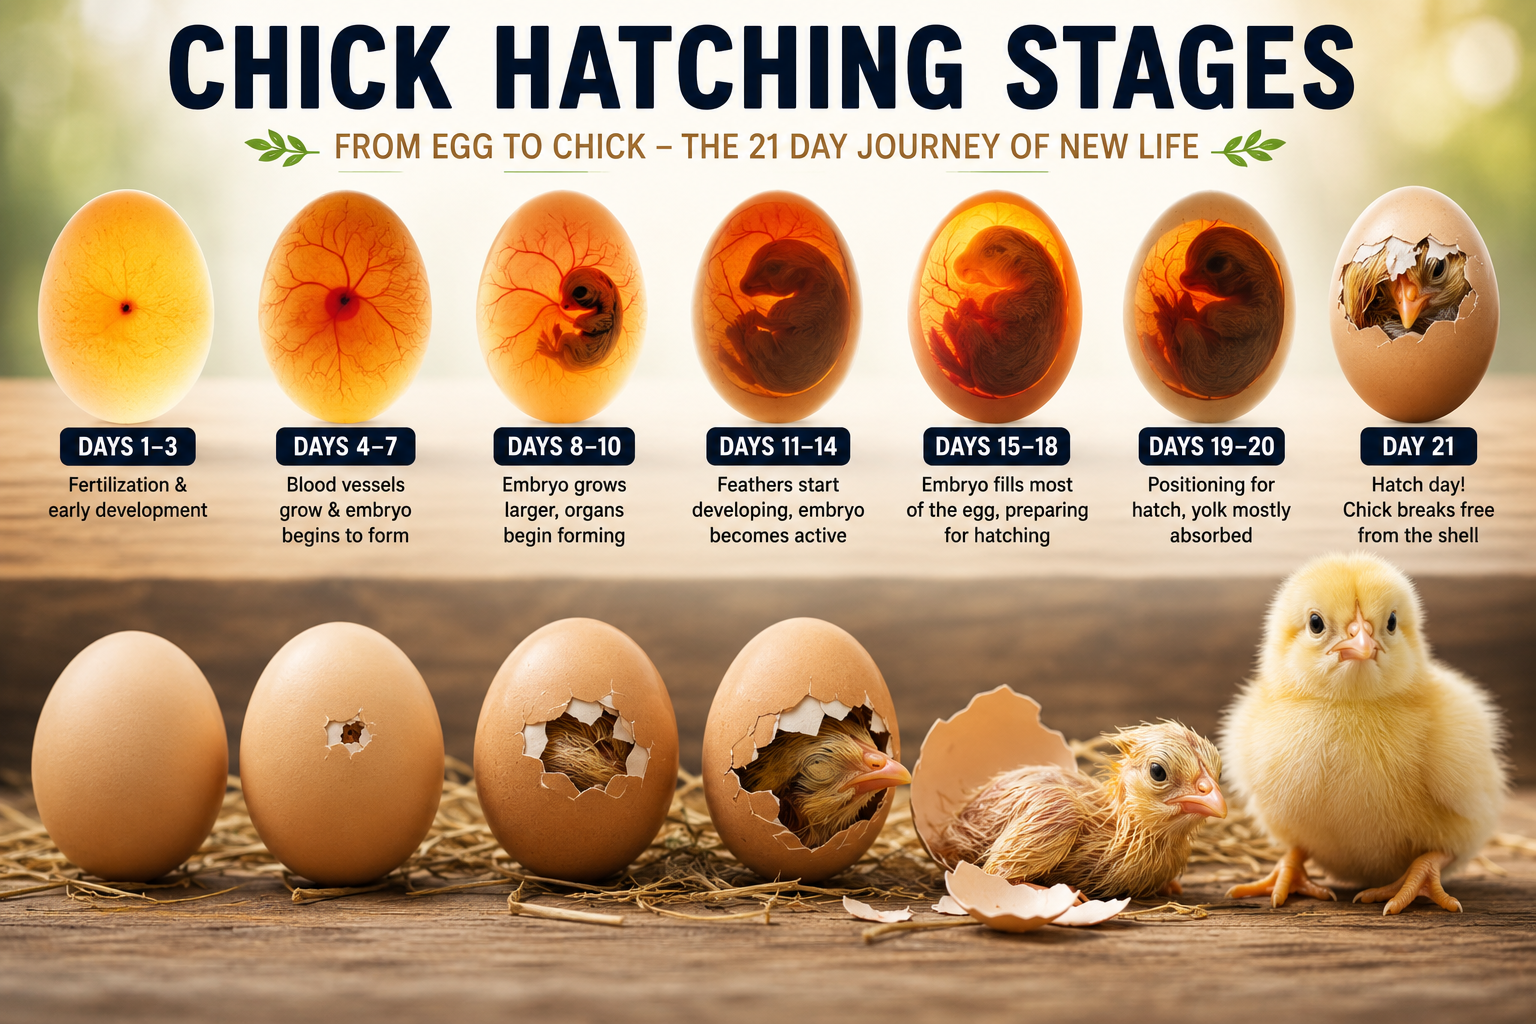
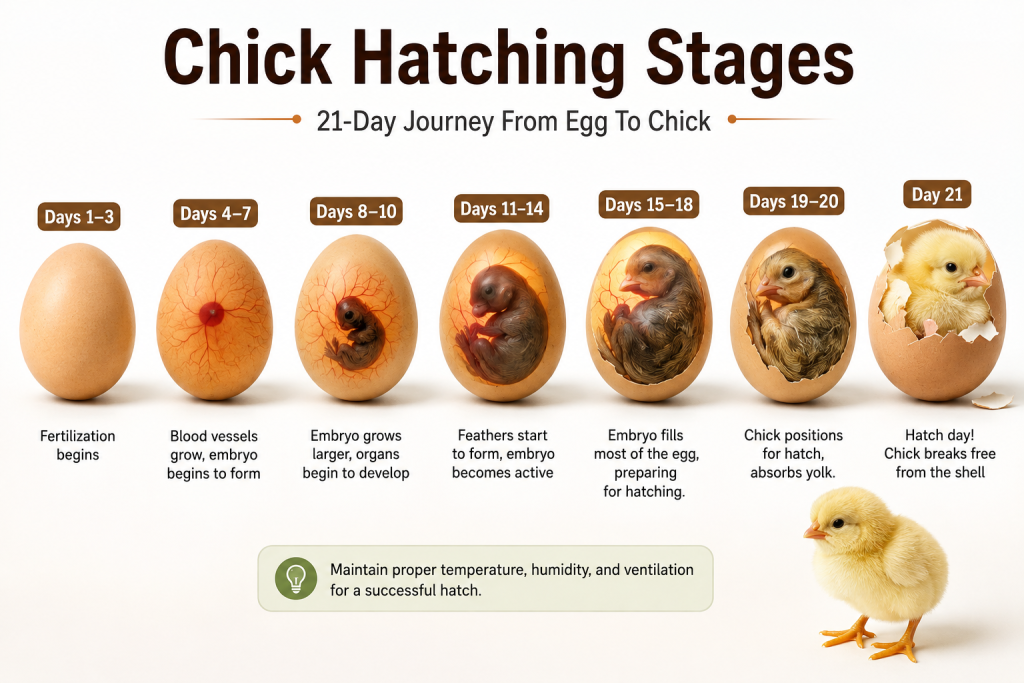
Days 1–7: Early Development
During the first week, the embryo begins developing rapidly. The heart and early blood vessels form, while the basic body structure starts taking shape.
Additionally, the embryo develops important organs. If you use a suitable candler, you may eventually see blood vessels spreading through the egg.
This is an important period for chicken egg incubation, so keep the incubator conditions stable.
Days 8–14: Rapid Chick Growth
During the second week, the developing chick becomes more recognizable. Feathers begin forming, and bones, muscles, and other body parts continue developing.
Furthermore, the chick becomes more active inside the egg. The embryo also uses nutrients from the yolk to support its growth.
At this point, careful monitoring can help you understand the chick development inside egg without disturbing the eggs too often.
Days 15–18: Preparing for Hatch
The final development period is another major part of the chick hatching stages. The chick continues growing and gradually uses more of the available yolk.
Additionally, the chick moves into a position that prepares it for hatching. The egg contains less available space as the chick grows.
This is a good time to prepare your brooder, clean bedding, fresh water, and suitable chick starter feed.
Days 19–21: Hatching Time
The final phase of the chick hatching stages is known as hatch day. The chick usually moves into the correct position and begins breaking through the inner shell membrane.
Next, it makes a small crack in the shell called a “pip.” The chick may then slowly work around the shell before pushing its way out.
Importantly, do not rush to help a chick hatch unless there is a clear, serious problem. Hatching can take several hours.
Types of Egg Incubation
There are two common approaches to hatching chicken eggs.
Natural Incubation
A broody hen naturally provides warmth and turns the eggs. Therefore, this method requires less equipment.
However, results depend heavily on the hen’s behavior and the environment.
Artificial Incubation
An incubator provides controlled heat and humidity. As a result, it gives keepers more control over the egg hatching process.
Modern incubators can include automatic egg turning, digital temperature controls, and humidity monitoring.
Buying and Decision Guide
If you plan on incubating chicken eggs, choose equipment based on flock size and experience.
Look for:
- Reliable temperature control.
- Easy-to-read humidity monitoring.
- Good ventilation.
- Automatic turning if possible.
- Easy cleaning and maintenance.
- Enough capacity for your needs.
Additionally, always follow the manufacturer’s instructions because incubator designs can vary.
Common Mistakes to Avoid
Many failed hatches happen because of simple mistakes. Therefore, avoid these common problems:
- Opening the incubator too frequently during hatch time.
- Allowing temperature to fluctuate significantly.
- Ignoring humidity requirements.
- Using dirty or damaged eggs.
- Failing to clean the incubator properly.
- Handling developing eggs unnecessarily.
Moreover, avoid washing hatching eggs unless you fully understand the risks, because the egg’s natural protective coating helps reduce contamination.
Chick Hatch Day Care Tips
After the chick hatching stages are complete, give the newborn chick time to dry and become active.
The chick should remain in the incubator until it is dry and fluffy. Then, move it to a warm, safe brooder with suitable bedding.
Provide:
- Clean drinking water.
- Quality chick starter feed.
- Safe, dry bedding.
- Appropriate brooder heat.
- Protection from drafts and predators.
Conclusion
Understanding the chick hatching stages makes the incubation journey less stressful and more rewarding. From early embryo development to the first pip and final hatch, every stage has an important purpose.
Therefore, maintain stable incubation conditions, avoid unnecessary disturbance, and prepare the brooder before hatch day. If you are starting your first batch in 2026, follow these steps carefully and enjoy watching your chicks begin life.
Leave a Reply